Sewing Projects: The Caftan Experiment.

I bought a few yards of black chiffon recently, and wanted to try something relatively simple and low stakes to get a feel for sewing with it. I’m also on the prowl for some kind of fancy-handmade-yet-generic-enough-to-make-en-masse gift for the adult women-folk of the family. A see through caftan might be a bit risque, but it sure beats a generic vanilla bath set. Let’s call it a beachy cover-up, if we must be so prudish.

So this weekend was the trial run.

To sew a caftan, theoretically, you really only need a few measurements: the width (measurement from end of arm to end of opposite arm where you want the garment to end), the length (where you want the garment to end), the desired size of your neck opening, where to put the side seams, and where you want to gather or belt in the garment. My highly sophisticated blueprint:

image

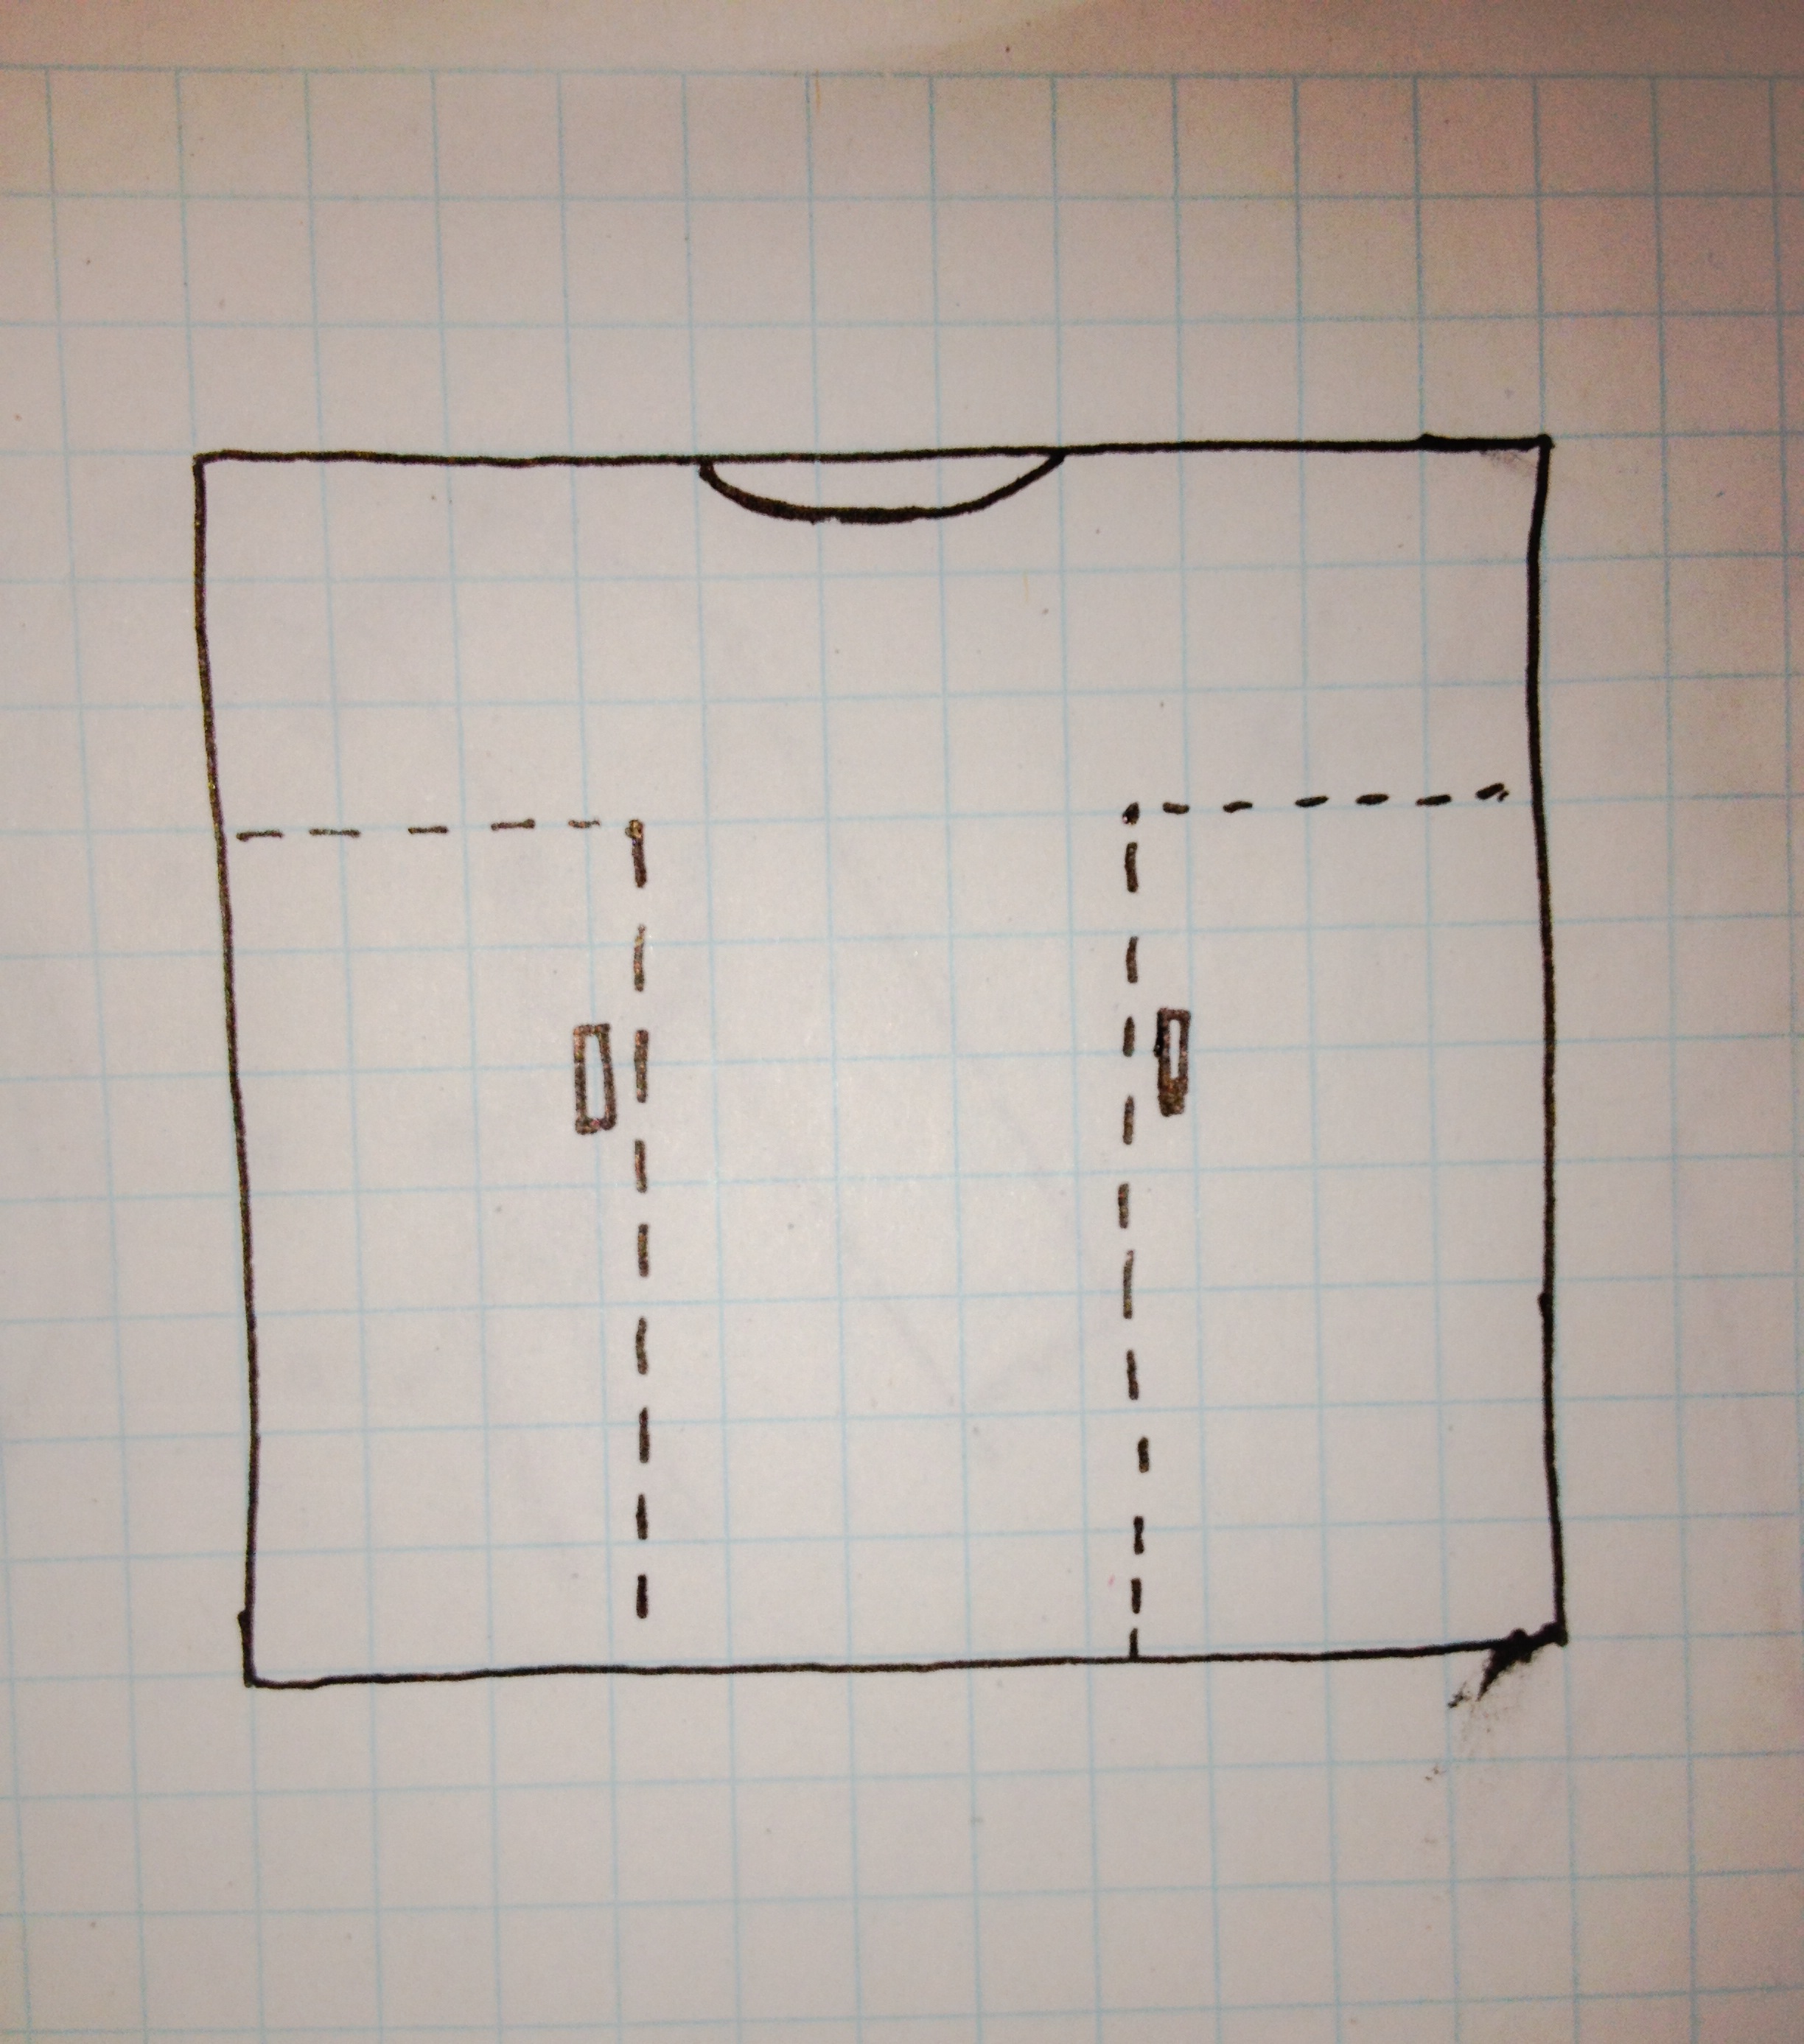
When I did this I sewed it in one piece of fabric folded into quarters and a head hole cut from the center, which was, I think, a mistake, because it’s so tricky to hem in this way, and I didn’t want to add a facing to chiffon. Next time I’ll do it in two pieces to make the neckline finish neater, and easier to manage if I try a v-neck. I measured it to end just above the knee but forgot to account for the mathematics of boobies and so it hit a few inches higher on the thigh than I had intended.

Sewing it up was simple enough. I started with hems on the bottom of both sides, sort of out of necessity, because chiffon is a messy beast. It’s also incredibly slidey and I found it tricky to maneuver without seam lines getting all drunk like. Not a big deal on the hems and the neckline but a huge issue when I topstitched down the sides. My moment of genius solution to this was to use tissue paper to draw a stitching pattern and then to pin it to the top of the fabric as a guide and a stabilizer. Then when it’s finished, you just tear it away. Magic!

What I wanted to end up with:

laurelCanyon-020113-bc-005_t650(image credit)

 What I really felt like:

Petrie_original_colors(image credit)

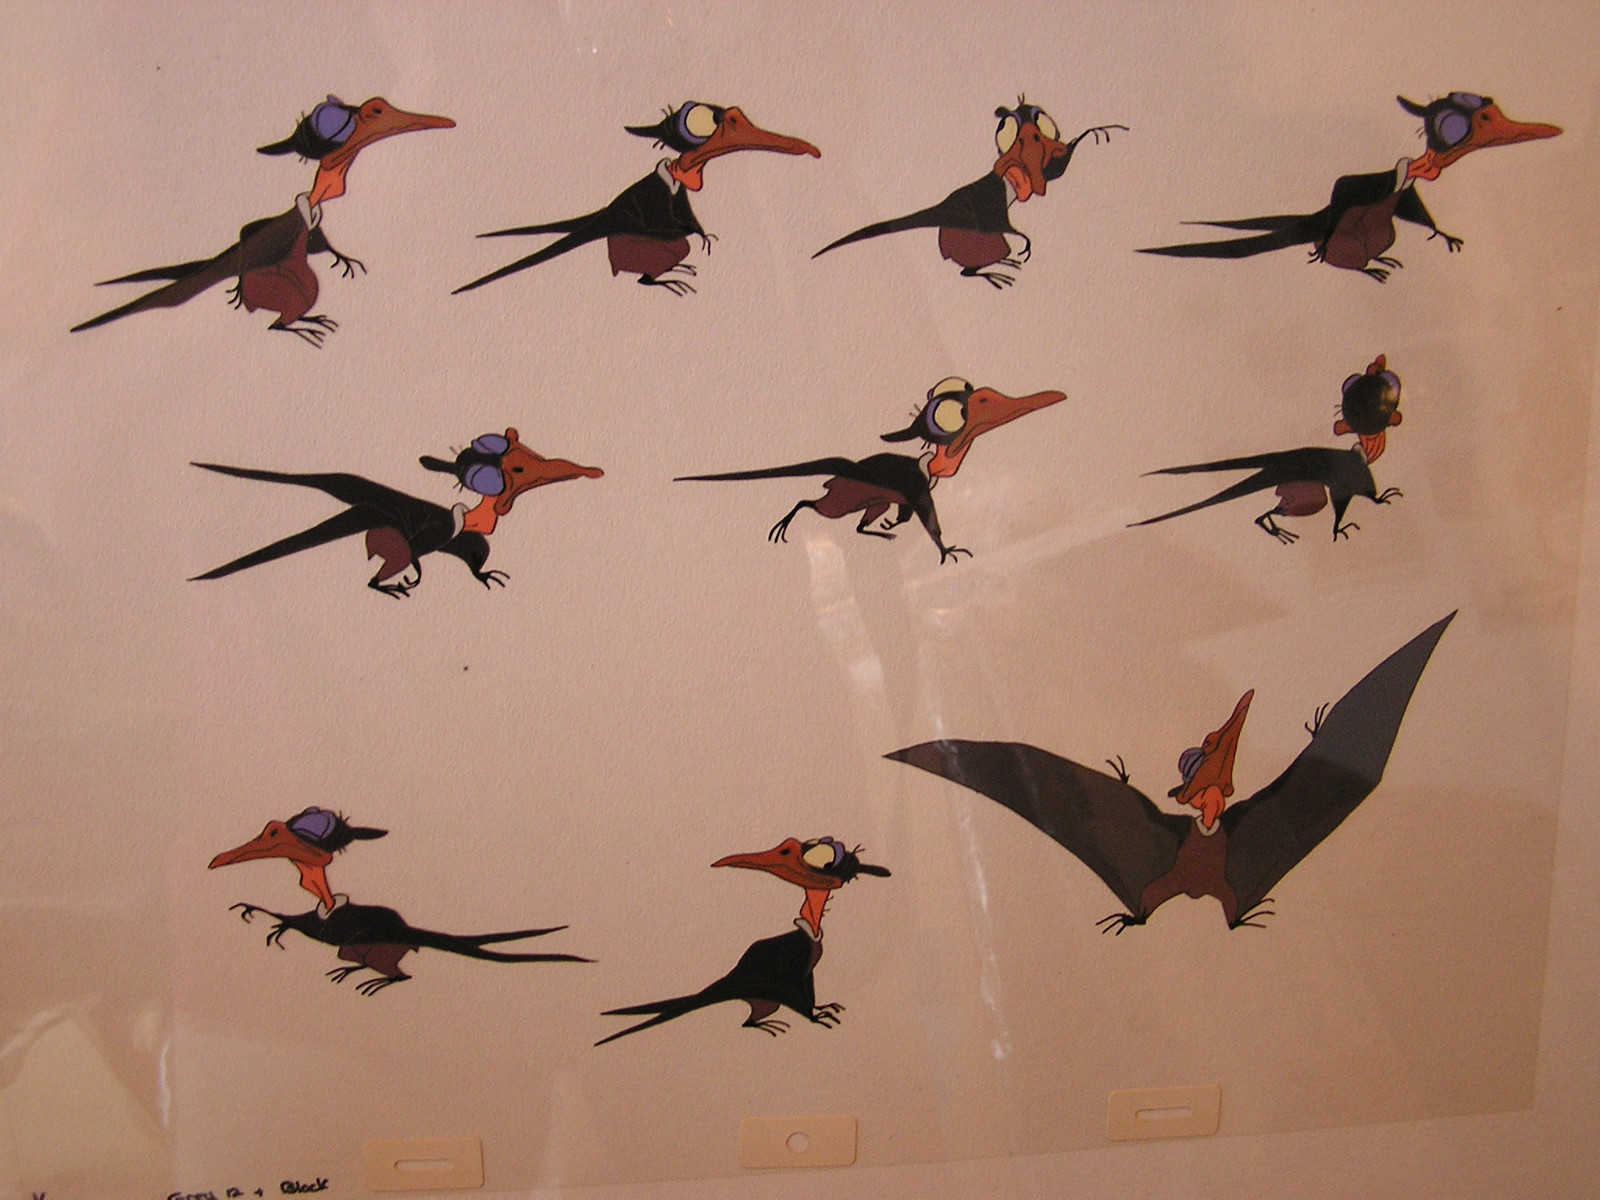
I think the long sleeves and excess fabric below them made it feel more flappy than I wanted. More experimentation to come!

Why Sewing Machine Addiction?

Sewing machine addiction is a helluva drug. So far in my life, I’ve been prone to obsessive interests that come and go and almost always involve hoarding and organizing materials as part of the pleasure of the obsession. Sewing machines are no exception. In fact, they’re one of the strongest experience I’ve had with any hobby since my childhood dinosaur phase and young adult survivalist kick that had me, among other things, living in a tent in the yard for a month. Lolz.

I’ve lost count of the actual number, which is blurry anyway because some of my sewing machine projects involve a machine or two that’s pretty much bound to be just a parts machine. I have a few vintage Husqvarnas that don’t run that might end up Frankenstein/Steampunked into some new creature eventually.

young frankensteinBut I really need to stop hoarding, and also to maybe Etsy off some of my least favorite machines to clear out some room. There are *at least* 15 sewing machines crammed in my litle 12″x12″ office (whose closet bottom is the angled ceiling of the staircase, so no storage space there, either) along with two cabinets, a table and chair, coffee table, and two workbenches. Tight and womblike and disheveled is usually what I go for in a workspace, but it’s too much.

And yet I can’t seem to keep from drooling over other machines I’d love to have. Because it isn’t just about the utility. Each machine represents so many things to me: a mechanical puzzlebox to put into working order, a beautiful tool to learn to use, an antique with its own unique history, and a piece of design that speaks volumes about the aesthetic of its time.

If someone dropped a top of the line contemporary Pfaff on my doorstep, I don’t think I’d use it. I don’t find it inspiring. It’s a tool that has all these features and computerized functions, but it’s not a piece of industrial art. It hasn’t got the history and the charm of wear. It doesn’t make me dream about the previous owners and previous designs it might have created toward the enrichment of the lives of its owners. It’s plastic, without a personality. Give me a pin-rashed, silvered decal-ed old Singer handcrank any day so I can marvel at the simple elegance of the mechanics and turn the well-worn wood of the handle and more deeply enjoy the tactile nature of the experience. Give me the spaceship knobs and funktastic designs of the late 50s and early 60s and let me consider the way the space race changed everything, even sewing, as I stitch away. And I also kind of feel like it builds character to learn to sew a proper buttonhole without the one push button function, but I’m a Luddite like that.

That being said, it’s a pretty shitty would-be-minimalist who is scouring ebay daily for old 50s Kenmores. It has to stop somewhere. So I think I need to start collecting images instead, see if I can put together a design timeline for machines, enjoy pondering the visuals rather than possessing the actual machine. I also need to keep focused on how I really want to spend my time: making, crafting things, not just owning them. All of these machines work better with regular oiling and use, so I need to pick my favorites and rotate them, instead of having machines that sit unused.

Because if I collect many more, my family is going to commit me.

Husqvarna 51E

My obsession with vintage Husqvarnas is in full swing. It started with the one I recently posted about, which I got from Goodwill for $25, with a running motor and a turning handwheel but broken belt. It seems like once I get the belt issue fixed, it should actually work. (I re-measured the old broken one and found it to be closer to 19 3/4″ rather than the 19 1/4″ belt I have been fighting with. That half inch makes all the difference in the world. I think on my first measure I didn’t stretch it far enough because I didn’t want to touch all the goo all over it. Yuck.)

Being  a hoarder obsessive (not even joking), I also find it virtually impossible to pass up a $20 sewing machine even though my “office” is full of almost too many of said machines to move in. One day, I will start an Etsy shop. But not today. So Goodwill has provided me with multiple Husqvarnas in various states ranging from completely frozen to partially frozen to filthy and seemingly hopeless. In addition to the 19 with the belt problem, I have a 1030 (frozen handwheel/main shaft) and a 6020 with a frozen stitch selector and a broken stitch selector knob from someone trying to force it. I also bought another mystery one from ebay which looked to be in good condition, save for the missing speed control/power cord.

51eback51e


What some internet scouring and the super-helpful Yahoo vintage Husqvarna group tells me is that it’s a Husqvarna Viking 51E. Which is basically just a flatbed version of the Husqvarna 21 (which some argue was the best vintage Husqvarna model). It’s nearly impossible to find anyone talking about the model online, so it will be interesting to try! It has a three prong power cord, which doesn’t look like anything I currently have except maybe the Slantomatic cord, which is the wrong shape. I’ll have to see it in person before I try to find a replacement. Regardless, I love the green finish and the styling. My guess is that it, too, will need a new belt, but looking at the external setup and the lack of a reduction gear involved, my guess is that it will be easy peasy to throw a standard stretch v-belt on there. Also, with the way that everything is aligned and that exposed handwheel, if I could rig that up in a treadle table I bet I could even treadle with it!

Husqvarna 19e Belt Replacement

My Husqvarna is a 19e, which is a sleek, classic-car-shiny piece of vintage goodness. It runs, but when I received it the v-belt was broken. I took the broken belt out and measured it and bought a 19 1/4″ lug belt to replace it. I’m not sure if I’m doing something wrong or if I measured wrong and the belt just doesn’t fit or what, but I can’t get the damn thing back in the machine. The compact cast iron body of the machine is visually appealing but difficult to open up and access. To really get in there I had to remove the base which has the motor and wiring still awkwardly connected to the body, remove the handwheel and remove the reduction gear thing-y. I had cut the original belt off to measure, and as usual, regret not carefully photographically documenting the position of everything first. The technical manual helps, but it has line drawings that aren’t especially clear on the position of small parts and springs and where exactly everything should be.

imageHere’s what my actual reduction gear looks like:

image(4) image(7)

My machine is filthy; I keep tinkering at it with alcohol and q tips or Mrs. Meyers basil scented cleaner on the parts that aren’t really moving and potentially damaged by the moisture. (Too many chemically fumes makes me dislike the process.) There are some parts on that reduction gear that were tricky to replace when I tried to put the (too short?) lug belt on and reassemble.  Trying to get it on was a truly awful time suck, since the belt has to go over the handwheel and loop over the reduction gear. But to get it on the reduction gear you have to get past the large outer gear on the reduction assembly (in the photo above it’s the gear to the farthest left). I tried doing this first and putting it on the handwheel last but it’s just not possible with the angles and the tension on the belt. It was an incredibly awkward process compared to a Singer, where you usually just loosen the motor mount bolt and create a little slack, loop the belt where it needs to go, and put everything back in place.

I was also not super impressed by some of the components of this gear setup. While the machine is solid and seems like it’s well built, the case that goes over the motor and the smaller belt is plastic and is, of course, cracked where the screws go. It probably won’t ever be all that secure when I put it back on. The reduction gear itself is not exactly solid feeling. It’s plastic of some kind and probably would be one of the first things to go to crap on the machine. There is a little plastic bracket that fits inside a part mounts the reduction gear to the rest of the body–that’s cracked too. It fell out during disassembly and I had no idea where it went originally, but it fits inside that mount and over a two pronged metal piece. Seems like a less-than-efficient design. There is a spring and a metal arm toward the bottom of the assembly that I’m not sure exactly what position to return to when I’m finished either, but we’ll see.

So the Husqvarna and I are at a standstill until the 15″-21″ stretch belt I ordered arrives. I read good things about the lug belt, but I think I’ve put about 4 hours into it so far and I just don’t know how the improved traction is worth all that. If/when I get a belt successfully installed on this, I’ll definitely post a step by step since the 19e seems really difficult to find any specific information on.

Husqvarna Service Manual

It irritates me immensely when people try to charge money for manuals that they didn’t even scan that they just happened to find, freely available on the internet. It’s a jerkwad way to make a buck. I bought a frozen up Husqvarna 1030, I guess mostly because I’m a masochist, and some website had a service manual for the 6000 series (with instructions for earlier models as well) for sale that I almost spent $10 bucks on. Happily, I happened to find the exact same manual FOR FREE on archive.org. It’s available here in a variety of formats to download. Pdf version below. May you have better luck on your Vikings than I’m currently having–previous owners have broken the knobs from trying to force frozen parts, parts won’t free up even with the wd40/hair dryer treatment, goobered up motor areas that have my hands and everything in a 6ft radius all sooted up. Can’t win ’em all, I guess.

HusquvarnaViking6000SeriesServiceManual

Singer Slantomatic Troubleshooting

I’ve been sewing all weekend on a Slantomatic 401 I bought on a whim for $50, as a fixer upper project, when I first began my downward spiral journey into sewing machine hoarding. It was a mess. The camstack was frozen solid with old grease, and the stitch selector wouldn’t move at all. The whole machine was full of weird grime–not dust, which tends to wipe off easily enough, but a greasy caked on goo that soap and water and even WD40 didn’t do much to remove. I’ve been working at it with isopropyl alcohol and Q-tips. The outside isn’t fantastic, but I went over every nook and cranny of the inside and removed all the gunk and reoiled it with Tri-Flow oil. I freed up with camstack with a combo of WD-40, a screwdriver to scrape hardened crud bit by bit from the gears, and a hairdryer. The hairdryer is magical. The heat loosened up old frozen parts just enough for the penetrant to work its magic, and now it’s fully functional! Not beautiful, yet, but functional. (For your tinkering pleasure, see the end of this post for a Slantomatic 401 manual, service manual, and a link to an amazing tutorial on all things frozen camstack related from The Archaic and The Arcane blog.)

So I oiled it up to work on my Advance raglan pattern. For my wearable muslin version I settled on an ivory jersey, and most of it went really well. Well, I should explain. There is a cycle of emotions I go through when sewing vintage patterns. I begin in dreamy joy, enamored of the pattern illustration, dreaming of looking all Audrey Hepburn in my future garment. The main seams sail along. I get most of it together with my illusions intact. And then I get to the facings, and my dreams begin to crumble in the face of geometrical reality. They inevitably blow my mind. Most of them seem to be designed to fit together, from front panel to back to the other side, which I think is great, theoretically. But there are always problems with the snips and clips and places where the work has to turn to match edges and it’s never quite all I’d hoped. This is where the worry sets in. By the time I get to sewing up closures and hems, I’m pretty sure I’ve blown it. The topstitching is the nail in the coffin, especially with jersey fabric, where the feed just never goes as smoothly as it should and my lines end up looking like I sewed them drunk. When I try it on, I almost inevitably find that my tree trunk waistline does not fit without risking taking someone’s eye out popping off a button. And the shoulders. Typically, they don’t fit for crap. So I find myself staring at the pattern illustration feeling foolish for ever believing that I would resemble a woman whose waistline is drawn to be smaller than her head. But then, if Mad Men should have taught me anything, it’s that illustration=advertising=creation of a fantasy.

This time, I mostly just disliked my topstitching and resolved to add more width at the waistline. Shoulders, at least in jersey, fit wonderfully in the raglan cut. Also, I wasn’t sure about interfacing the jersey; now I know. If I want a crisp finish and pretty collar edges, interfacing is a must. Especially in formless bendy soft and squishy jersey. I’m considering redrafting the facing where it joins. There must be a simpler way.

But…I like learning things the hard way.

Links:

(Singer 401 Sewing Machine Manual)

(Singer 401 Service Manual)

(The Archaic and The Arcane’s Tutorial on Camstack and Other Issues)

Style Inspiration: Catwoman of The Dark Knight Rises

Full disclosure: I had a major goth girl phases in my misguided early twenties. My aesthetic has changed immensely over the years–no more black pleather with chainey things, no more piercings jutting out of my face, no more Black No. 1 hairdye. But I still adore wearing black; it makes me feel self-possessed, crisp, and it has the potential for unrivaled elegant minimalism.

Cut to my in my PJs, working and zoning on some fluff tv in the background. The Christopher Nolan Batman trilogy as “fluff” reveals much about my dark broody nature but I digress. The trilogy is okay, I don’t feel particularly strongly about it, except for Selina Kyle’s character. The first watch, her semi-snarkiness seemed a bit over the top for me; the second watch, I was in love with her I’m-a-hardass-but-really-not vibe, her complicated morality, her color scheme choices. Something about the dark elegant costume pieces with retro inspired lines and feminine but not overtly sexual styling just mesmerized me. Which is to say: there shall be costume design emulation in my future.

catwoman style lines

The catsuit is functional and gorgeous as superhero costumes go. I love the curves of the waist and the almost corseted look of the curves there, as well as the raglan sleeve and the almost Mandarin stand collar. There is a curve hugging dress she wears in another scene which appears to have kimono sleeves and a 50s era waistline, but the styling is so perfect it doesn’t look like a period piece. In her airport scene, the suitjacket and skirt ensemble are pure 50s glamour. I haven’t been able to find much about the inspiration for the wardrobe, since most costume discussion of the film focuses mostly on the action hero suits and more obvious costume choices. But if I had to wager money on it, I’m betting there’s something interesting happening with femininity and contemporary womanhood driving those concepts.

And during my obsessive internet scouring for future sewing and styling inspiration, I found a few images from shooting of scenes that apparently never made it in the film. Imagine, Gentle Reader, my squeals of girlish glee and the jazz hands that ensued.

catwoman not in filmA capelet AND a coat dress. Maybe a little too glaringly vintage for the film, but really cool to see given a Hollywood treatment. Definitely trying to sew the capelet soon. There’s something about the aesthetic of the whole world that I deeply enjoy. Contemporary but with these nostalgic overtones in everything from the design elements and architecture to the story itself.

Advance 7833: Vintage Raglan Blouse with Collar and Sleeve Variations

image
This, friends, is my weekend sewing project. Having wonky shoulders (broadish, forward) and an utter hatred of garments restrictive of my arm movements, here’s hoping the raglan sleeve will prove to be my friend. So much to love in this design–simple but fitted, with the optional elegant touches of the French cuffs and scarf collar, versatile in terms of wardrobe. I’m hopeful.
For any pattern drafters on the hunt for inspiration, a look at the actual pieces:
image(1)I’ve also been wanting to make a pair of pants. I think this blouse, in a light blue broadcloth to start, and maybe in some ivory satin should it go well enough to dip into the higher end of the fabric stash, would look amazing with some high waisted Katherine Hepburn style pants or closer fitted cigarette pants. My pants making has been dreadfully limited, though, and I’m highly perturbed by the problem of the prominent camel toe I see sometimes on sewing blogs. Being an extremely self conscious type mocked for odd things in grade school I simply cannot deal with the camel toe. Not at all. So I fell down a rabbit hole tonight reading all about adjustment possibilities to avoid the dreaded thing. More on that when I get some practice in. Also, discovered the possibility that I might have a swayfront issue (like a swayback, I suppose, but a pelvic tilt in the opposite direction that might make an excess of fabric in the front). It seems to be an elusive adjustment to track down a tutorial for, so one of my goals for the weekend is to dig around some of my vintage pattern drafting books for more information.

Weekend randomness.

tumblr_mekg62oNcF1qzhou3o1_1280

image credit: Alejandro Melero. borrowed from here

My weekend to do list is a bit excessive, but in a nutshell, the projects and random interests on deck for the next few days:

-sewing a raglan blouse

-working on my manuscript for Yale Younger Poets. I was having weird claustrophobic feelings of my youth slipping ever so quickly between my fingers thinking that 32 was the cut off age and my eligibility to submit was fast evaporating. But no! I have until 40 before I am no longer considered a “Younger” poet by the curatorial folk in Yale publishing. And I also have more years to submit than I thought. Yay! I have sort of let my writing go over the last few months, for a lot of reasons and also because busy. It feels good/anguished/complicated/but yea actually good to come back to with the self-imposed deadline.

-thinking in depth about autism and neurodiversity issues after Seinfeld revealed he believes himself to be on the spectrum. These issues are really important to me, so much so that his revelation aroused such an outburst of enthusiasm in me that I did some reposting with fuck words in my notes with blatant disregard for any bluehaired aunties who follow me on facebook. I think my grandma will understand; she knows I did my time in food service and that I was bound to pick up some naughty language over the years.

-tinkering on my fixer upper Slantomatic 401 to make said raglan blouse. I bought it on a maybe not so wise impulse for $50 on ebay a few months ago, condition unknown, dirty and disheveled but complete with many accessories and cams. Luckily it arrived mostly undamaged, stuffed in a cardboard box with only two musty old thin blankets for protection. Ebayers and their crappy packaging. *shakes head* So I was excited that it ran without a fuss, even though it was caked in greasy grimy gunkiness that makes me think it was stored in some kind of fried chicken restaurant or maybe one of those places on Buzzfeed’s abandoned places lists. So far I have cleaned it, lubricated and oiled it, balanced the tension, used a hair dryer and wd40 to unfreeze the frozen camstack levers, disassembled and cleaned and reassembled the tension assembly, removed and cleaned the balance wheel. Oddly, the old girl is missing the set screw on the chrome knob/clutch/balance wheel, and since the Slantomatic has a different clutch washer than most of the Singers I’ve seen it’s not easy to find a quick replacement. It works pretty well, though I think it needs some usage and more oiling to really smooth things out after being so neglected.

Free Necchi Manual Links

I hate it when people charge money for sewing machine manuals. Vintage sewing machine fanatics seem to give so freely of their knowledge and experience on the web that selling manual scans seems gross somehow. So…more of this as I find it! If this is helpful to you, please leave a comment and feel free to tell me all about your beloved Necchis. It is so very good to talk about obsessive interests with friendlies.

99 Ideas for Creative Sewing (1956) Came with Necchi Supernovas. Download it from this page (bless you, original poster. Bless you!) http://www.newtreadlersvillage.com/NecchiSupernova.html

Necchi Lelia 513 Manual, found on Tammy’s Craft Emporium, which is a delightful blog of all things vintage sewing. May Crom bless Tammy too for posting this to her blog: http://tammyscraftemporium.blogspot.com/2010/09/necchi-lelia-513-instruction-manual.html

And all of the following come from the person who created the http://freenecchisewingmachinefiles.weebly.com/ page. We have similar views on how sewing machine manuals should be out there for all to enjoy and cuss over our repairs as one happy collective well armed with information, and typically I wouldn’t direct link, but s/he wants the info spread to anyone who needs it. I love the way s/he thinks. That page has:

Necchi BU Nova Manual: http://freenecchisewingmachinefiles.weebly.com/uploads/1/8/7/3/18731174/bu_nova_manual_foreword_1.pdf , http://freenecchisewingmachinefiles.weebly.com/uploads/1/8/7/3/18731174/necchi_bu_nova_manual.pdf

Necchi BU Nova Instructions: http://freenecchisewingmachinefiles.weebly.com/uploads/1/8/7/3/18731174/necchibunovainstructions.pdf

Necchi BU Mira Manual: http://freenecchisewingmachinefiles.weebly.com/uploads/1/8/7/3/18731174/bu_mira_manual_foreword.pdf, http://freenecchisewingmachinefiles.weebly.com/uploads/1/8/7/3/18731174/necchi_b-u_mira_part_1.pdf, http://freenecchisewingmachinefiles.weebly.com/uploads/1/8/7/3/18731174/necchi_b-u_mira_part_2.pdf

Necchi WonderWheel information: http://freenecchisewingmachinefiles.weebly.com/uploads/1/8/7/3/18731174/necchi-matic_wonder_wheel.pdf

Necchi Service Manual (which made me almost incontinent with joy when I downloaded it!): http://freenecchisewingmachinefiles.weebly.com/uploads/1/8/7/3/18731174/necchi_service_manual_bu-bf_nova-mira.pdf

Necchi Model List: http://freenecchisewingmachinefiles.weebly.com/uploads/1/8/7/3/18731174/necchi_model_list.pdf