Working with Slopers: How to Use a Sloper to Grade A Skirt Pattern

Pattern grading can be done in a variety of ways–slashing and spreading a pattern, shifting points as x,y coordinates on a grid, radially, and I’m sure there are more. If you have a sloper that fits you well, you can use your sloper as a guide when grading patterns to your desired size. Using a sloper to grade is essentially using the slash and spread grading method, but the approach is a little bit more hands on and intuitive than it is mathematically precise.

Someone asked me for advice on how to use a sloper to grade patterns, so I wanted to write out the process as I would approach it. This is only one way among many, but I hope that it might be helpful and maybe help clarify working with slopers to adapt sewing patterns to specific measurements as well.

What is a sloper versus a regular pattern?

A sloper is a basic fitting shell, or a pattern that has been adjusted to fit your body shape very closely, with only the minimum required ease to allow for movement (wearing ease). A sloper represents the minimum amount of fabric required to fit your body. A sloper pattern that has been adjusted to your body is like a two dimensional dress form, a map of mass distribution and fitting adjustments to accommodate them. A fitting shell or sloper pattern that has not been fitted to a specific body is a pattern that fits a generalized ideal body as closely as possible while still allowing for movement.

A pattern is different from a sloper in that it doesn’t follow the body exactly. It almost always adds fullness or additional ease in a variety of ways to the garment in order to create shape. There are places where the garment must anchor to the body or be held in place by clinging close to the body, and in those places, the sloper and the pattern will be almost identical. But in other areas, the pattern will add extra fabric to create volume.

How can a sloper be used to work with patterns?
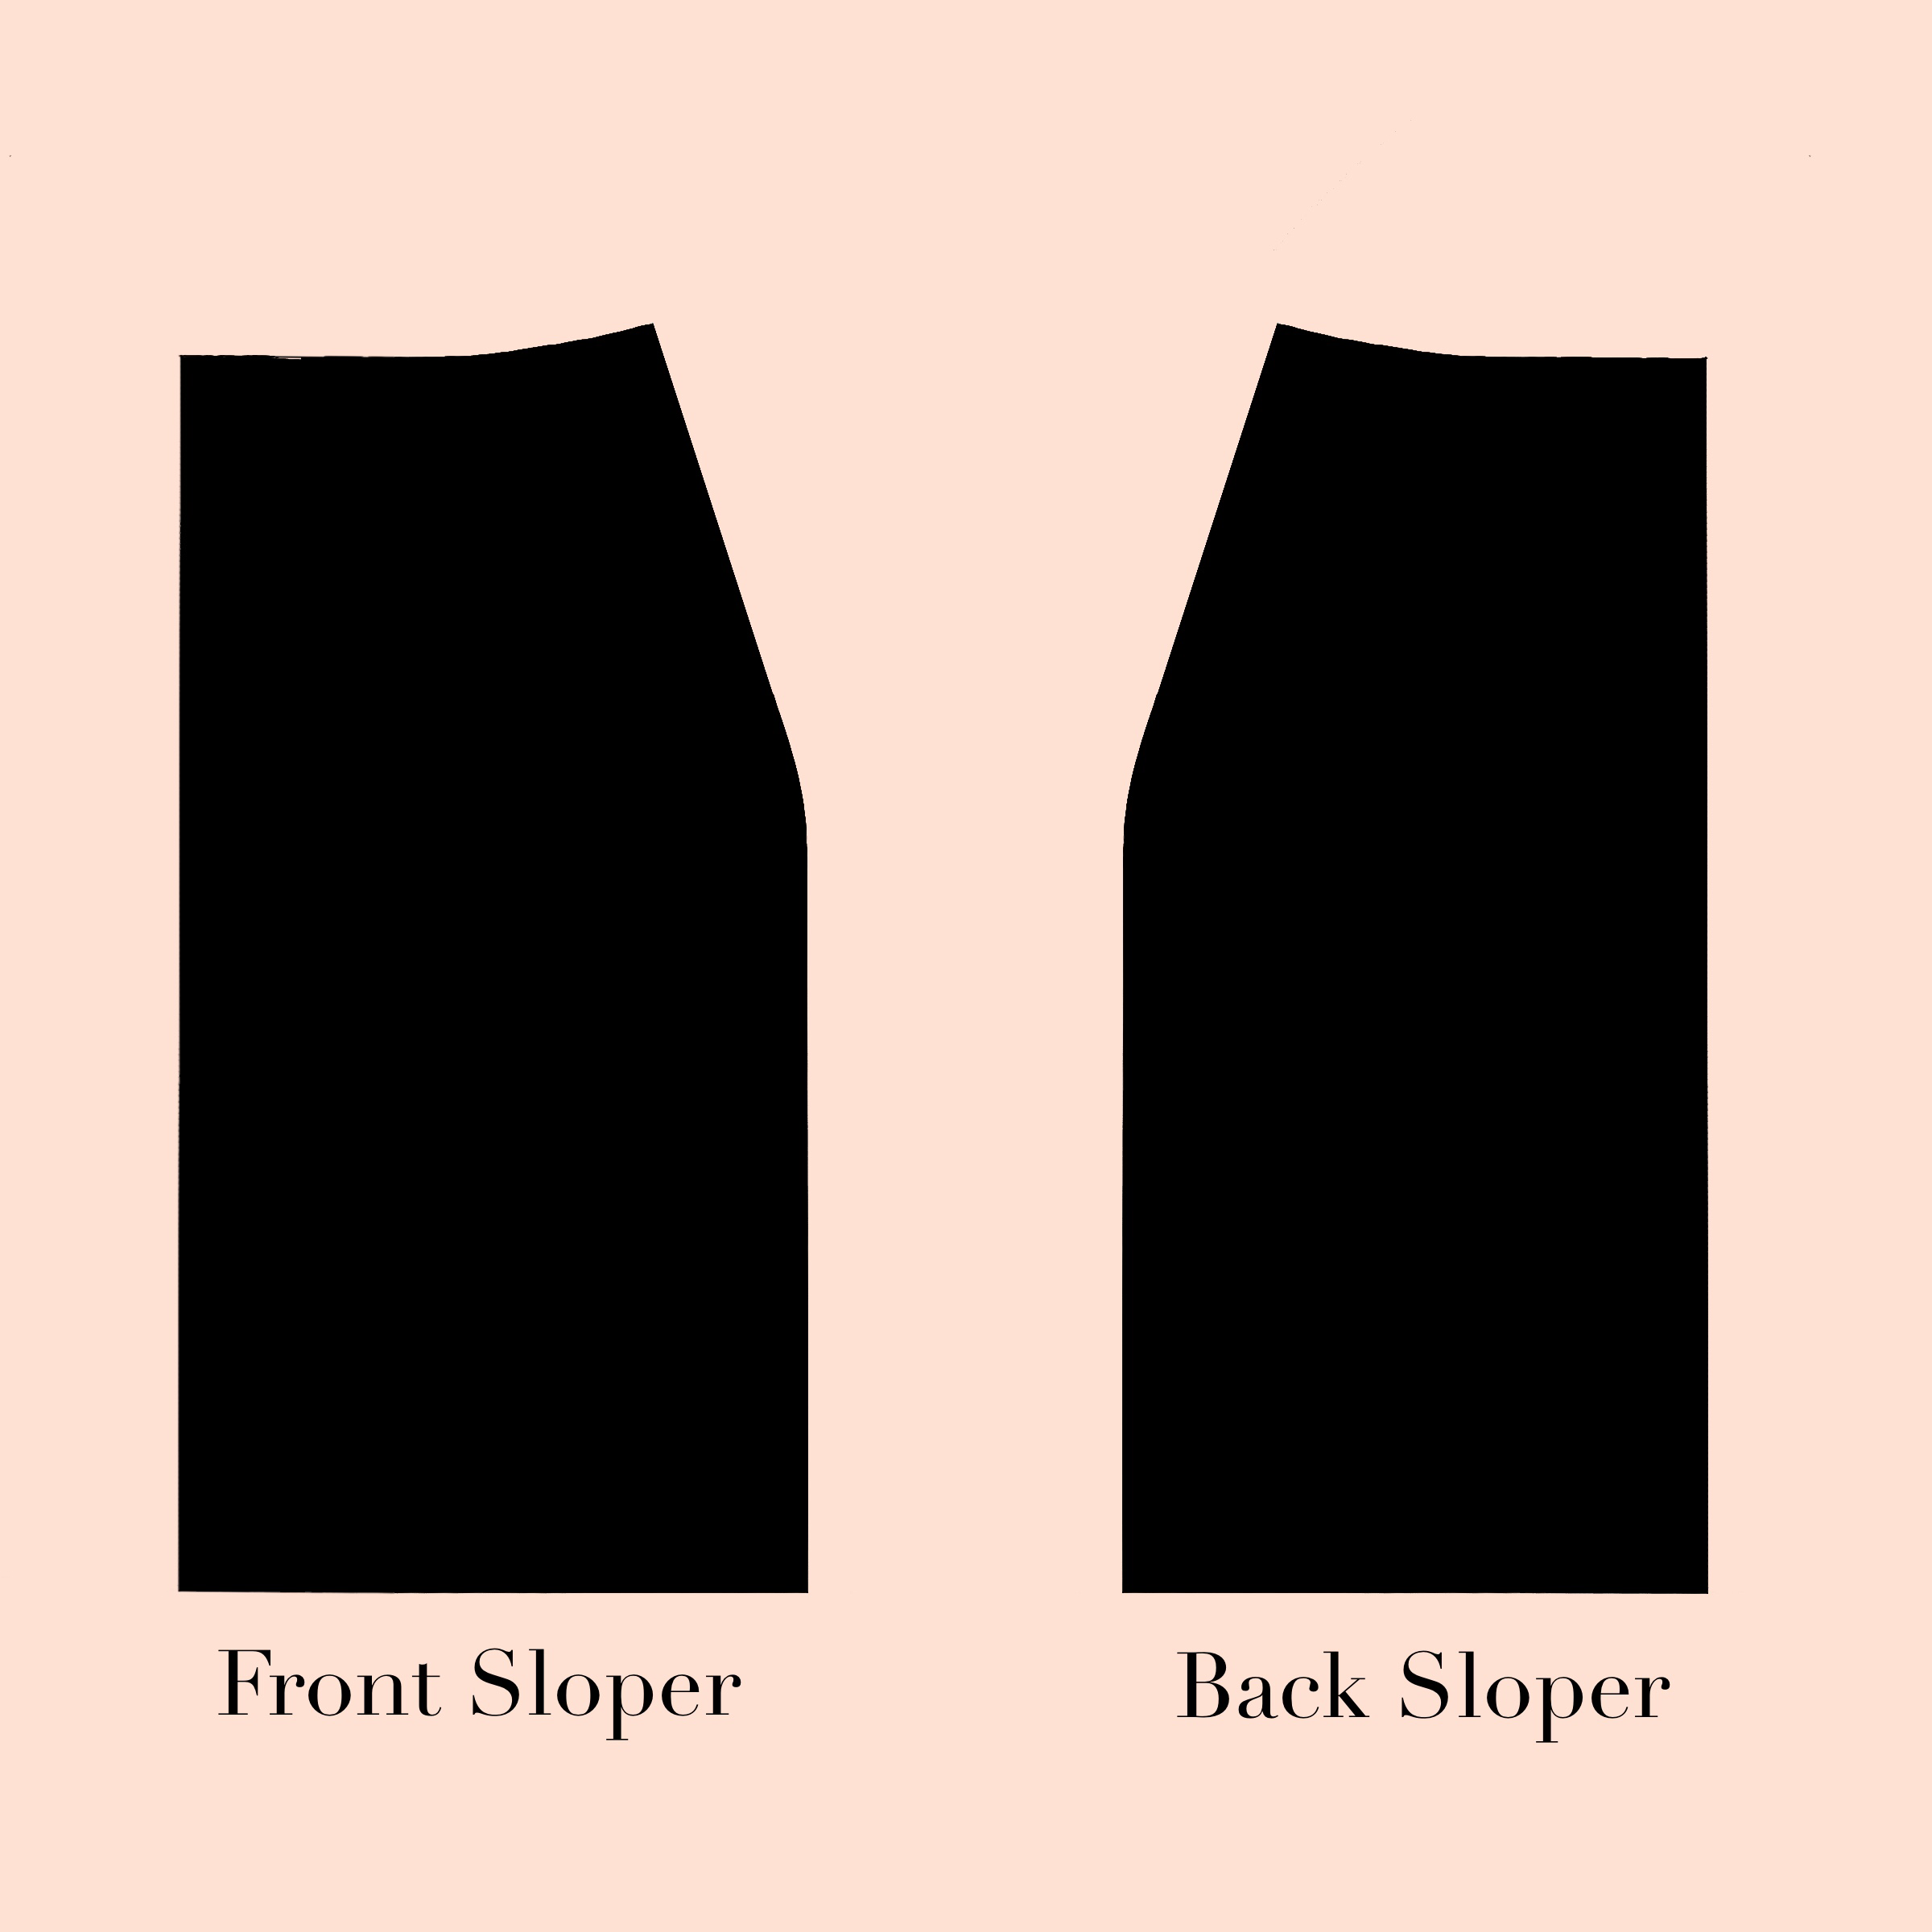
A sloper provides you with a map of the minimum amount of fabric necessary to fit your body. You can overlay and compare this to the pattern to be sure that the pattern is large enough to encase your body effectively. If there are places in the pattern that are smaller than your sloper, you know that you need to deal with those and add room in some way before you ever cut into your fabric.

A sloper can also help you to make your standard necessary adjustments to the pattern before you test, and can save a lot of repeated steps and fitting processes if you sew a lot of your own garments. If you know that you always need to increase waist circumference to get a good fit, you can incorporate this adjustment into your sloper and know where to add to every pattern you make before you begin.

A sloper can be used to grade a pattern up or down to your desired size as well, though this method may be less precise than grading by more mathematical methods. Essentially, using a sloper to grade is just one way to do a slash and spread grade, and the sloper becomes a guide for moving pattern pieces. It offers a quick and painless way to adjust patterns visually, and it can save some time by incorporating your fitting adjustments and resizing your pattern in a single step.

What is slash and spread grading?
Pattern grading is the process of enlarging or reducing pattern dimensions to create different pattern sizes from an existing pattern. This can get very complicated, because the way the body varies from size to size is a complicated subject that garment makers and manufacturers continue to struggle with. But the idea is simple enough.

Overall grade = the difference between the current pattern measurement and the desired pattern measurement (body measurement plus desired ease).

Distributed grade = the overall grade amount divided by 4, which tells you how much to add or subtract to each quarter panel of the pattern. Pattern pieces generally represent one quarter of the body, unless they’re asymmetrical, so 1/4 of the overall grade amount is distributed to each piece.

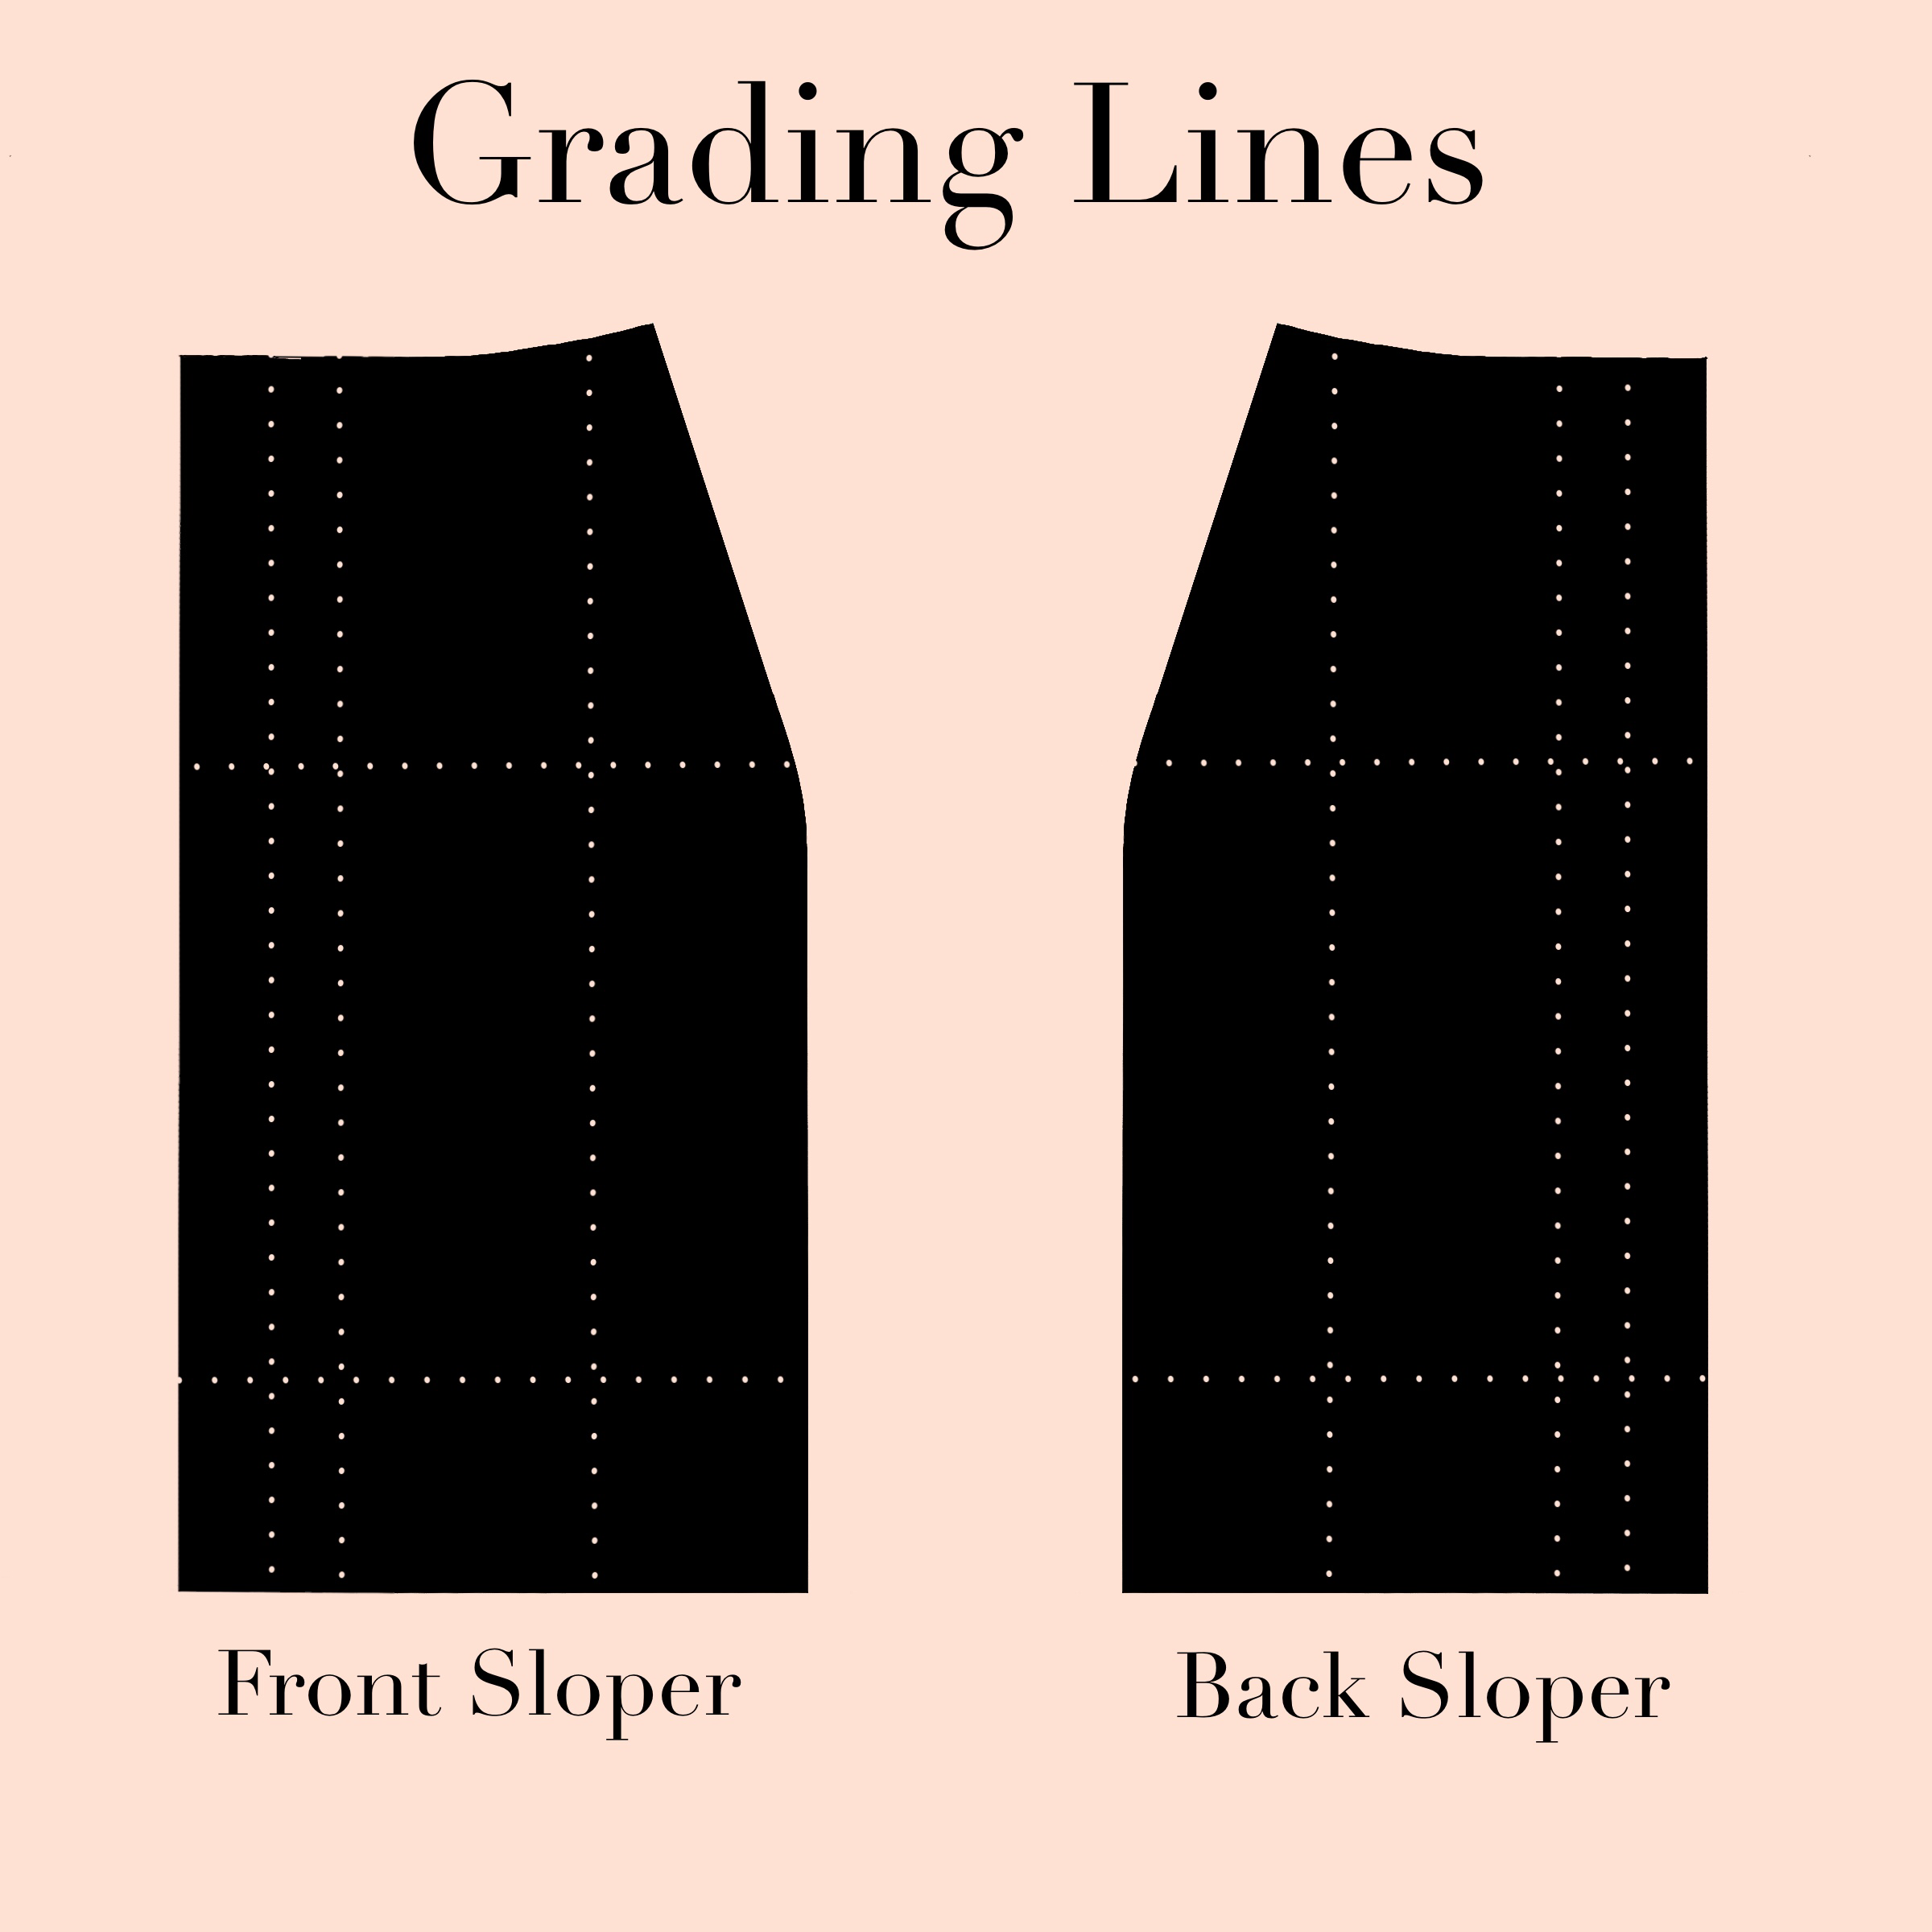
This additional space is added to the pattern in specific places to allow for the different amounts the body grows or shrinks from size to size and different places in the body. (For example, when increasing a size, you may add two inches at the waist, but the neckline circumference will increase by much less.) There is a standard set of grid lines representing where to slash and spread or overlap a pattern.

If you’re grading without a sloper, these slash line placements are very precise so that you can grow the pattern a very specific amount exactly where it needs to expand. That’s why there are double lines at center front and back. There’s a really good Threads article that explains this in detail here:

www.threadsmagazine.com/2008/11/01/quick-reference-for-cut-and-spread-pa…

So how do you determine where exactly to slash a pattern for resizing? It depends on your purposes. If you’re grading a pattern to an abstract standard, a generalized pattern to be used by multiple people and body types, you can use the standard grid lines shown above. These do seem to be agreed upon somewhat universally in all the patternmaking sources I’ve seen that use a slash and spread method.

But if you’re grading for your own body measurements or a specific person in mind with specified proportions that may or may not align with sizing standards, then the slash lines positions are more flexible and are determined by the needs of those body dimensions.

The exact slash line placement can vary based on pattern complexity as well. In patterns that aren’t very complicated like a skirt, the cut lines to slash on can be positioned with less precision than a more complicated pattern with crotch curves and scyes to deal with. The multiple slash lines are really just to allow the pattern to be spread or overlapped smaller amounts in more places so that the change in volume is spread out. In a pattern like a skirt with very simple lines, changing it incrementally by adding or subtracting smaller amounts in more places would yield the same results as fewer slashes that add or subtract a greater amount in fewer places.

Sloper Versus Pattern for Grading Purposes

If you’re using a sloper to grade rather than precise mathematically determined slash and spread amounts, this changes your approach in a couple of ways.

In terms of slash line position, if you’re grading with a sloper, especially one that has been adjusted to fit your body specifically, you usually only need to slash and spread where your body needs the space or where the pattern needs to lengthen. For example, if you’re making vertical adjustments and you have a waist to hip length that is shorter than standard, then your sloper hip and waist position are what you should use to determine whether or not you need to adjust the pattern. If the pattern has too little or too much length from waist to hip, then you would slash between the waist and full hip and move the pattern to line up with your sloper. The exact placement of the slash line doesn’t matter as much as the correct positioning of body landmarks.

It’s also slightly different than straightforward slash and spread grading because wearing ease and body measurement increases are already incorporated into the sloper pattern itself. The design ease is what will need to be added to the sloper. The final pattern and the sloper should not match exactly, because the sloper represents minimum fit and the pattern represents style created using volume and seaming. The goal is to preserve the proportions of the pattern while using the sloper to adjust sizing.

It is important to note that while wearing ease (included in the sloper and in patterns already) is somewhat universal, design ease, which is the widely varying amount of extra room added to create volume in garments, is proportional. For a style to have the same overall appearance whether a size 4 or size 16, that amount of additional volume must increase proportionately relative to the body. For example, having 2″ inches gathered in at the waist will appear differently on a waistline that is 24″ than a waistline that is 40″ in circumference. Two inches represents about 8% of the waist circumference in the original pattern. For the style to be graded well, the proportions must be considered where there is fullness added to the pattern. For it to appear proportionately similar, the amount gathered for a 40″ waist would need to be about 8% of the waist circumference, approximately 3.3″.

If you are grading up or down a size or two, especially if the garment design is simple, you may not need to worry about the proportions changing too much and you can probably disregard it without your end result being disproportionate. If the pattern is only going up or down in size by a couple of inches, the additional percentage of design ease to factor in is small enough to be negligible. But for greater size increases or decreases, it’s advisable to consider the proportions of body measurement compared to the pattern measurement and keep that proportional relationship consistent in your graded pattern.

How the Garment Hangs from the Body

When using a sloper to grade a pattern, consider where the pattern aligns most closely to the shape of the body, and where it hangs from or anchors to. For skirts and pants, the place the pattern anchors on the body is usually the waist and hips. The design relies on closeness to and tension against the body to keep it in place. In these places, the pattern should be most similar to the sloper. If the garment has pleats or gathers at the waist, there will be additional volume there, but aside from design elements, the pattern will take the shape of the body there, for the most part, because it anchors there.

Similarly, ignoring the cut away shapes of the neckline and the embellishment of the collar, the area where shoulders, neck, and back intersect at the top of a pattern is usually almost identical to a sloper. This is the part of the body that the garment hangs from, so a smooth, close fit to the body can be expected here (with the exception of shaped collars or funnel necklines, etc).

For the simple flared skirt I will be using as an example, the garment anchors at the waistline, and uses tension against the body here and the size difference between waist and hips to remain in position. So my sloper and my graded skirt pattern will have the same shape here, because there are no design features and no design ease. If there were design features like pleats or gathers, I would figure out the proportions they represent relative to the body, and figure out the amount to add or subtract to the graded pattern in proportion to the desired body measurements.

The Grading Process

To grade a pattern up or down with a sloper, you’ll need a sloper in the desired size, and a pattern that you want to grade, as well some large paper to trace on, sharp or mechanical pencils, a ruler or square, scissors, and probably some scrap paper and tape. It’s best for these purposes if your sloper extends the full desired length of the finished pattern. For my example, I’m grading a skirt pattern, so my skirt sloper should extend to the desired length of my final pattern. If needed, extend the vertical length at the center front, center back, and side seam lines.

Begin by tracing a copy of the pattern you want to grade. For simplicity’s sake, leave off seam allowances. They can be added back later and it’s much less confusing to remove them for now. Markings and grainlines aren’t necessary either, just the pattern shapes and structural features like darts and gathers or pleats. Facings are unnecessary as well, and can be redrafted from the final graded pattern.

Slash and Spread Along Grading Lines

Typically for the slash and spread method of pattern grading, a standard set of gridded lines is used to determine where to slash the pattern and by what percentage of the desired grade the pattern is to be expanded or reduced. With a sloper, the precise distance to move pattern pieces can be determined by just aligning the pieces visually, though for patterns with a lot of additional volume, this just establishes the basic shape.

It’s important to remember that additional volume may be needed where there is a lot of design ease added to the pattern so that you can preserve the proportions. But sliding the pattern to align with the sloper provides a starting point, and for small size changes, the proportions are similar enough that they can sometimes be ignored. For my simple flared skirt example, the flare at the bottom is the only place where the design ease proportions are a consideration. If my original pattern has a bottom hem that is 12″ larger than my sloper hem of 36″, then the design ease is 12 divided by the sloper measure (or body measure plus wearing ease of 36, for a result of 33%. So whether I’m grading up or down, the final pattern should be 33% larger than the body at the bottom edge.

So start with the grid lines. If your pattern has seam lines that divide each quarter into pieces, these grid lines can be moved slightly to position them within pieces. This is more of an eyeballed art than a science. There is less flexibility in locations like the neckline or scye, though. If it helps, patterns can be butted up to one another at the seams, temporarily taped and separated later.

Align the pattern with the sloper at the low hip. (This is my preference, generally – using the unchanging hard skeletal structures of the body at the full hip and the high bust to choose pattern sizing and as a starting point for adjustments.) When sliding pattern pieces, try to keep them aligned with the XY grid formed by the center front and an imaginary line bisecting it at a 90 degree angle. The pieces will be moving vertically and horizontally, but shouldn’t be tilting.

Adjust horizontally first. Cut along the horizontal grid lines and spread or overlap pieces to align to the top and bottom of the sloper. Keep the low hip of the pattern in alignment with the sloper low hip. It can be helpful to tape the pieces in place temporarily and to use scrap paper to tape and stabilize pieces in place when spreading them apart. The new position of the pattern top and bottom will be used to redraw your graded pattern.

Then adjust vertically. Cut along the vertical grid lines and spread or overlap pieces to align them to the inner and outer edge of your sloper pattern. Tape into place. The new position of the pattern pieces will be used to redraw your graded pattern.

Redraw the pattern seams, smoothing and stretching or condensing curving lines as needed. True the front and back by making sure that side seams match up lengthwise. If the original pattern is symmetrical at the front and back side seam, the graded pattern should be as well.

Use the new pattern seamlines as a guide to redraft any attached facings, facings, or waistbands to fit the new pattern shape. Redraw seam allowances if desired.

Grading a Pattern Up Using a Sloper

Here is an example of how I would approach increasing a pattern in size. Let’s say I have a stretch pattern for a flared skirt that is a few sizes too small, but I have a sloper that is my desired size and fits my measurements.

First I trace the pattern onto a new sheet of paper, preserving my original pattern. Then I decide where the lines to slash the pattern will be based on the positioning for these lines in standard grading procedure. I draw these cut lines on the pattern front and back.
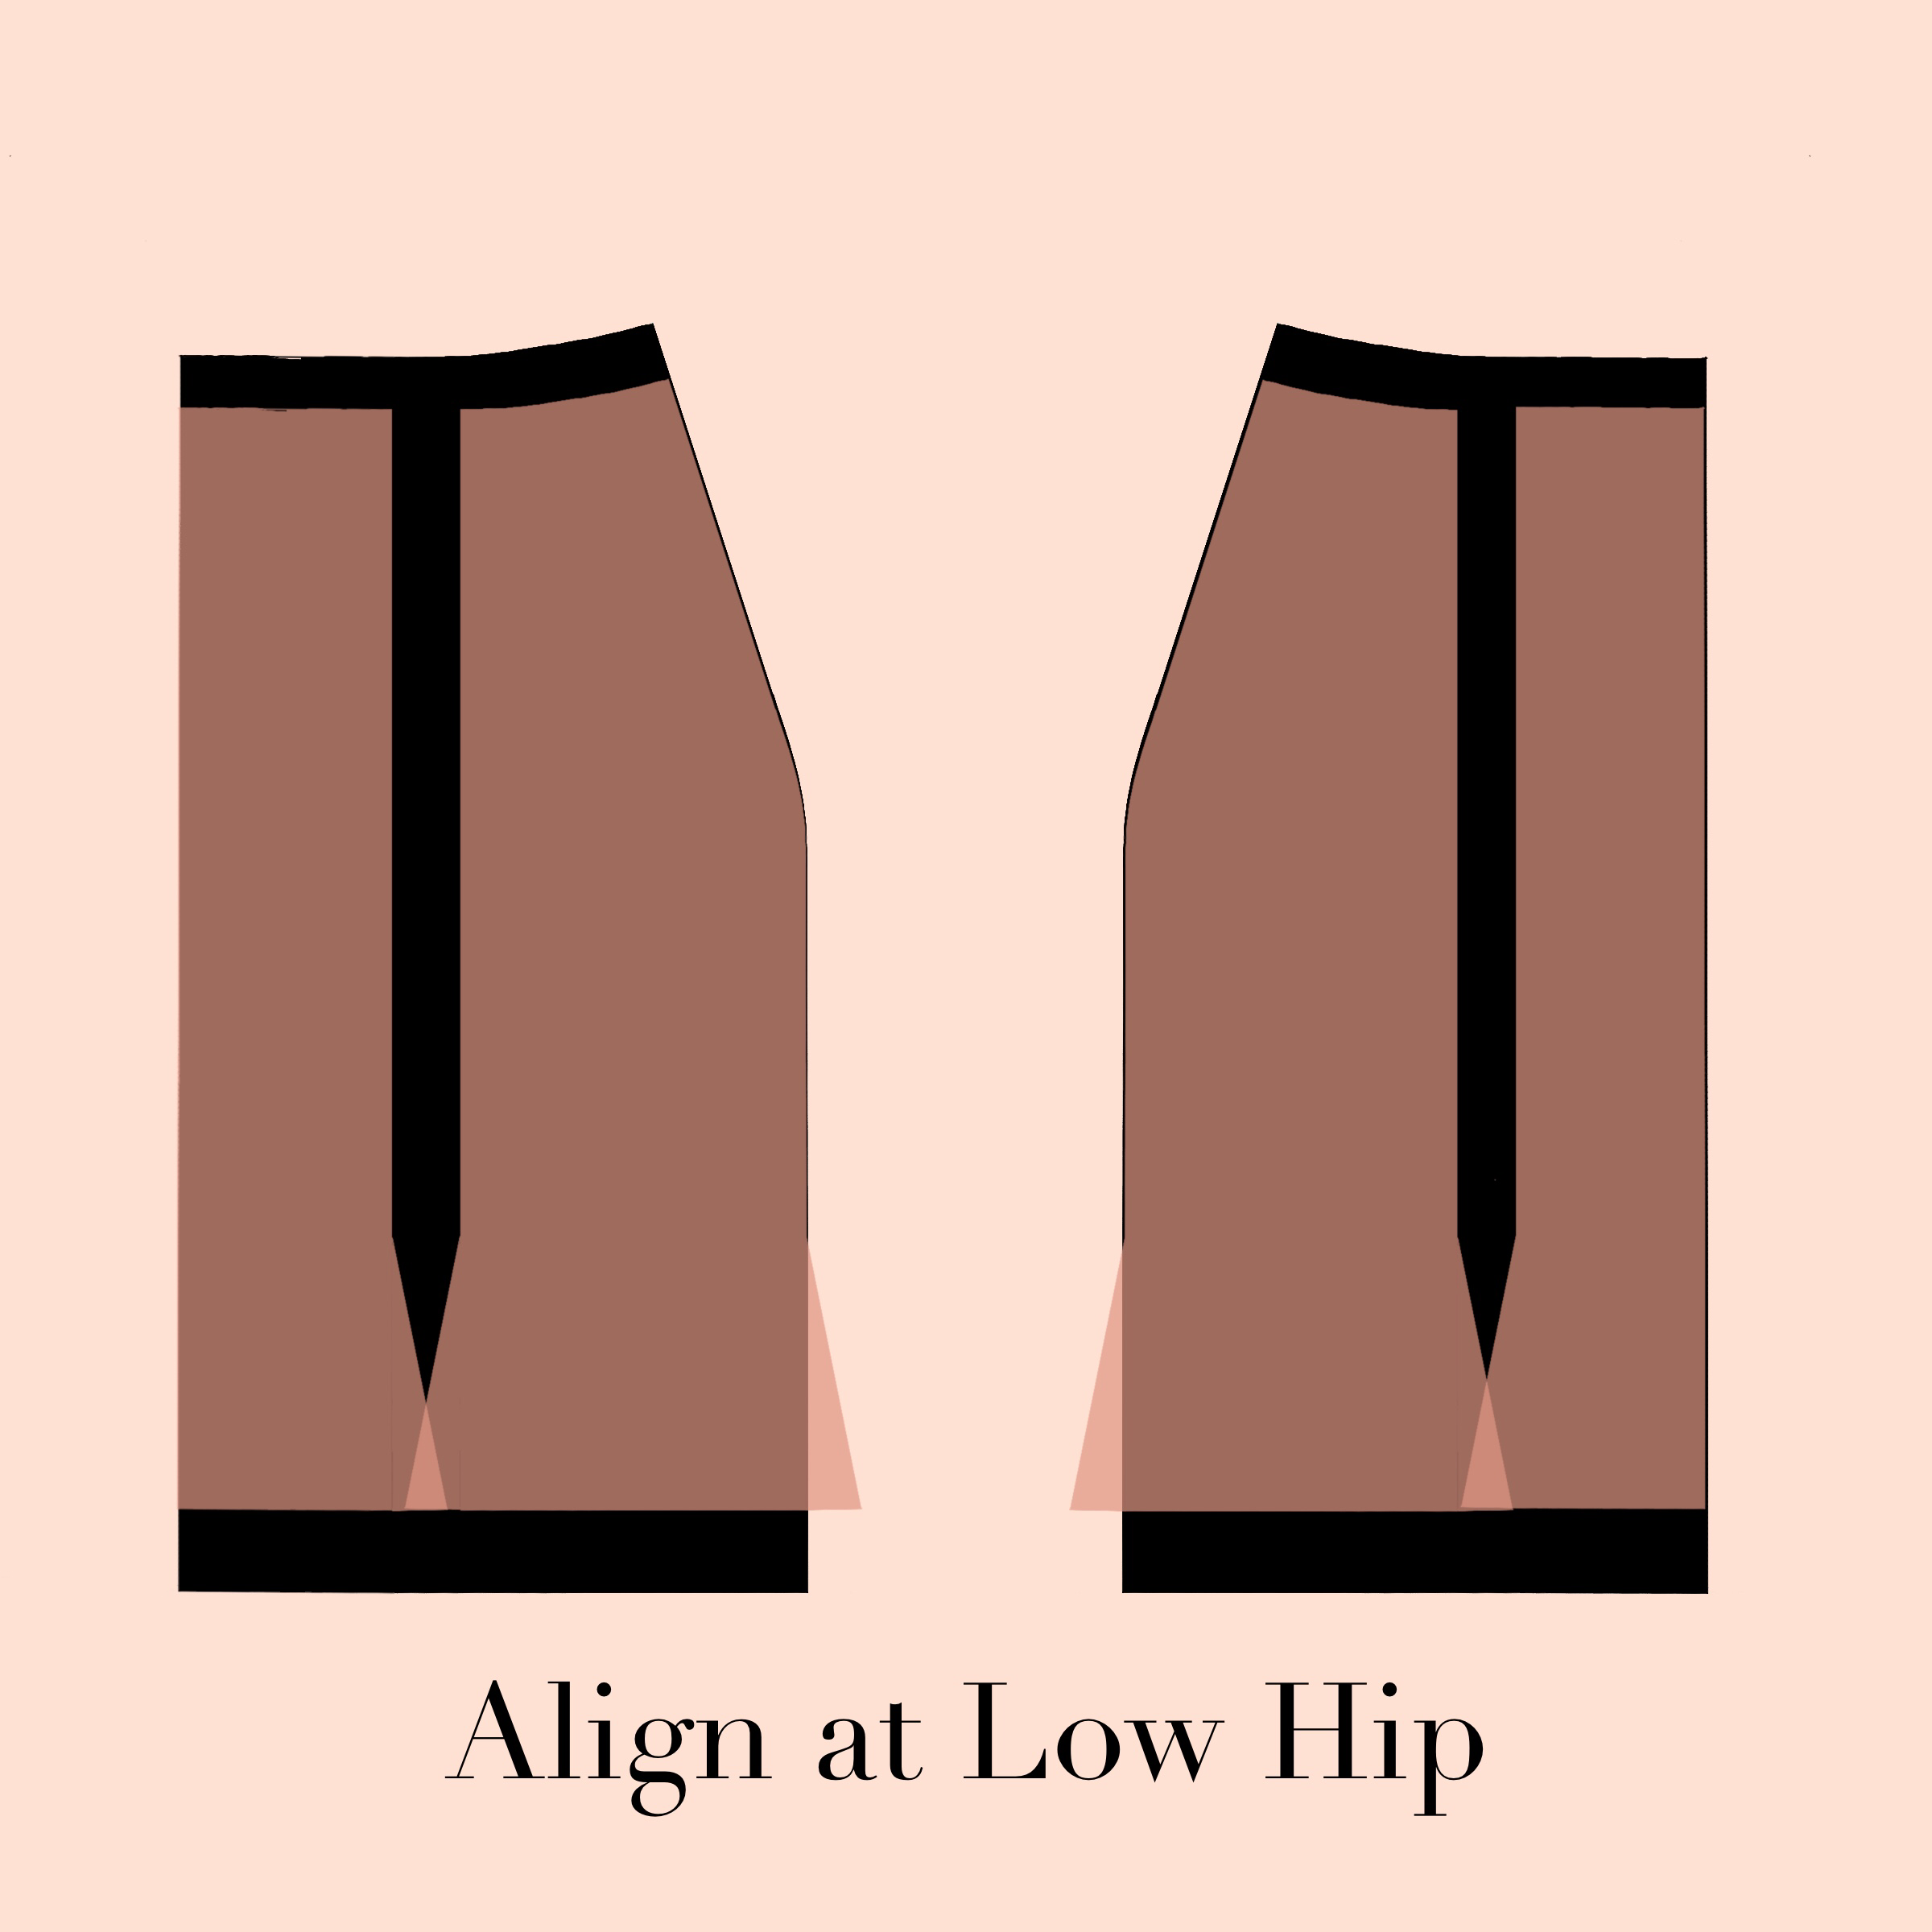
Then, I align the pattern and the sloper at the low hip. This is mostly just personal preference – I like to orient my pattern work with the bony structure of the hip and then adjust around the softer, more shapeable parts of the body. Then I make vertical adjustments first by slashing and spreading at the horizontal slash lines.

If my sloper is as long as the desired length of the final pattern, I want to use the top and bottom of the sloper to define the general position of the top and bottom of my graded pattern. I tape the pattern pieces temporarily in position so they don’t slide around while I adjust further.

Then I look at the pattern horizontally. The sloper establishes the general position that I should slide my pattern pieces into. The pattern pieces will probably extend beyond the horizontal edges of the sloper, because the pattern will have additional ease added here to give it its shape.

The new position of the pattern pieces acts as a guide for where to redraw the seam lines for the enlarged pattern. The outer seam shapes should be traced over and smoothed from the pattern position after spreading apart, as shown by the red dotted lines above. The position of the inner seams can be determined mathematically if you choose by determining the proportions of the original and maintaining that proportion in the enlarged pattern. (I’m pretty comfortable with eyeballing it for simple patterns, though.)

Where there is design ease included in the pattern, it may be necessary to adjust to match the proportions of the original pattern. In this case, if I’m enlarging the pattern significantly, the amount of design ease at the bottom may need to be increased slightly to match the proportions of design ease to the body measurement of the original. I might add a bit more volume to the bottom flare to keep the look of the pattern consistent, as shown in the red lines above. If I’ve only graded up a size or two, this may not be necessary, though, since the difference in proportion would be relatively small.

Then I true the seams by comparing the seamlines to make sure the lengths of all of my seams match up, redraft any facings or waistbands using the new pattern pieces as my guide, and add back seam allowances. My final results would look something like the yellow pattern pieces below:

Grading a Pattern Down Using a Sloper

Decreasing pattern size is a similar process, but pieces will be overlapped instead of spread apart. In this case, I have a pattern that is too large, and a sloper that is my desired size.

First I trace the pattern onto a new sheet of paper, preserving my original pattern. Then I decide where the lines to slash the pattern will be based on the positioning for these lines in standard grading procedure. I draw these cut lines on the pattern front and back.
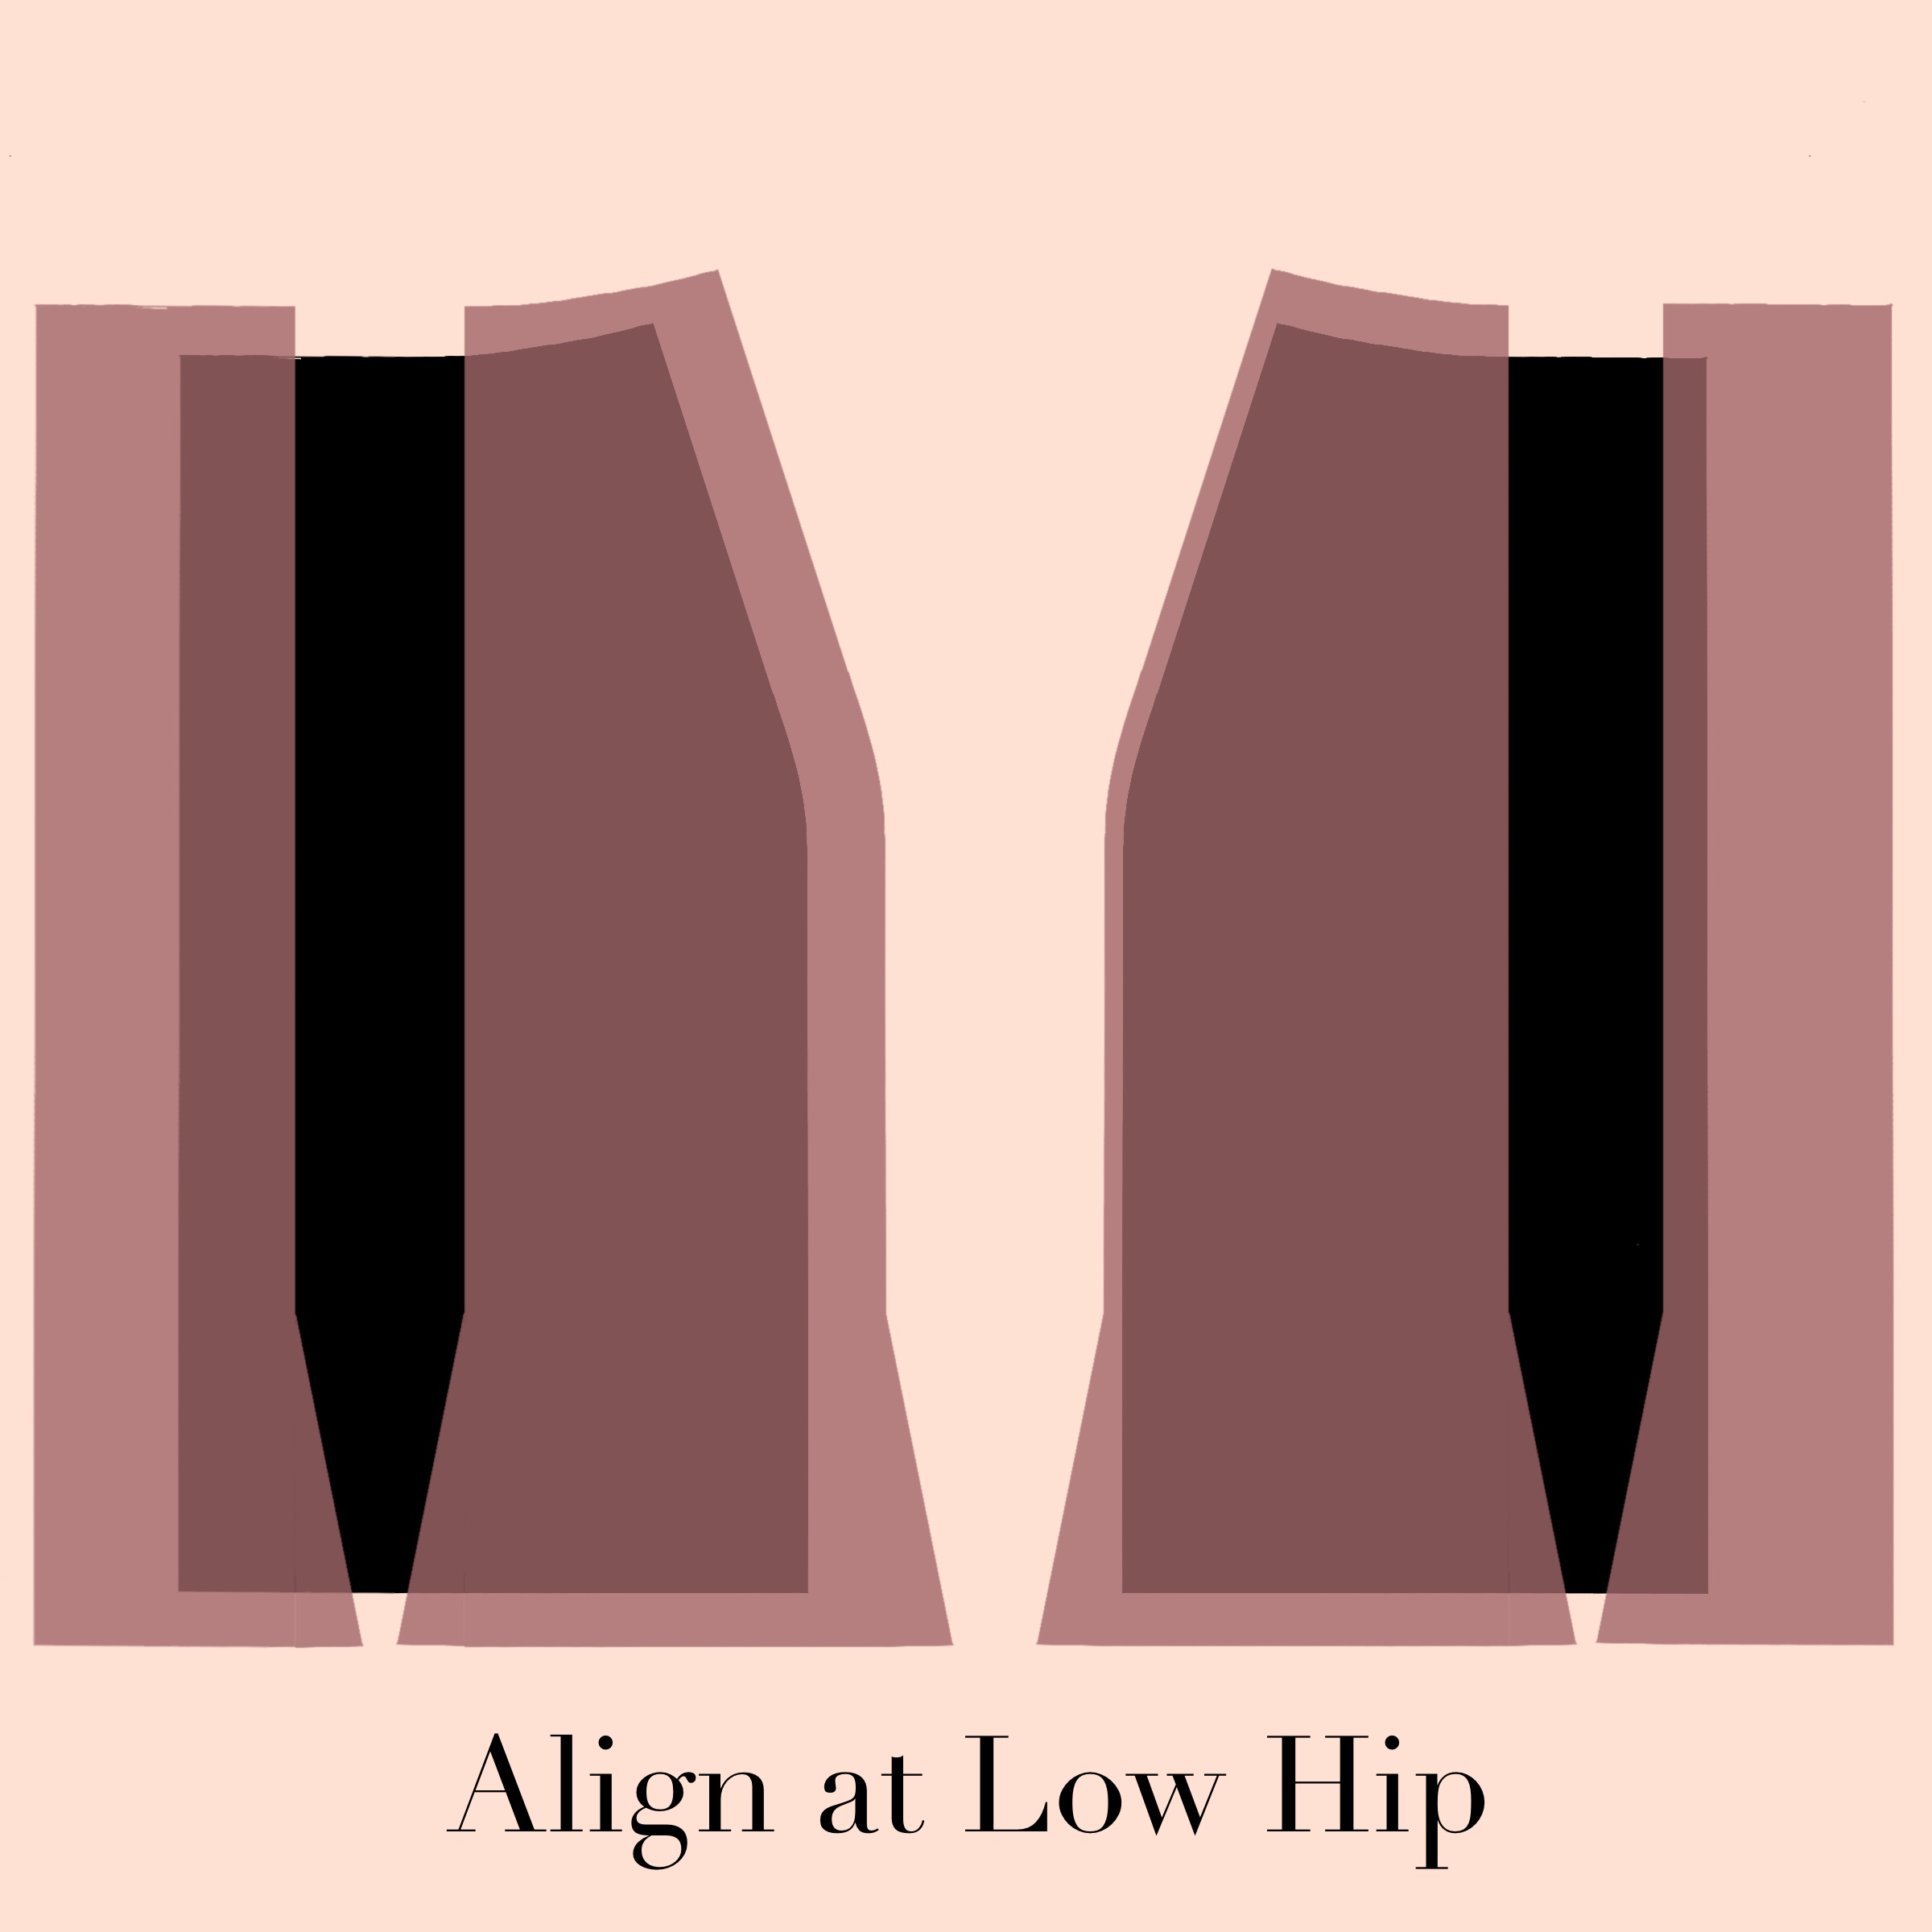
Then, I align the pattern and the sloper at the low hip. Then I make vertical adjustments first by slashing the pattern at the horizontal slash lines and overlapping to align it with the top and bottom of the sloper. I tape the pattern pieces temporarily in position so they don’t slide around while I adjust further.
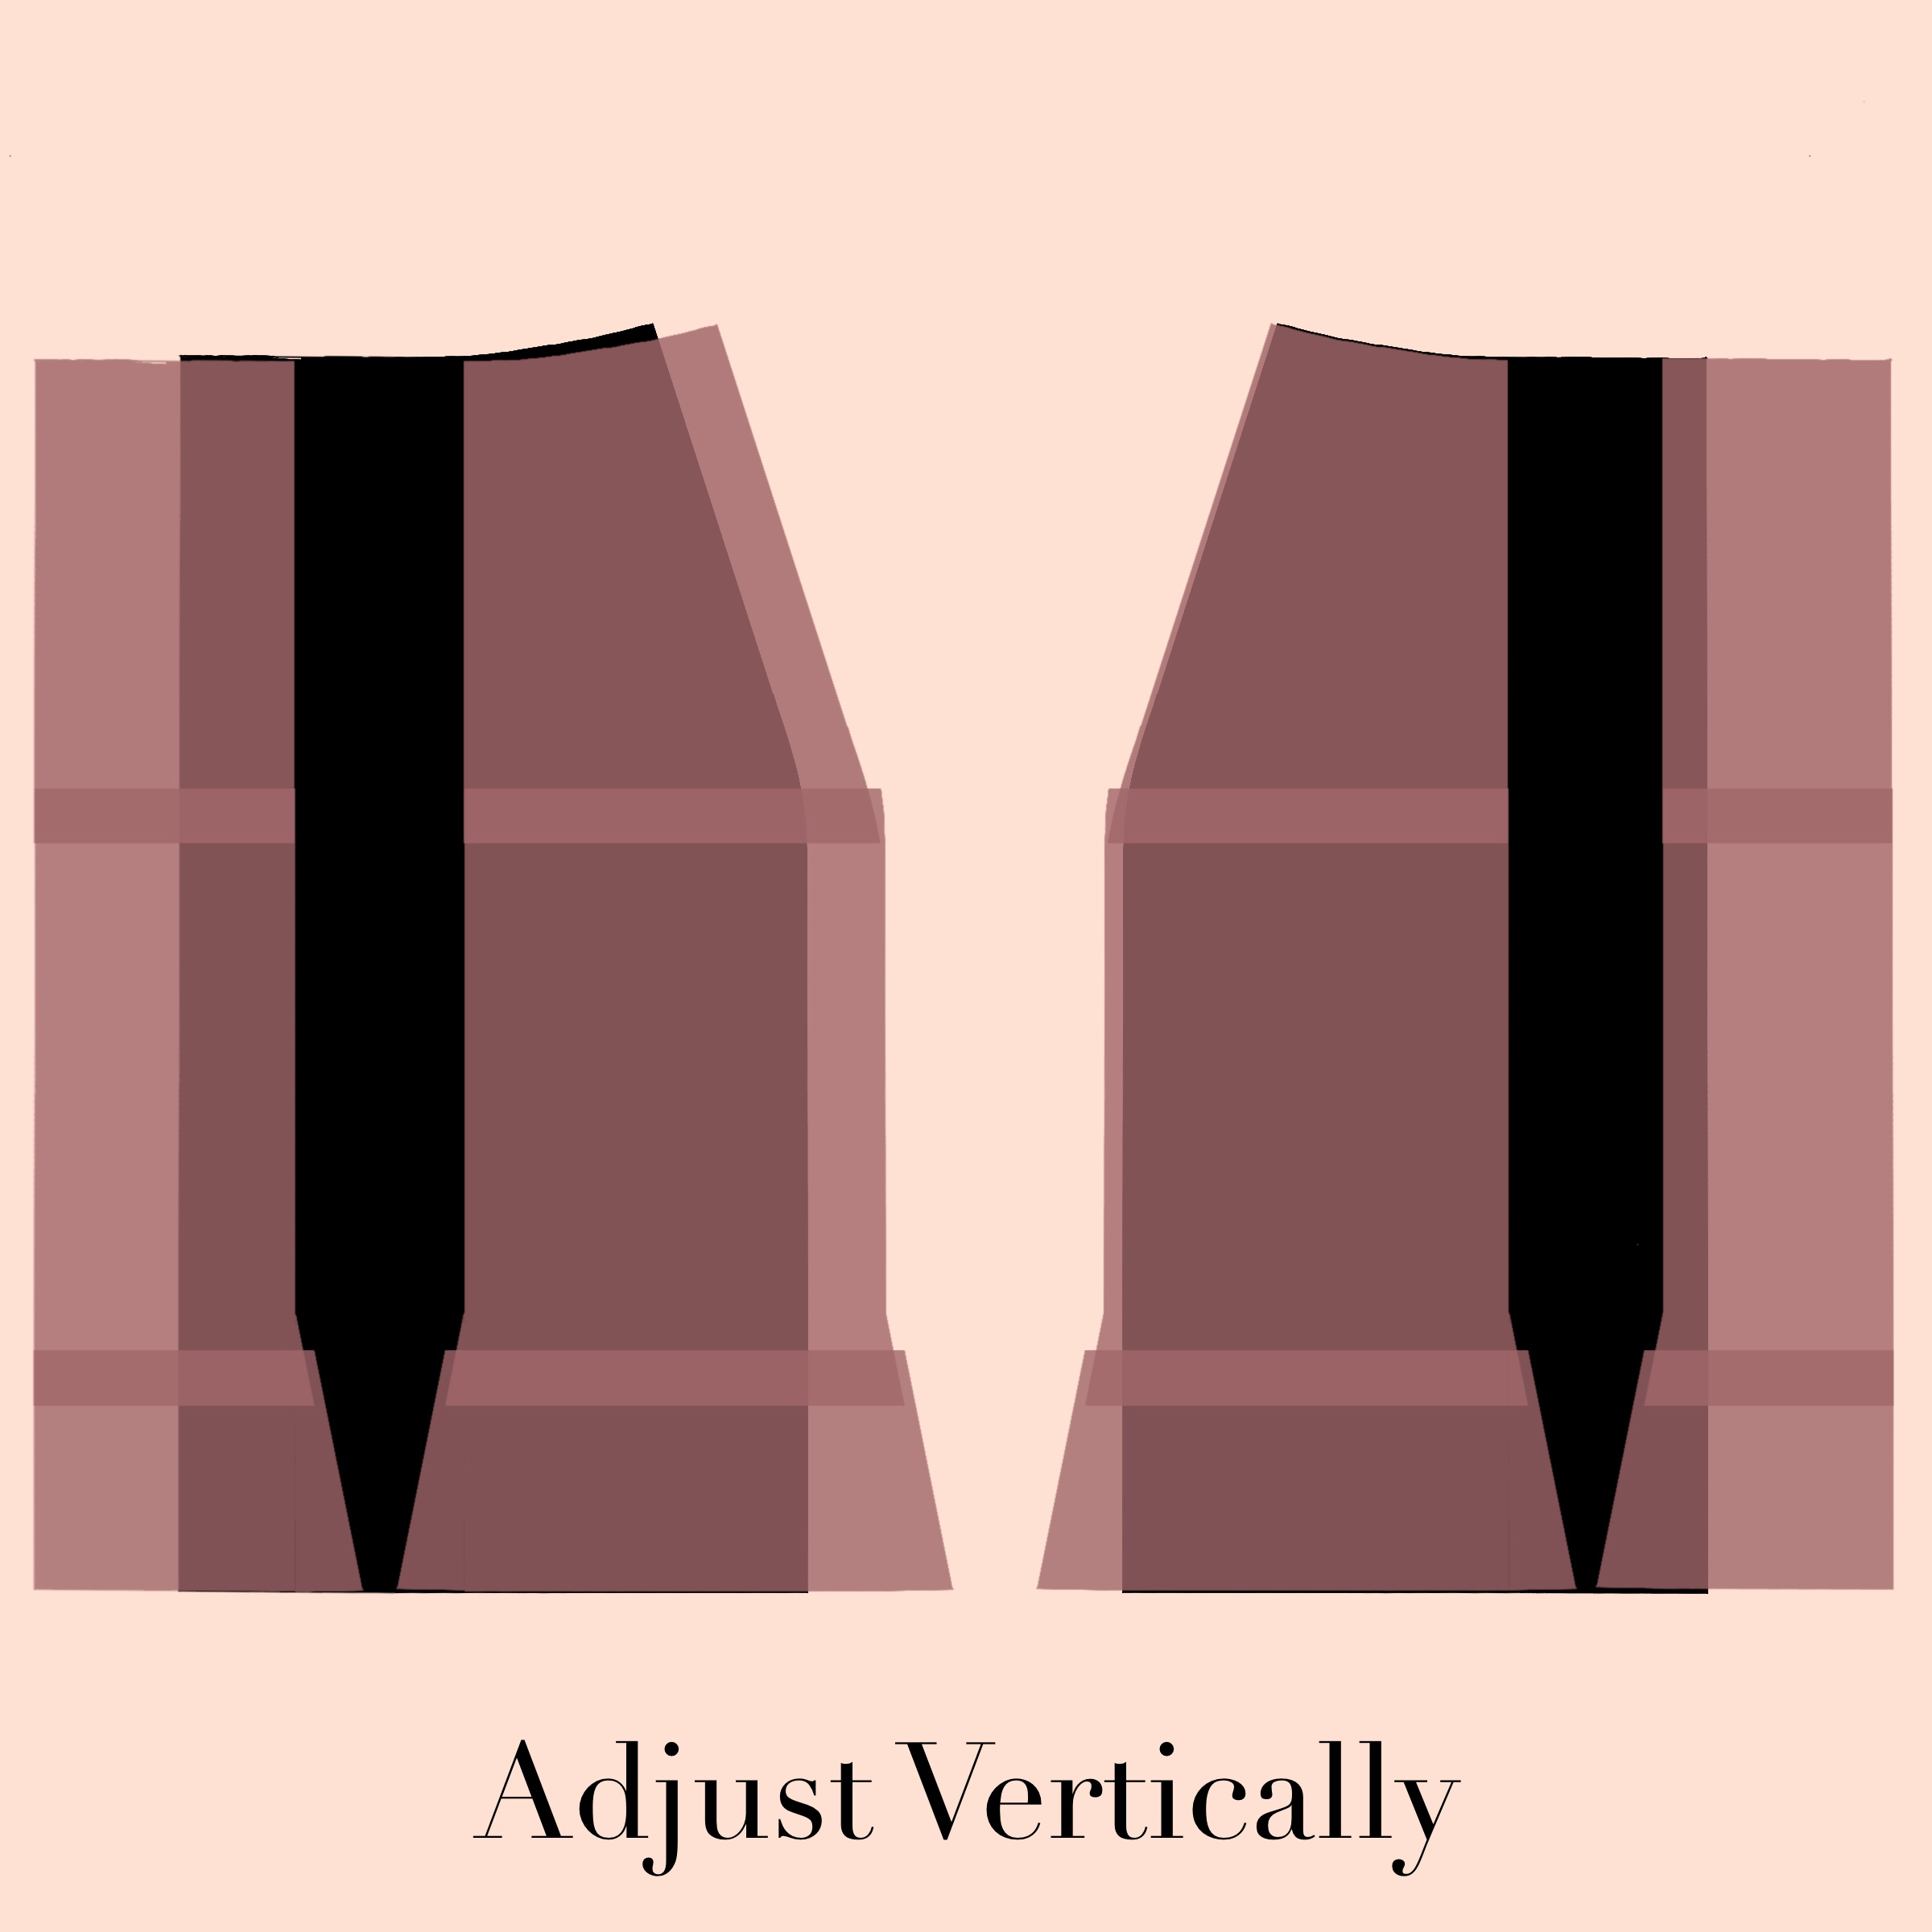
Then I look at the pattern horizontally. The sloper establishes the general position that I should slide my pattern pieces into. The pattern pieces will probably extend beyond the horizontal edges of the sloper, because the pattern will have additional ease added here to give it its shape.
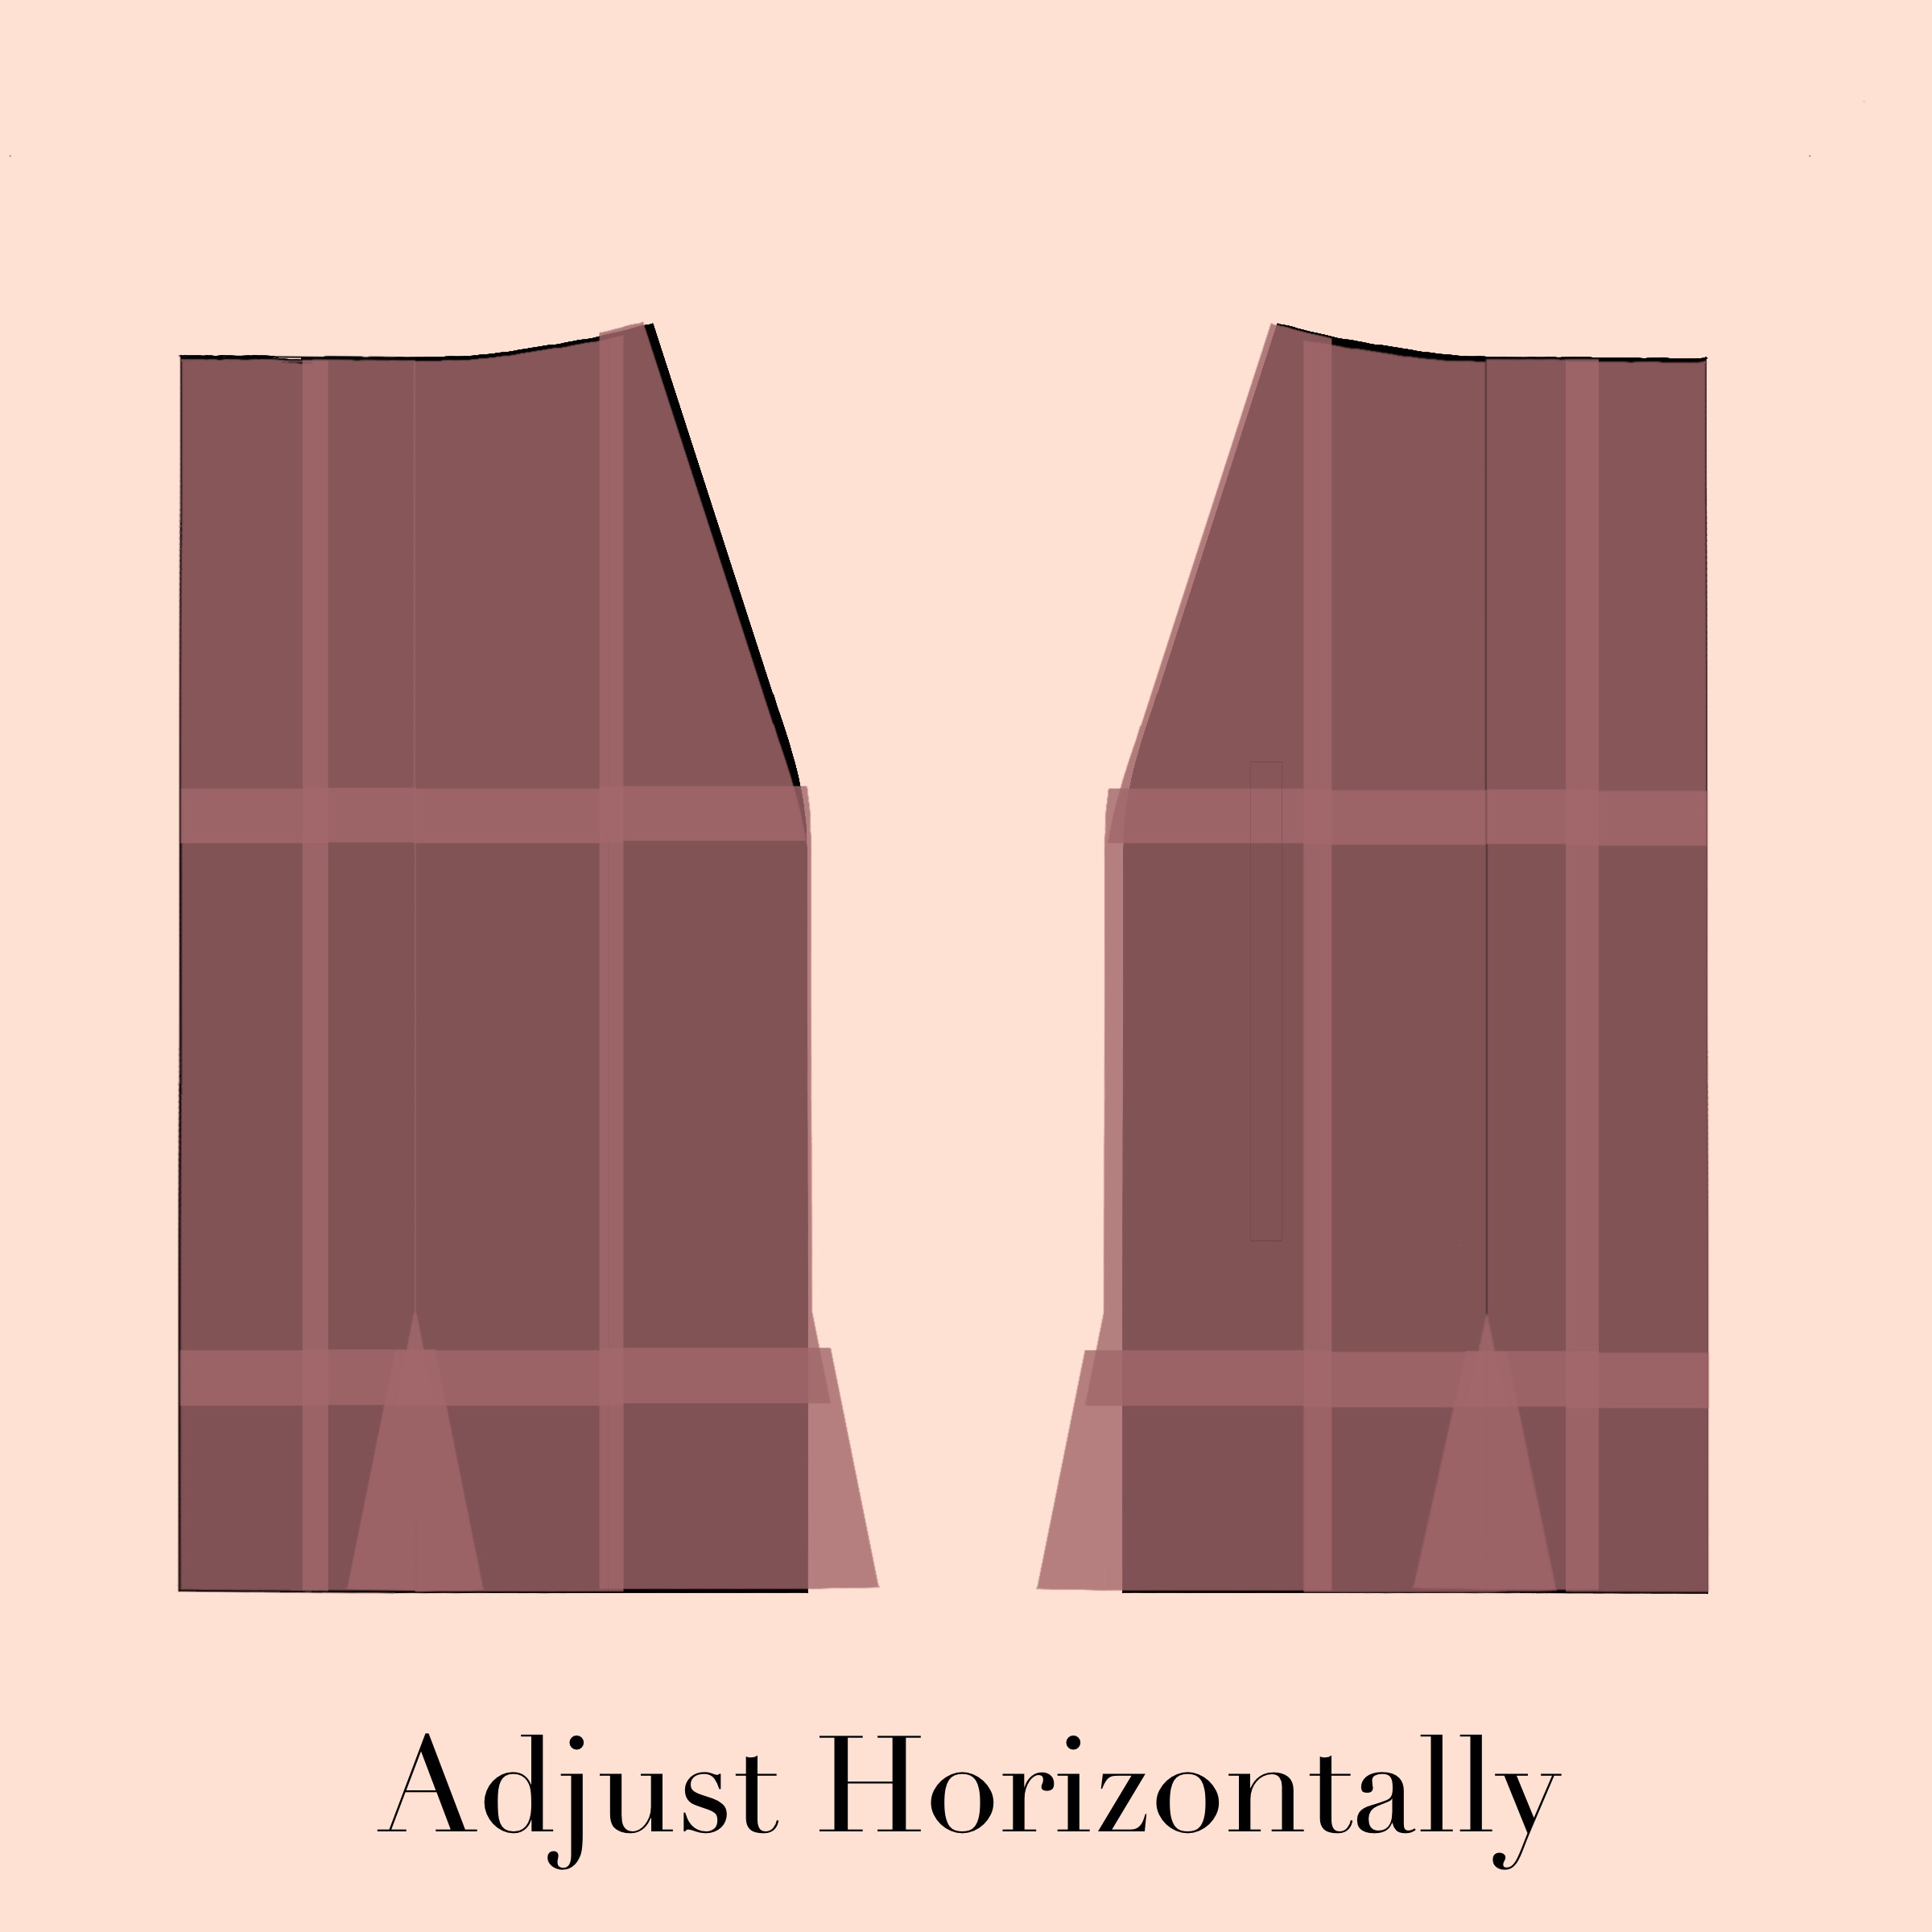
The new position of the pattern pieces acts as a guide for where to redraw the seam lines for the enlarged pattern. The outer seam shapes should be traced over and smoothed from the pattern position after overlapping, as shown by the red dotted lines below. The position of the inner seams can be determined mathematically if you choose by determining the proportions of the original and maintaining that proportion in the enlarged pattern. (I’m pretty comfortable with eyeballing it for simple patterns, though.)

Where there is design ease included in the pattern, it may be necessary to adjust to match the proportions of the original pattern. In this case, if I’m reducing the pattern significantly, the amount of design ease at the bottom may need to be reduced slightly to match the proportions of design ease to the body measurement of the original. I might remove some volume to the bottom flare to keep the look of the pattern consistent, as shown in the red lines above. If I’ve only graded down a size or two, this may not be necessary, though, since the difference in proportion would be relatively small.

Then I true the seams by comparing the seamlines to make sure the lengths of all of my seams match up, redraft any facings or waistbands using the new pattern pieces as my guide, and add back seam allowances. My final results would look something like the yellow pattern pieces below:

And that’s pretty much it for grading up and down with a skirt sloper. I hope this was helpful! Thanks again to the person who asked me about this process. If you have any questions about working with slopers, feel free to ask! And If you need a skirt sloper, I have several available at my Etsy shop here, including the stretch sloper pictured in the examples above. I hope everyone is safe and well and as contented as can be, given the craziness in the world at the moment.

Woven and Knit Sloper Patterns for Women’s Skirts

women's woven skirt sloper pattern PDF download

I have two new sloper patterns to share, a women’s skirt sloper for woven fabrics and a women’s skirt sloper for knits, both in 12 sizes. (Available through Etsy for instant download and in large format pdf for copy shop printing, too.) Drafted my first digital fashion flats and created a new logo, too! I’m *really* excited, because my efforts to work out all my sizing and grading standards consistently is starting to come together. From a pattern drafting standpoint, it’s important to me to develop a solid, consistent basis to draft from going forward, but also from a personal standpoint, I’m excited to be creating a full library of personalized slopers so that I can get the fit I want, consistently and easily. If I know exactly the baseline I need, I won’t have to sew muslins or toiles. So there will be more of these in the future, and more to come on how to use them, because although sewing is an excellent move for less waste and better consumption habits and putting quality over quantity, sewing muslins of everything is a waste of time and fabric that I hate, and probably lots of other sewers do, too.

So what is a sloper, generally speaking? A sloper is the basic starting point for pattern design, also known as a fitting shell. It’s a baseline with enough wearing ease to allow for movement and breathing, but no design ease and no details, and usually it doesn’t include seam allowances, since they complicate the process of altering the sloper.

Why use a sloper? Patterns almost never fit as is, because all patterns are drafted to fit an average set of measurements. Since there is so much variety in human body proportions, the designer has to choose an average to work from, in the hope that these body dimensions will be a good starting point for their customers. Unless your measurements match this set of baseline measurements, the pattern will need adjustment to better fit your body. Getting a great fit with a sloper allows you to do this process once and be able to replicate it again and again, rather than having to sew a test garment to fit each new pattern you sew.

The sloper is meant to be a two dimensional dress form. When you sew a sloper, the intent is to establish a great fit, and to then use this as a template to modify other garments. Since the sloper has no details and no design ease, it represents the minimum amount of fabric you require for a garment to comfortably cover your body and allow for movement. The sloper is the baseline, where the pattern contains design ease and detail to add style, structure, and movement to garments.

These slopers are drafted for a hip that’s 9” larger than the waist, which is the amount I settled on when I looked at ASTM sizing charts and studies of actual bodies. It’s a good starting place for a lot of people, though I have a more rectangularly proportioned figure, so I’ll have to add about 2-3” to the waist for a correct fit. When I made my size chart and grading rules, I looked at the somewhat idealized proportions some of the big pattern companies use and tried to use measurements that were based more on real bodies than their dress form proportions. My hope is that my sizing will fit more rectangular/apple shaped/pear shaped figures better, since statistically it seems to be more the norm than the hourglass in the real human population.

I have never been a big wearer of skirts for my own wardrobe, but between sweltering humid Missouri summer, being on a 50s/60s movie kick when baby wakes me up in the middle of the night and discovering the wonderful drama that is the tango skirt, I think I need to add some to my wardrobe. (Last night’s 3am insomnia feature was Cat on a Hot Tin Roof with Paul Newman and Elizabeth Taylor. Made a boring old pencil skirt look downright savage.) I also wanted to draft them because the skirt is really the bottom half of so many full body patterns like robes and coats that I felt like I should expand my knowledge of that type of lower body garment to better draft the full body ones.

I’m thinking of posting some step by step photos of the process of sloper sewing, fitting, and then adjusting patterns with them, because examples of actually using a personal sloper aren’t all that easy to find. It’s also a good way to start on the capsule wardrobe I’ve been wanting to sew when I Marie Kondo declutter the rest of my clothes again. The transition from pregnant body to postpartum body has complicated it a bit, too, since my figure isn’t quite the same as it was before and everything is trending lower and squishier than it used to. So I’m resolving to sew for the body I have, discard anything that doesn’t fit or can’t be altered to fit, and then take in as needed in the future. Clothing that just sort of fits is such a big part of the clutter in my house it’s silly, especially for someone with sewing/fitting on the brain so much.

Lots of lingerie and other sewing and crafting stuff to share, but I’ll save it for another day. My personal life is a fog of sleep deprivation and coffee but also baby giggles and summer vacation with my big kiddo, too. Hope summer finds you well, too, Gentle Reader.


Free Downloadable Sloper Patterns and a Website for Free Resources (!!!)

woven-bodice-sloper-cup-size-variations

I’m super excited to say that I have FINALLY designed and fleshed out a website that I feel good about. And on this website, you will find the *free downloadable sloper patterns* that I have been working on for approximately a year and a half. Why so long? Let’s just say that there are a lot of opportunities for screwing up some seemingly minor thing in the process of choosing sizing, developing grade rules, drafting, applying said grade rules, and modifying for cup sizes, not realizing it for a very long time, and then having to go back and start completely over because one thing affects 37 other things! 🙂 Which is not to say that I can guarantee these are perfect, but I’ve learned so much in the process of creating them that it has been time well spent, and I hope they can be useful.

These are the starting point for my pattern line, and I’m making them available as a potential fitting aid for my future patterns for anyone that chooses to use them, but mostly as my way of trying to contribute something that I hope can be useful to the online sewing community. The online crafting/sewing crowd is so inspiring and generous with encouragement and help and tips and tricks that it’s been a huge part of making this craft what it has become for me. So thank you, friends!

I’ve put every single size in my range up on my website as separate pdf files, and there are B, C, and D cup size variations for each one. They can be used for determining sizes and fit for my (upcoming) patterns, or they can be used as a sort of two dimensional dress form for working out exactly the fit you need for any pattern, or they can be used as a base for your own pattern drafting. I have some resources like a finished measurement sheet, a body measurement worksheet printable, and a tutorial on measuring yourself and adapting the sloper to your measurements on my website here. Feel free to share them with anyone that might find them helpful!

A nested version of the pattern that includes all sizes is available on my Etsy shop here, if you’d prefer it for grading between sizes or your own drafting purposes.
WHAT IS A SLOPER?
A sloper is the basic starting point for pattern design. Also known as a fitting shell, it is a baseline with enough wearing ease to allow for movement and breathing, but no design ease and no details. (It isn’t quite the same as a moulage, which fits even tighter, like a second skin, and it isn’t the same thing as a block, which is a basic pattern for a specified style, with design ease included, that can then be elaborated with details.) Slopers don’t include seam allowances.

WHAT IS A SLOPER USED FOR?
Patterns almost never fit right out of the envelope. This isn’t a failure of the pattern. All patterns (except bespoke ones) are drafted to an average set of measurements that falls somewhere in the middle of the vast spectrum of human shapes and sizes and body types. Unless your body dimensions happen to be very close to that average set of measurements used in drafting, your pattern will need adjusting to better fit your body. A sloper or fitting shell can help you to work out and keep a physical record of those adjustments.

A sloper is like a two dimensional dress form. You can use a sloper as a basis for designing your own patterns, or you can use it as a fitting aid to adjust patterns to your body measurements and preferred fit. In adapting a sloper to your own measurements, you establish a known minimum requirement for garments to fit, and you can establish the fit adjustments that you know you need to apply to every garment, instead of figuring them out anew for each pattern. The sloper provides a baseline for fit, where the pattern uses additional design ease, design lines, and detailing to give style, structure and movement to garments.

I wanted to draft my own set of slopers as a starting point for a few reasons. First, I wanted to start from a more realistic shape than the body model commercial companies usually assume. The industry standard body model is usually hourglass shaped, though statistically, most women do not have this shape. I wanted to use as a starting point a somewhat fuller waist and hip measurement than the Big 4 for a more rectangular body type, which statistically is more common, at least in certain European population samples. In developing grade rules, I tried to incorporate statistical measures of actual bodies rather than dress form increments or standard grades for tricky areas like shoulder length. My hope is that this will yield a better, more realistic fit, but the downside is that finding the right one for you will probably require taking your measurements and may not translate directly from what you’re used to using in a pattern from one of the Big 4 companies.

I also wanted to draft my own slopers to start with a very fitted baseline, and going forward, I want to offer patterns that are very clear about the amount of ease they include. Mostly this is because one of my recurring struggles in sewing from commercial patterns, especially trying to sew a historical range from late 19th century to 30s and 50s patterns to contemporary ones, is that the amounts of ease change so much over time and between manufacturers that it’s hard to know how something will fit without making a muslin of everything. And making muslins isn’t the best use of fabric and to me is the. most. boring. thing. ever. Personally, I prefer patterns that don’t include a ton of ease, and patterns from the Big 4 almost always have too much for my liking. So in my future drafts, I expect to use ease standards closer to the lower end of the industry standard range, and I intend to be super clear about that ease so that sewers know what to expect without having to try it and see quite so much.

demeter-nursing-bralette-burgundy-lace-gothic-lingerie

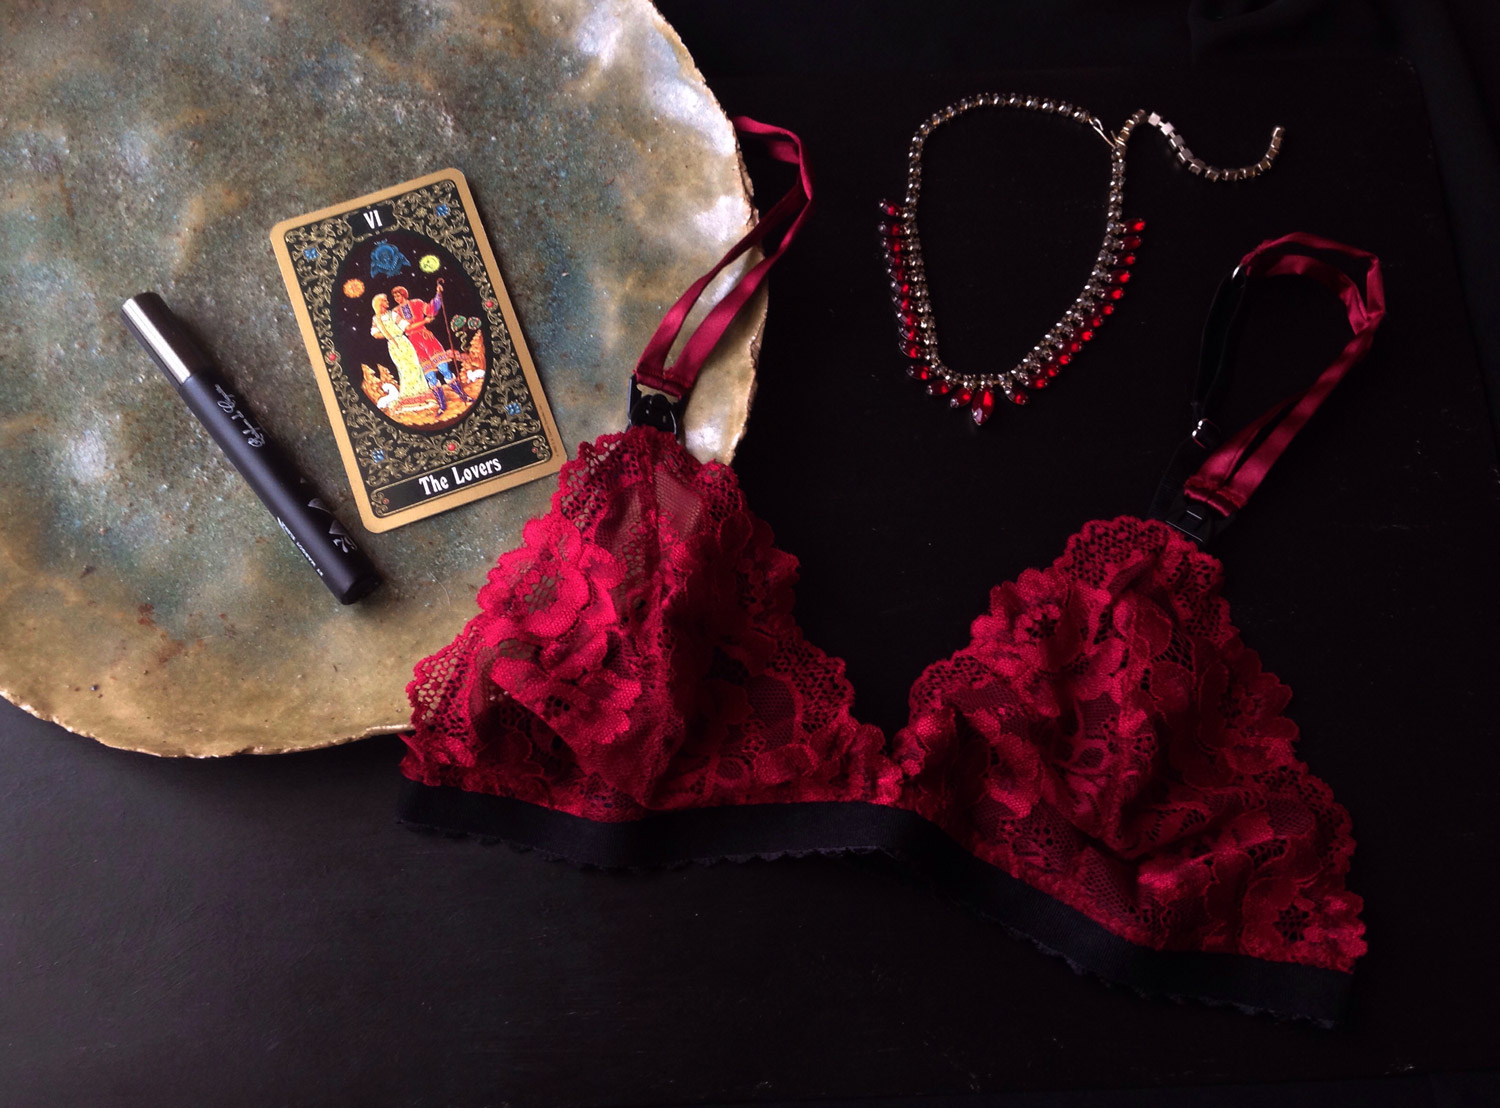
In other news, I added my first underwired and nursing bras to my etsy shop, because holy manic nesting impulses channeled into my creative pursuits instead of my godforsaken hoarder house, Batman! Pregnancy makes me feel like a crazy woman, but throwing myself into work is extremely therapeutic right now.

Coming soon to the blog: how to adapt a sloper for maternity, in which yours truly shall snarkily narrate an exploration of the changes pregnancy has wrought upon this physical form and how I deal with them in the flat pattern format. It will also serve as an extreme example of how to adapt a sloper to your body measurements. 🙂

Have you used slopers in your sewing? Have very strong opinions on the amount of ease one way or the other included in commercial patterns? I’d love to hear your experiences! 🙂

excuse me while I talk about my underwear.

I’ve been sewing a lot of lingerie lately. My life is kind of a series of small possessions–I play host to a revolving door of obsessive interests, immersing in one after another, always centered on an axis of making *something* with a nostalgic eye cast backward in history. My hoarding of pattern catalogs and sewing ephemera *may* be giving way to hoarding of lingerie materials, which in my mind, marks some kind of progress because it’s more about the action of the crafting and the enjoyment of the moment while creating the thing than it is about possession of a thing. We’ll see.

I’m trying to move more into making than owning, more about enjoyment of the process than collecting (but I still love you, bookshelf!). I find trying to sew beautiful things to be a therapeutic exertion of will over a sometimes ugly reality. Politics has me hand-wringing? Grab my lace. Worried about antartic ice sheets? Turn off a few more light bulbs and grab my lace. Focus on the lace. The Western world seems to be both far better than it has been in the last few millenia, in terms of civil rights, gay rights, the standing of women and children, literacy, information access, medicine. Yet in terms of scaled economic injustice and systems of exploitation of labor, climate change, pollution, the island of plastic in the pacific, mercury in and acidification and warming of the oceans, species extinctions, the disappearance of the middle class, the disappearance of privacy, the uncertain future of jobs in a time of automation, it is arguably worse and far more complex than I think most human brains are evolved to be able to grapple with. I don’t know any answers. But in an often ugly, screaming world, I am trying to quietly make what beauty I can. I make lace things. I make lunches. I make babies and make love and make breakfast magic out of 3oz of leftover steak, three eggs and last night’s soggy skinned baked potato. I make scribbles. I make crude jokes. I make my grandma laugh. (Since she watched Sons of Anarchy and Game of Thrones, there’s not much that phases her. <3) That’s often all I feel I have the efficacy in this world to do.

Anyway…I’ve sewn Cloth Habit’s wonderful Harriet pattern at least 10x since I bought it.

17265840_1930846020476535_754337784939937792_n

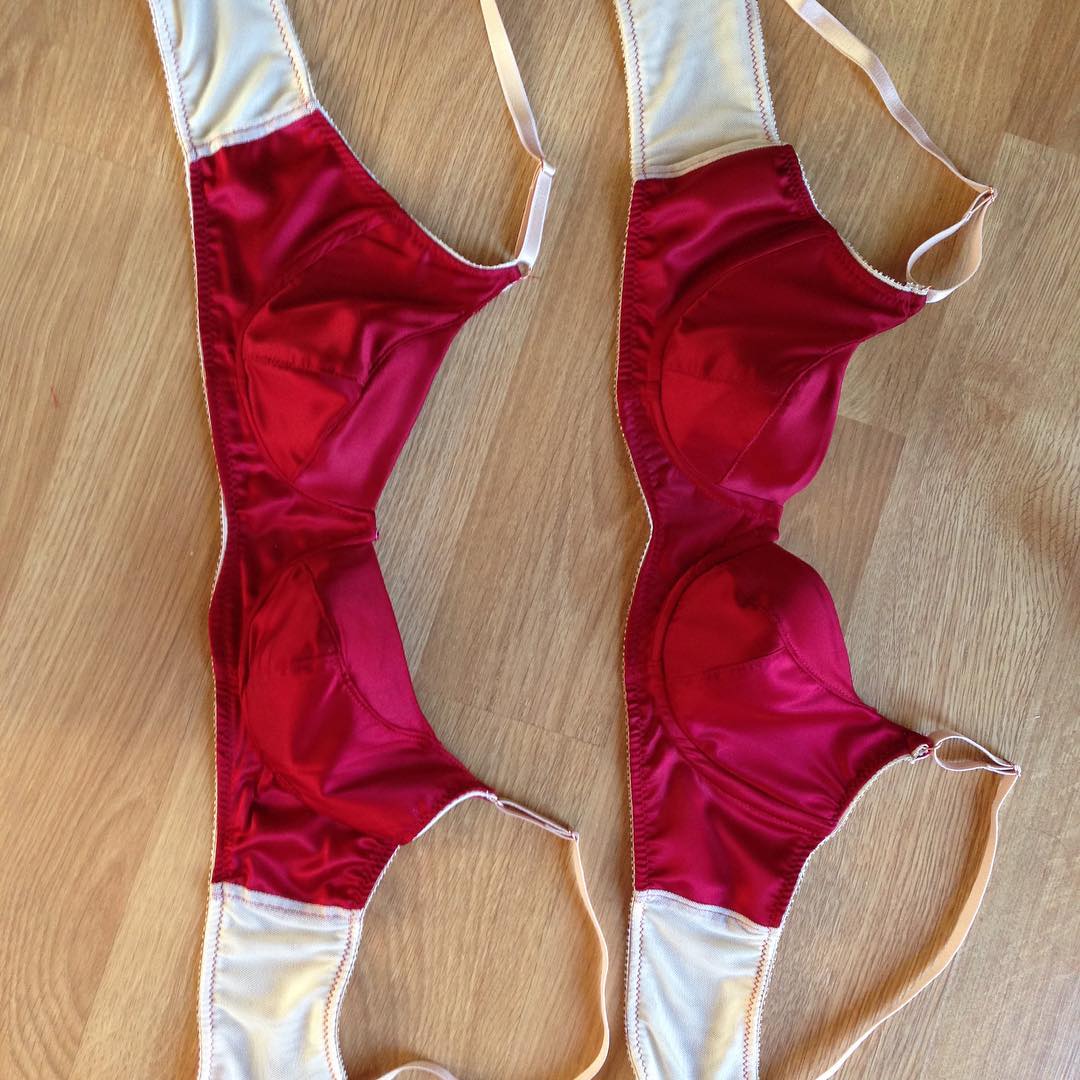
As it was, without modification, the cup placement was slightly narrow for my rather broad boob placement, as to be expected with any pattern I sew. Yet because my shape is shallow up top, the upper cup was sagging sad and empty, as most bras have for me forever. Not the fault of the pattern, just natural variation in human anatomy. (It is a peeve of mine when people complain about patterns not fitting their bodies precisely, especially when it comes to breast shape, when it would be so utterly and obviously impossible for any pattern maker to account for the bajillion types of bodies and mass distribution in existence.) So I tried tweaking the pieces by taking the C cup as a baseline / wireline / cup to cradle joining point and overlaying the B and A size pieces as guides to taper down to the projection of a B cup at the apex and the A cup at the top. Not sure if this was the most efficient way to do this. In fact, it surely wasn’t. But it gave me something that works. I’ve struggled for a few months with the relationship of the wire to the pattern and cup shape, but I think it’s starting to make more sense and really come together for me now. There are a few great blog entries on this topic on bramakingblog.com that were helpful for me.

17334125_262283604225128_413021780513390592_n

17265569_884816068327887_2521088344679514112_n

17126592_420084094998317_7506524165256511488_n

17439096_379261855792342_336682383254224896_n

After about 10 iterations, I wanted to try something else–specifically, something less pokey in the side boob. Since I need a wire for a bigger cup size than my actual projection, and I have wide boobs on a short torso, I often feel like the wires that fit me are way too long. Demi wires are a great answer to this problem, so I worked some more on a self drafted bra pattern with a different shape. I’ve been trying to up my technical game by working on enclosing all the seams in my bras (there’s a post on doing just that on the Watson pattern on the TailorMadeBlog that got me started on this). So I tried one attempt with a full band.

17662330_634252816766161_3269715218980143104_n

17587435_390372281339967_4557884865780908032_n

Then I reworked my pattern as a partial band bra for shallow demi wires and ended up with this.

17596669_1888032454812658_4997340181431320576_n

17596517_183875235456215_6889366695152975872_n

Considering some minor tweaks and fabric variations for this. Happy Sunday!

Vintage Sewing Library: W. D. F. Vincent on Shirtmaking; early 1900s shirt miscellany


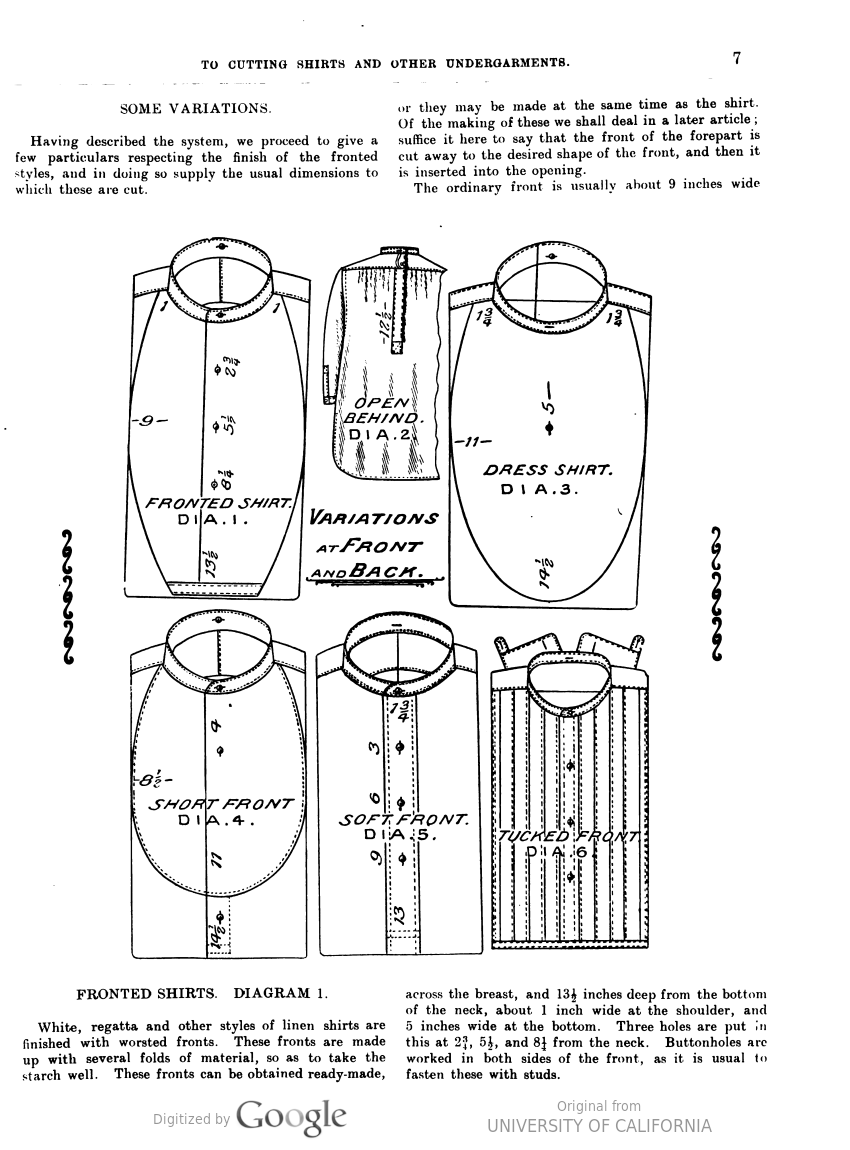
I’m having a mini-obsession at the moment, trying to learn to make a proper shirt. The boyfriend is in dire need of some new ones, so, armed with a Craftsy course by David Page Coffin on shirtmaking details, this book from late 1890s-early 1900s? by the W. D. F. Vincent, prolific editor of Tailor and Cutter, and a heavy dose of Boardwalk Empire = weekend filled!

Parenthetically, I should say that really, really love the David Page Coffin Craftsy courses. He has an interesting way of approaching his areas of interest, which I find relatable with my usual pattern of get obsessively interested + read a bajillion things tangentially related to subject –> try to synthesize firehose of information in way that makes sense and breaks subject down into components. Of course, I think my process is complicated by attention deficit/distractability issues (which is why I sewed a pair of pants and a cut-on Mandarin collar kimono experiment blouse a whim this week, instead of, oh, say, a SHIRT). But I really enjoy his way of breaking down the problem of shirt or trouser making into a core pattern and interchangeable detail elements, rather than being another dressmaking sew along this is how you do it from start to finish kind of course. This course doesn’t really cover how to construct or draft the bare bones shirt pattern itself, but that’s where the W. D. F. Vincent comes in.

sacshirt


yoke-back-fronted-forepartfronted-part-variationsdirectmeasureshirts-from-lounge

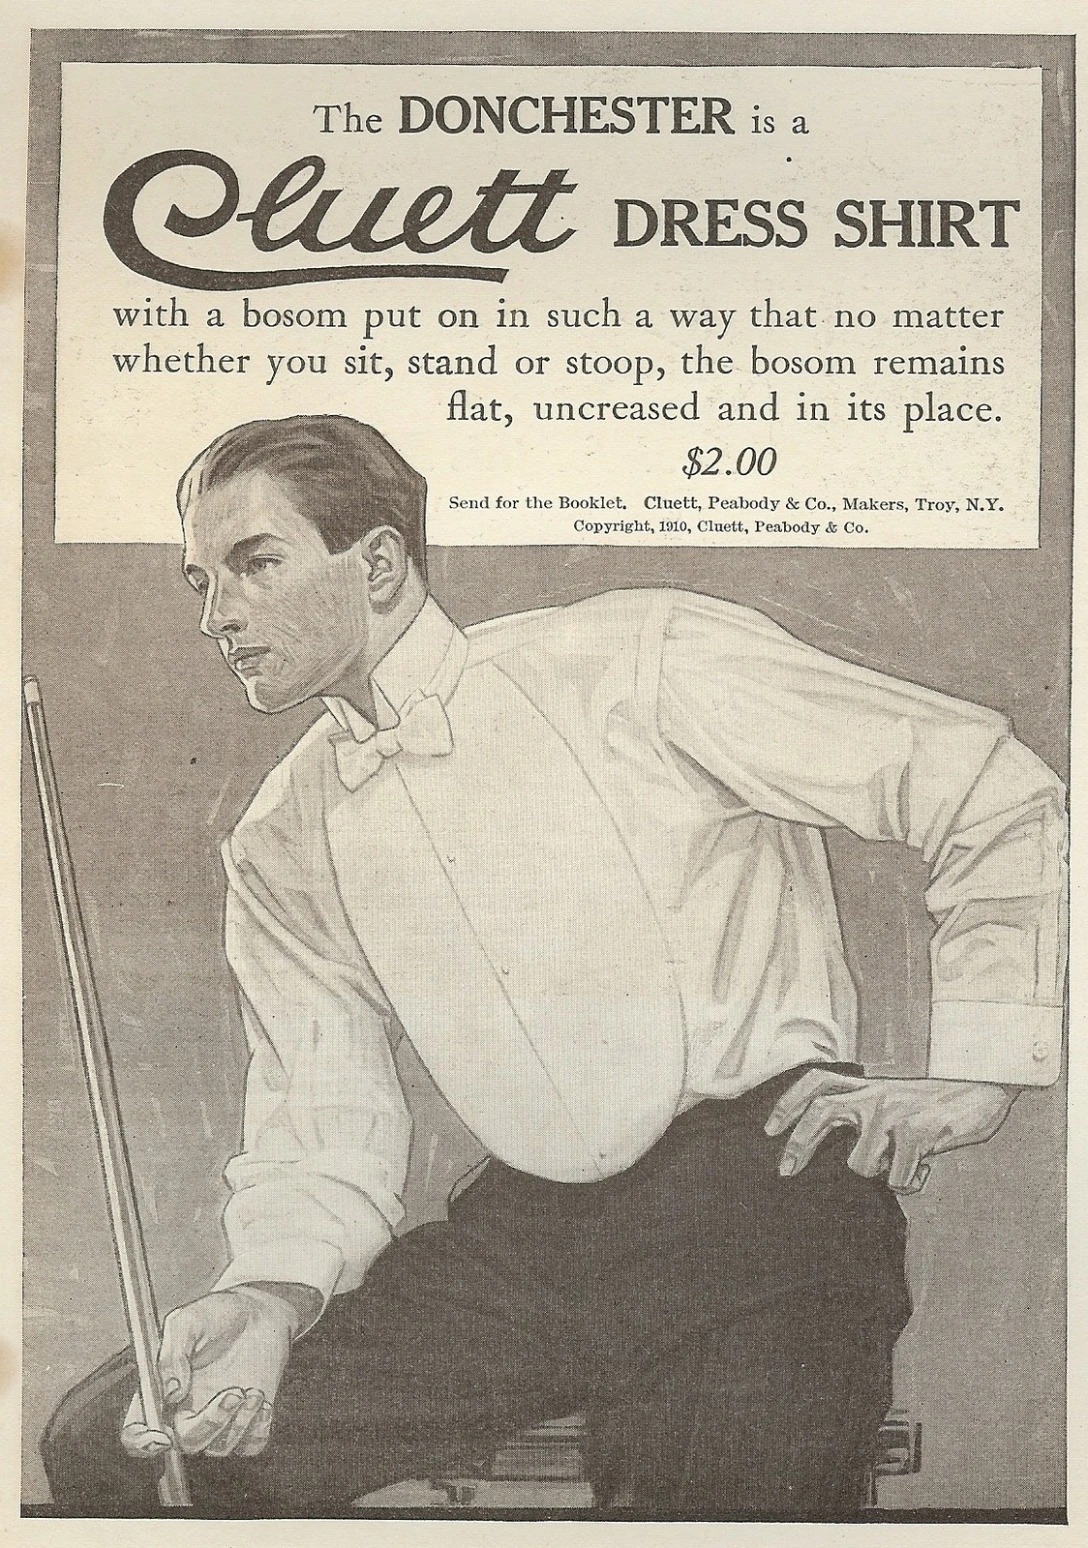
Detachable collars are familiar enough to me from Peaky Blinders and the mini-obsession with them I had while binge-watching that show, but I wasn’t fully aware that the shirt fronts (or “detachable shirt bosoms”) were also detachable. Apparently these were made in detachable and even disposable form:

1912-fiberloid_shirt_dickey

Apparently they were made in cardboard, paper and other materials for kinds of work like waiting tables, where it was easier to just trash the false front rather than launder one.

Then I vaguely remembered seeing the Bugs Bunny opera skit and suddenly the world became comprehensible:

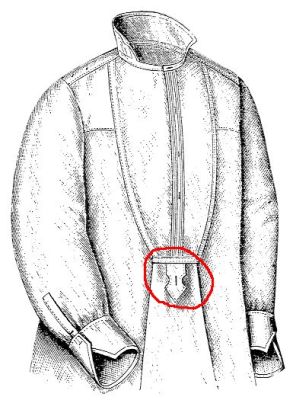
When the singer’s layers start to unfurl, you see his detachable collar come off, his shirt front roll up, his suspenders holding everything in place. Apparently these detachable shirt fronts were typically held in place with buttons to the trouser front. Thank you, google patents! Also, fun fact, apparently they didn’t incorporate this into the elaborate, very accurate costuming for Downton Abbey and you can sometimes see these formal fronts bunching up on the actors where they would not have if buttoned properly. (citing my source) Apparently shirts of the era would have had a button there, where loops like this could fasten:

trouser-button-detachable-front


Patents reveal a variety of fronts and fastening configurations (I have a patent fetish, not gonna lie):


And the cherry on top–did I mention detachable collars in the Vincent book? Because this is sewing porn right here.

collars-and-cuffs


I think that’s about all the overcaffeinated tangents I’ve got. Happy weekend!

Current Sewing Projects: Knit Blouses and Victorian Blazers, Oh My

I want so many things on my sewing table. Impossible things. Impractical things.

Camiknickers.

7221aefa7f049f40805764e9dbd870fb

Black tulle tutus and sunglasses and spring cool.

0448ce27b55c43f963b4e14f899e8715

To draft the perfect catsuit.

f0d5f98e2b3bf9a88801dde901a8621e

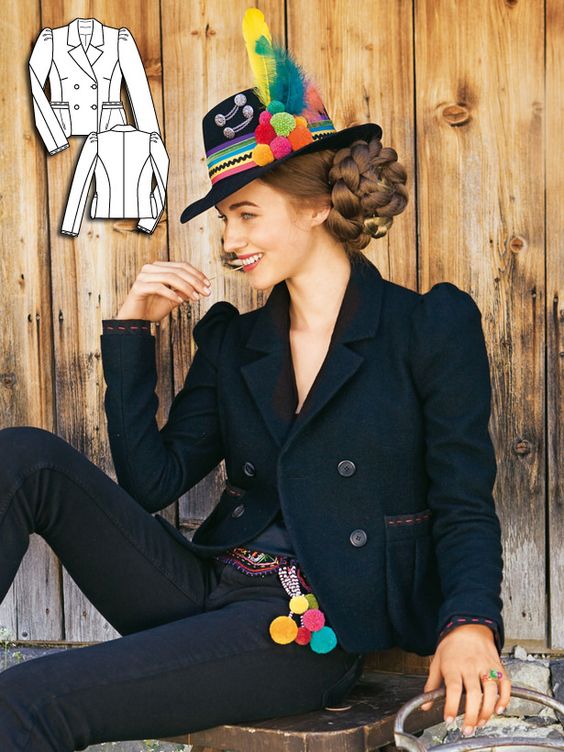
But more than anything this week, I have been working on a Victorian style blazer. Something like this, but sleeker, more vampirey. This is a Burda jacket from the Hills are Alive or something about the sound of music, but my brain is taking it to a dark nuclear post-apocalyptic place. I loathe the running stitches and the pockets and the boxy fit, and I don’t like the position of the front bust darts either. So like this but not really like this at all except the high shoulder and the high-ish back neckline. *shrug* I also have been irritated in the past by the lack of seam allowance on Burda patterns, so I definitely won’t be buying this one. Just eyecandy. Also: do you think that’s really her hair, or is that a weave? It’s a serious hunk of hair there.

c392960c746cad8d6af1cb533ed0bace

My partner hates poofey shoulders. So of course those have to happen. Because like Lady Gaga, I’m a free b***h, baby, and I LIKE a little old timey high sleeve cap if it doesn’t poof vertically. I’m thinking a single button closure in the front, a shawl collar, with a high back neck. I’ll probably give it a go in denim waste fabric for now, saving my red herringbone suiting for when I get the fit right.

I’ve actually had a good sewing week–I tried using  a vest pattern to draft a bodice for a jacket, and used my 1880s sleeve from the recent tailored jacket attempt. The fit is nearly perfect, except for the shoulders. When I move my arms forward, it pulls on the front of my shoulder and on the back, along the edge of the scye near my scapula. All my reading of historical tailoring stuff has me wanting to try a new approach on my next attempt. They talk about getting armholes TIGHT, which seems to be sort of the opposite of the slash and spread suggestions I’m used to seeing and trying and failing miserably with. The idea, as I understand, is that the better the fit of the bodice, even–and maybe especially–in the armscye area, the more independent the sleeve movement will be from the more stationary bodice. Instead of lowering the armhole or adding more back ease and sacrificing the hard earned fit, I’m going to try adding more fabric to the bodice armhole, but not only in my usual vertical direction–I’m going to shift the side seam outward and slightly up. With my back being broad and somewhat rounded at the shoulder/scapula line, as well as slightly hunched forward, my back is taking up fabric from the sleeve and my shoulders/back extend in this weird diagonal way compared to the standard form. What I want to do is cover my entire back with the bodice, so that the ease in the sleeve isn’t used up by my back mass. If that makes sense. We’ll see!

I took my jacket attempt #1 and chalk lined it all up trying to figure out where to add. I even bought some hook and eye tape, since I haven’t gotten over my buttonhole aversion just yet. So drafting and cutting attempt 2 is my project for tonight!

Another thing to consider is sleeve pitch. Sleeve pitch, as I understand very roughly, is the sort of rotation of the sleeve in the scye. Most of the time the center top of the sleeve is aligned with the shoulder seam in the usual high position on top of the shoulder. But with stooped posture or forward shoulders or very erect postures, tailors *seem* from my reading to rotate the sleeve slightly within the scye to accomodate. This keeps the grainline in the right position relative to the arm. So with my shoulder being rotated forward maybe 10-15 degrees from standard (this would be set “high” in the tailoring parlance, I think), I might try rotating my sleeve forward to keep the hang correct. What I’m curious about in this case, though, is whether it matters at all that this might throw off the match up of underarm sleeves and side seams. Would one need to shift the underarm seam? In my case with the 1880s style two piece sleeve it doesn’t matter at all, though.

I’ve been branching out and sewing with knit fabrics quite a bit too. I resisted it for ages, seeing it as something like playing an electric guitar to sound good because your technique isn’t good enough to play acoustic. But the perfectionist in me loves the lack of fraying seam edges and the lazy instant gratification craver in me who has been sewing for three years with precious little wardrobe action to show for it ADORES the fact that I can sew up something quickly that forgives minor fitting issues. So far in the last two weeks I’ve made: two great fitting, exceedingly comfortable pairs of thongs (which I intend to make a pattern of to send out into the world soon!), a princess seamed scarf collared 1930s style blouse and another more Edwardian-ish high necked, poofy gathered sleeve blouse in a sleek, pretty ITY knit! Not gonna lie, I’m pretty stoked. That’s like a year’s worth of finished objects for me, and ALL self drafted. Someday, when I find a tripod, I’ll have to post pictures. It’s an incredible feeling to find that my spread-so-thin sewing attentions come together sometimes and actually produce something.

Also, the weather is BEAUTIFUL here. I love it.


Happy weekend!


The Dreaded Monobutt vs the 70s, or, Amanda tries to draft a pair of pants that flatter her butt

Today I am on a mission. I lost my sailor pants pattern (oh, the downsides of being a hoarder) which I had perfectly tweaked via trial and error to avoid the camel toe problem. I like tight-ish pants, but cannot, cannot, cannot stand when they appear to bifurcate my front crotch. Do. Not. Want. It occurred to me while fangirling over David Bowie and how he always manages to have this epic boldy-move-through-the-world-with-his-crotch posture in his rock star jeans (see exhibit A below) that men’s jeans must not have this issue, since they have to deal with a bunch o’ stuff in the front.

I’m sorry, Bowie, but the line between objectification and inspiration is a very thin one.

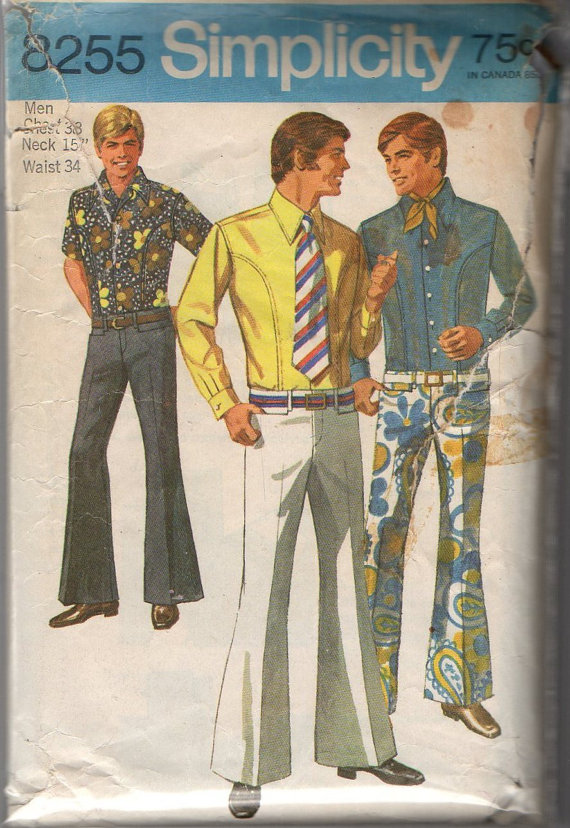
I *also* very much dislike the contemporary cut of jeans that Kathleen Fasanella terms the “monobutt” and discusses at length on her blog at fashion-incubator.com. So much food for thought there. I’ve been studying pattern envelopes from the disco era, ’cause god knows if you were gonna gyrate at the disco with all the fervor cocaine could induce, you could not have your crotch and butt being all bound up by the cut of our your super tight super fine pants. Exhibit B: This fantastic 70s pattern, which incidentally features princess lines on a men’s shirt!!

simplicity8255 mens jeans shirt front

nomonobutt70s

This is available on etsy (here) at the moment. What I find fascinating is the cut of the back piece vs the cut of the front piece. For most pairs of women’s pants I’ve sewn from patterns, the curve is pretty equally divided between front and back pieces. This keeps most of the curve on the back piece, which makes sense, because the front needs to be flatter to accomodate the goods. So if you’re a woman who doesn’t want the camel toe look, my thinking is that you could learn a lot from the line here.

What also interests me is the slight pitch of the back piece. That is not a typical up and down straight pants piece. There is curvature to round the glorious muscles of the gluteus maximus. That pattern piece does not squish it into one indiscriminate jammed up mass (that my butt has actually ripped apart at the seams) but rather allows enough fabric to encase it.

If emulating these curves doesn’t work for me, I’m turning to Elvis costumes next. Have you EVER seen an Elvis jumpsuit that gave him a monobutt? NO. Also potential study fodder–karate pants. I did karate as a teen and those drawstring uber-comfortable pants saved me during my pregnancy. I wore them almost daily. They are designed for movement, with a large gusset in the crotch, and aren’t exactly the look I’m going for at present but I could learn a lot from their construction in my quest to design a pair of superpants. Said quest got a little boost from this cover illustration from Modes et Travaux, which should be arriving in my mailbox any day now. Yay hoarding! Yay Maggy Rouff!
modesettravauxpants

Vintage Sewing Library: Modern Pattern Drafting by Harriet Pepin

I adore old sewing books. These tend to have much more information than contemporary books, which may be due to sewing being a serious occupation for many more women during the first half of the 20th century than it is now in our era of cheap ready made clothing. *suppressing rant on exploitation built into system of production of cheap ready made clothing and why the first world nations have this luxury as hard as I possibly can* I’m going to work on adding many links to the vintage books I have found online, but for now, just one gem:

modernpatterndesign

Harriet Pepin. Modern Pattern Design. Available from Michou Loves Vintage, a gorgeous site in German. The download page is (here); Modern Pattern Design is under the expandable menu for “Schnittkonstruktion.”

Another source is (here), and yet another source is web based, through the Wayback Machine’s archived version of vintagesewing.info, a site (now unavailable) that was a rich resource of vintage sewing books. It is (here) and photos to follow are sourced from there.

It’s available for over $100 on etsy (here) if you’re into collectibles!

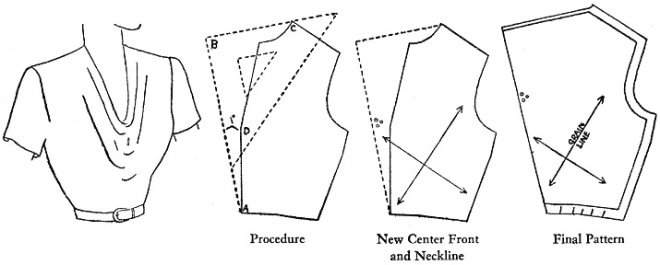
This book goes into incredible detail on constructing patterns from a basic sloper. To give you an idea of how well it shows pattern manipulations, here are several examples of how to modify a pattern to create various types of cowl necklines. I just did this on a jersey kimono top and it took me about an hour using a Threads Magazine tutorial. It was an involved, frustrating process. Next time, I will try one of these:

cowl1cowl2

cowl6 cowl5 cowl4 cowl3

And just one more gushing fangirl inclusion. I have been messing around trying to figure out bra making for my unique figure (broad rib cage, small bust, forward shoulder, etc) since bras have ALWAYS been a problem for me. Without the context of the bodice pattern around it, the bra cups and band are a bit puzzling and easy to screw up. Enter this sense-making illustration:

bratopBless you, Harriet Pepin. Bless you.