Weekend Project: Treadle Tune Up!

I have crafter ADD.

I am still working on the perfectly fitted yet moveable bodice/sleeve–I’m on attempt #6 in the last three weeks, I believe, and have used up all of my muslin hoard in various attempts, but will be launching into the next iteration tomorrow. I let myself do one attempt every 2-3 days lest the frustration reach throw-a-sewing-machine point. I think I’ve almost got it, though 🙂

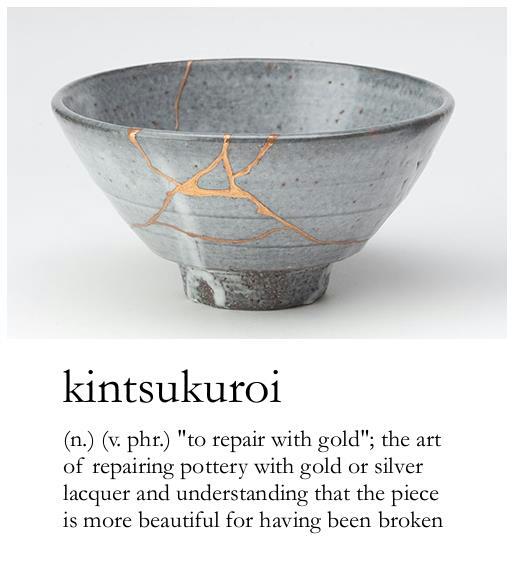
As a respite from said frustration, and because I always visit my grandparents on the weekend, and because my grandparents aid and abet my showing machine addiction by sending me sewing machine porn pictures during their flea market outings AND allowing me to stash my overflow in their basement, I decided to finish rebelting my Singer treadle! Months ago, my grandpa and I went on an hours-long drive to pick up this Craigslist find in a very cantankerous ex-hippy older man’s basement. He became much friendlier when I made it obvious I was not out to haggle and did not want to dismantle the machine and sell it as a foo-foo shabby chic table. Nothing against shabby chic, but seeing whitewashed cast iron hurts my little bitter heart. Apparently his too. He said he had bought it decades ago and an ex girlfriend used to sew on it during the 70s, but he had never gotten around to refinishing it as he’d hoped. It was dusty and had some staining and damage to the wood surface, and the machine is varnished and the decals have some serious wear. But that’s part of its appeal. There’s an aesthetic ideal called wabi sabi in Japan that I think of with old machines and antiques–beauty in imperfection, beauty in the natural cycle of decay with time, wear from use. I’ll spare you that rant, mostly, but it’s a fascinating subject. For example:

tumblr_mkfx5d5hp91ry2m62o1_540

So anyway, my treadle. It needed a belt, and a TON of oil, and some serious scrubbing and loosening of varnished parts. Replacing a treadle belt isn’t hard, exactly–you just buy a precut length of leather belting, or measure it with a string over its path through all the turns of the flywheel and balance wheel, and then you trim it to the point that it’s got enough tension against the wheels to turn the machine, but not too tight. According to the interwebz, a slightly loose belt works better, and some people even recommend violin bow rosin to help with the grip. (This and much more wisdom on treadle tips and tricks here.) It took some fiddling to get the length just right, and my grandpa used a very small drill bit to drill a hole on either end of the belt. The edges need to be trimmed so that the two ends of the belt butt up to one another, and then you crimp the staple that usually comes with the belting shut securely by squishing it just right with a pair of pliers. Grandpa has mad skills in this department. Tricky but nothing compared to the storm of swear words that I unleash on a vintage Husqvarna. I love the simplicity of these old machines so much. There is a very Zen pleasure that comes from playing around with them–and in the treadling action itself. It takes some getting used to, since the wheel will move in either direction when you initially start to pedal and it will break your thread if it moves away from you (for a Singer treadle–White and some other models move the opposite direction, though). But using a slight turn of the handwheel with my right hand to convince it to move the right direction really helps. So does using my hand to bring the wheel to a complete stop. I’m sure it gets easier with time and practice.

ad482788-770d-4fe6-8e1a-6d042b83e3f4

All cleaned up, cast iron cleaned with a rag and sewing machine oil, etc.

76ecbd99-d0d3-464c-aaa9-8db6eb328f84 (1)

Sphinx decals. So cool! Evidently the discovery of King Tut’s tomb led to Egyptomania in fashion during the 20s.

ac604c70-1548-4a0d-b45d-244b23c237ee

My grandpa shared a big chunk of the mancave for my machinery. I think he enjoys it, too.  The treadle to the right is table only, and was a gift from some friends who wanted it to go to a nice new obsessive’s home. It was missing the front drawer and the wooden pitman rod connecting the flywheel on the base to the treadle pedal part had been broken. So after months of scouring online, I found replacements for both. Evidently the pitman rods were made in metal as well as wood–I wish there were a contemporary source for these, although I suspect someone with woodworking skills would have no problem making a new wooden one. Alas, I do not.  My grandpa repainted the legs as he remembers them from his childhood. He did a wonderful job on them!

abb54768-8a04-468c-b618-896ae99a0611

The woman who it originally belonged to apparently loved that distinctive 70s green that the drawers are painted in. I don’t, and I hope to use some Citristrip one day to remove it. My partner jokes that one day I’m going to get us haunted by messing with the wrong antique. Let’s hope it’s not by refurbishing this one.

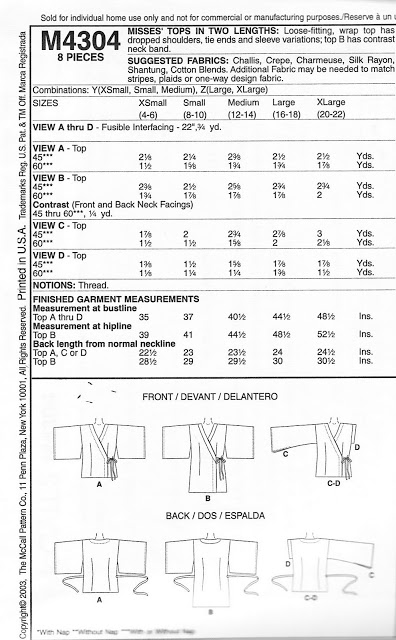
And also…I’ve been working on the pattern for this!

1887-young-ladys-tailor-jacket

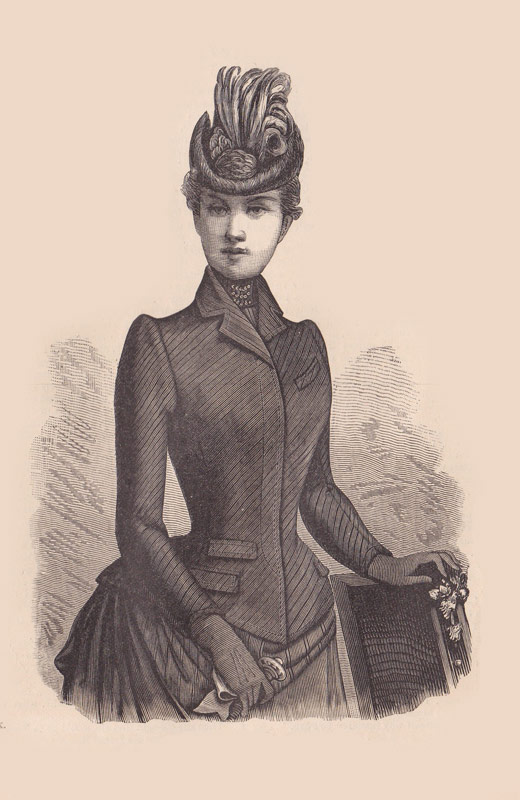
It’s from a fashion magazine during the 1880s that came with a huge pattern insert. The pattern pieces are all printed on top of one another, so I have my work cut out for me. It’s quite a tangle. But–once I get my sloper perfected; fingers crossed for try #6–I’m looking forward to attempting it!

Anyone else have any treadle experiences? I’d love to hear about them!

Current Projects: Sewing Dickeys and Tinkering on the Necchi Esperia

So far I’ve sewn up one dickey that I really like. It needs buttons and buttonholes and some pressing, but here’s the work in progress:

photo 1It’s draped on the newly re-stuffed and covered-in-pinnable-jersey dressform my grandma and I made out of duct tape. Not perfect, but a good start. I wanted a high, cut on funnel-neck style collar so that I can press the edges down for that tuxedo look. Like this:

photo 2I love, love, love the color. I was surprised that it wasn’t pure hell to sew, either–it’s a cheap-ish stretch satin and the only ones I’ve worked with seemed to fray quite a bit, but this is holding up pretty well in the time between cutting and edge finishing.

photo 3Next time I sew this I’ll use lighter interfacing, because with a facing and the interfacing, it ends up a bit wonky around the neck when it’s worn beneath something. Behind it is the machine I’ve been using–it’s a Necchi Esperia from 1957 or so. I love the minimal design and the pastel. It was a Goodwill purchase–the motor was shooting sparks, so I got it for a song. I’ve seen that before, actually; if you’re lucky, it’s one of two simple things: carbon brushes that need replaced, or just dirt. these old machines are just a bit dusty in the motor and if you disengage the handwheel and run it at high speed for a few minutes and maybe add a bit of lubricant to the designated holes in the motor, it fixes it right up and runs much better. That was the case here, but it still isn’t quite right. I’m not sure if the timing is a bit off, but even after about 20 solid hours of sewing it still isn’t quite as smooth as it should be for a Necchi. (I haven’t learned how to work on timing yet, but I will soon thanks to the Ray White sewing machine repair class! :D)

photo 4There’s something I love about the simplicity of a straight stitch sewing machine. So much less to go haywire in the mechanics. And it seems like working with wovens about 90% of the stitching I have to do is a plain old straight stitch. This one is extremely crotchity about backstitching, though, and I haven’t ever noticed the same thing in another straight stitch only machine–if I switch to a reverse stitch from any position other than the lowest needle position, it’s pretty much guaranteed that my bottom thread is going to bind up and turn into a thread nest I have to pull out. It may be that all sewing machines do this and I’ve just been oblivious about the reason for the bind ups, but I don’t think so. Maybe a timing thing? We’ll see.

In my usual trying-to-do-five-million-things-at-once way, I’ve been at work on a black taffeta blazer, binding with chiffon seam binding as I go (my usual raggedy overcast inner seams are a pet peeve at the moment), doing the Burda University digital pattern drafting course, AND living out some of my early childhood library career fantasies by digitizing some of my old sewing books. So many things I want to do and make and try and read and, alas, so little time. #digitalageproblems

Sewing Project: Refashioning Old Clothes + Dickeys in 30s Style

So many projects, so little time. Among a bajillion other things, I’m currently working on a wardrobe refashion project. I’ve been really, really into wartime sewing pamphlets and cotton bag sewing materials that give tips on how to reuse fabric and refashion clothes that you already have into something new. During WW2 especially war rationing resulted in some ingenuity in reusing old materials.  It has me digging through my old bags of clothes I’ve been meaning to discard with a new pair of eyes! So many things that I don’t like because they don’t quite fit can be deassembled and used in ways I had never though of before. Some of my many sewing failure projects can be reused too.

There are lots of ways to do this–patterns with yokes, with top pieces and bottom pieces that join, special sleeves, kimono type sleeves, etc.makedomend image by BeautyArmy

And my current personal favorite–the bodice with a deep neckline + a dickey beneath. What is a dickey, you ask? It’s a common vintage clothing article worn beneath shirts and suitjackets to add variety, or to dress lightly underneath an outer layer. It’s a kind of partial blouse without sides or sleeves that sometimes has ties at the sides to hold it in position. Here are some pattern examples:

dickeys1

Advance 3247

dickeys2I love it for the potential variety this could add to a wardrobe. One shirt + an infinitely variable number of necklines. It also gives me a low risk way to indulge in and wear some of the nicer fabrics from my stash. Here’s what I’m planning on playing with over the next few days:

DSC_5291Two kinds of gorgeous red chiffon, some dot lace and some stretch satin. Normally I would be too afraid of wasting them, but since a dickey requires so little fabric and is cursed with far fewer fitting issues than a full blouse, results are likely to be pretty good.

I have two pieces of clothing to rework–both are velvet, semi fitted, and not at all my current style. One is an old button up basic blouse with no darts or embellishments. The other is a burgundy pair of pants which are a bit too clingy for me, and which I wore so much in my teen years when grunge was the thing and we all walked on our pants legs that the bottom 4″ of the pants leg is not pretty. The shirt will be remade as a deep v-neck (cutting out a new neckline, binding the raw edge with wide bias strips of a similar color broadcloth) long sleeved blouse, but the pants I will be completely disassembling and trying to remake as a more bustier-like fitted blouse or Edwardian style corset cover shaped blouse. The end goal is to be able to wear them with dickeys sort of  like this contemporary interpretion of 30s fashion:

30sfashiontoday

Obsessions: Sewing for Victory + Wardrobe Revamp

I’m an incredibly obsessive person. There are big obsessive interest cycles (ex: sewing, fashion theory) and then there are minor little hot burning obsession cycles. Currently I’m in the grips of two minor obsessions: figuring out and collecting the full series of the Woman’s Institute of Domestic Arts and Sciences books and pamphlets, and WW2 sewing trends related to rationing, mending and “remodeling” old clothing.

4.2.7

Is it really best fix his pants while they are on his body? Ummm, is he bent over a lawnmower? And what madness would drive someone to mow the yard in those shoes?? That poor woman is going to have to work at them for days to get the grass staining out after having to patch a man’s ass in full view of the neighbors. Nice.

It was such a different time and different mindset, both for good (yay community, yay sense of shared purpose) and bad reasons (stricter us/them dichotomies about different ethnicities, orientations, social status and horrible ways those were expressed). I’m fascinated by the way that “tightening our belts” and conserving was seen as patriotism during this era, but these days our priorities and propaganda seem more concerned with keeping those economic gears moving. We seem a much faster, more self centered, more acquisitive bunch and although I hesitate to oversimplify and judge one as inherently better than the other, I think that there’s a lot to be learned from the attitudes of the era. (And calling my pathetic rabbit ravaged failed psuedo-garden a Victory Garden is just the sort of irony of our time.)

Which is all a long winded way of saying my dumbass just hoarded an original Make Do and Mend pamphlet and is now hell bent on reworking my old wardrobe. I’ve been wanting to clean it out and reconsider my style in general. But reworking old clothing seems like killing two birds with one stone: wardrobe clean out + working on my craptastic sewing abilities. The fabric I love cut in a style I hate? Let’s not just dump it on Goodwill (especially with the questionable labor practices of theirs coming to light these days), let’s deconstruct that bitch and applique some Alexander McQueen style birdies on something. And if I fail, it’s not like I have to feel guilty for wasting the fabric.

Pattern Drafting: Basic Blouse for Forward Shoulder/Broad Back Fit

Over the last weekend, I decided to knuckle down and try drafting a pattern for a shirt from my own measurements. As I’d ranted previously, despite sewing something in the ballpark of 20 shirts over the last year from various patterns and with various modifications, nothing would end up fitting correctly without looking like a feed sack. So I consulted the Esther Pivnick Fundamentals of Patterndrafting book (freely available for download here) and proceeded to measure myself and fire down some synaptic pathways that have not been used since high school geometry. It was, essentially, a Klingon ritual of pain.


If I ever do it again I will a) draw actual lines on my body with a cheap eyeliner pencil so that there is no risk of measuring from different places and b) compile a worksheet to fill in measurements and label points for easier translation when actually drafting them. Hopefully no one catches me doing this because it might look a little too “it puts the lotion in the basket” for non sewers to understand. My measurements must have been a bit off, because the garment I ended up with was bigger than needed and didn’t really fit my midsection. The dart I ended up with in the front is, well, huge, which seems incorrect because my bust/waist/hip measurements are all within a few inches of 36, so there is almost no need for dart control to take in difference. BUT IT DID FIT MY SHOULDERS, which means IDGAF about having to redraft the waist.. I’m almost finished with the third test garment, which is a totally wearable buttondown blouse that allows for super fantastic happy funtime full motion of my arms. I can drive in it, I can raise my arms in it, I can EXERCISE in it (highly unlikely, but possible). Photos to come!

So here is what I learned about fitting a broad back and forward/curved shoulders:

-Adjust the angle of the shoulder seam on the front and the back bodice pieces. It’s easiest to lay them out so that they are butting up against each other at the shoulder seam. Adjust at the actual sewing line, not the seam allowance line, and add seam allowance back to your pattern pieces afterward. Consider the point where the shoulder seam meets the neck an anchor point. This does not change. The armhole also doesn’t change position. But the point at the end of the shoulder seam should be moved forward, usually just a small amount–for me about 1cm was perfect. Then redraw the shoulder seam line from the center anchor point to the end point on both the front and the back pattern piece. You’re essentially adding fabric to the back piece and subtracting it from the front. For me this makes the garment hang much better. But again, don’t move the armhole itself. Some things I’ve read have recommended shifting the curve of the sleeve pattern piece so that the sleeve cap ease is situated with the most fullness exactly over the ball of the shoulder, but I’ve found this adjustment to be unnecessary.

-Don’t mistakenly think broadening the shoulder seam and/or enlarging the armscye will add more freedom of movement. Been there, failed that. What you really need is to isolate the shoulder, which, almost counterintuitively, means the bodice comes high into the crook of the arm (think of what a gusset would cover). It also means the end of the shoulder seam should be behind the shoulder point, not quite on top of it. For me finding my shoulder point, subtracting about 3/4″, and angling the whole armhole back to meet this point made an enormous difference. It places the ball of the shoulder in a position to actually utilize the space in the sleeve cap to move.

-For the broad back/big shoulderblade area, I have in the past tried adding extra fabric at the lower third of the back and front armscye. Sometimes this works, sometimes it doesn’t. Sometimes it works but looks a little more 1950s dolman sleeve than I would like. But this time, I adjusted the bodice. In the Pivnick instructions she points out that the point at the tip of the side bodice, where the bodice side seam meets the sleeve seam, can be extended out horizontally up to 1″ to allow for greater movement (with no necessary change to the sleeve pattern, as I understand it). I did this and blended it into the previous line of the side seam and it seems to have worked very well.

And now that I have a basic pattern that fits, with a bit more refining, I should have a basic block to use for experimentation and I may, just *maybe*, be coming out of my shirtmaking rut.

Christmas Sewing: Kimonos and Spock Shirts and Raglan Blouses, Oh My

I have three days, a 20 yard bolt of black stretchy chiffon, three shades of teal/navy blue jersey and black jersey, and a dream. I somehow think that I’m going to be able to finish four kimono tops and one raglan Spock style tee–and work a normal schedule!–over the next three days.

It isn’t going to happen. Thank you, Sephora, for backup girlie gifts.

But it will be fun to try.

I drafted my own pattern for the Spock shirt. My sister is a big fan, and she’s of the Zachary Quinto Spock era, so this is my guide:

trek-movie-spockLooks like a raglan tee with an almost sports-jersey texture, some kind of satin stitching or shinier bias tape at the seams which I’m pretending does not exist for my sewing purposes, and a black high collar that extends above the v-neckline. I tried sewing my son a version of this for practice, but he refuses to wear it. And I didn’t even get a chance to draw the eyebrows on him first.

And then there’s the kimono top I settled on (instead of a caftan, which may be a bit too far into hippie land for the mass appeal I’m going for). McCall’s 4304 “2 Hour Top,” which I have sewn before and which took me significantly longer than 2 hours, but in the almost-year that has passed since my first attempt, let’s hope I’ve gained some speed. I want to modify it slightly, as the drawstring is a bit too high to flatter the apple body shapes with no discernible waistline that run in my family. I also might shorten and bell the sleeves slightly, and add a bit of length in a slight A-line to make the shape a bit more flattering.

mmcalls4304backmccalls4304front

My plan of attack is vaguely industrial-sewing inspired (more on this in the future, as I find it fascinating in a best-practices efficiency kind of way):

  • cut all my pieces at once with a rotary cutter for precision
  • wind many bobbins ahead of time
  • sew the garments assembly line style. Do seam one on all four at the same time, seam two on all four, etc, to avoid confusion and having to figure out how to do each step all over again for each individual garment
  • French seams for side seams to avoid having to finish edges later and for neatness, especially on this fabric

I’m sewing it on my Kenmore 158.12111, which I am more and more happy with the more I use it. It has a dual belt system, which makes it slower than some, but incredibly precise. I can stop pushing the pedal and the needle stops within a stitch and it becomes really easy to time it perfectly after a little practice. It’s a little loud and little shaky, but I think that’s in part because it needs more use after sitting for years and in part due to the smaller base of a freearm giving it less balance. I’m very impressed by its strength and the regularity of its stitches–so far, it hasn’t given me any trouble at all. This is supposed to be part of the appeal of the Husqvarna models with the reduction gear, but the Kenmore has the advantage of being made of metal, being designed with room and smart access panels to get in there and oil and repair, and of using common bobbins and bobbin cases. To be fair, I haven’t really had the chance to enjoy a fully functional Husqvarna, but if the reduction gear is the key advantage, I’ll take a Kenmore any day for the sturdiness and simplicity.

Needless to say my collection of Husqvarnas is still nonfunctional. (I have four: the 19e I replaced a solid 19 3/4″ belt with a 20″ lug belt after days of struggle to attain much less than satisfactory results; a 1030 that is frozen completely solid and became a candidate for a very enjoyable Bacchanalian dissection and which I used as a source for a donor belt which was a big fail; a 6000 series with a broken camstack and a broken reduction gear which I’m going to try to replace with the gear from the 1030; and a 51e flatbed which appears to be in great shape except it has no cord and the plug is a weird type that I can’t find a replacement for. *shakes fist*)

AND I almost forgot! I finished my raglan blouse in a woven to my satisfaction and shall be sporting it in all its pastel pink glory for the festivities. I’ll have to post a picture when I’m not so dark-circle-tired-eyed and Sunday grosstastic.

Sewing Projects: The Caftan Experiment.

I bought a few yards of black chiffon recently, and wanted to try something relatively simple and low stakes to get a feel for sewing with it. I’m also on the prowl for some kind of fancy-handmade-yet-generic-enough-to-make-en-masse gift for the adult women-folk of the family. A see through caftan might be a bit risque, but it sure beats a generic vanilla bath set. Let’s call it a beachy cover-up, if we must be so prudish.

So this weekend was the trial run.

To sew a caftan, theoretically, you really only need a few measurements: the width (measurement from end of arm to end of opposite arm where you want the garment to end), the length (where you want the garment to end), the desired size of your neck opening, where to put the side seams, and where you want to gather or belt in the garment. My highly sophisticated blueprint:

image

When I did this I sewed it in one piece of fabric folded into quarters and a head hole cut from the center, which was, I think, a mistake, because it’s so tricky to hem in this way, and I didn’t want to add a facing to chiffon. Next time I’ll do it in two pieces to make the neckline finish neater, and easier to manage if I try a v-neck. I measured it to end just above the knee but forgot to account for the mathematics of boobies and so it hit a few inches higher on the thigh than I had intended.

Sewing it up was simple enough. I started with hems on the bottom of both sides, sort of out of necessity, because chiffon is a messy beast. It’s also incredibly slidey and I found it tricky to maneuver without seam lines getting all drunk like. Not a big deal on the hems and the neckline but a huge issue when I topstitched down the sides. My moment of genius solution to this was to use tissue paper to draw a stitching pattern and then to pin it to the top of the fabric as a guide and a stabilizer. Then when it’s finished, you just tear it away. Magic!

What I wanted to end up with:

laurelCanyon-020113-bc-005_t650(image credit)

 What I really felt like:

Petrie_original_colors(image credit)

I think the long sleeves and excess fabric below them made it feel more flappy than I wanted. More experimentation to come!

Singer Slantomatic Troubleshooting

I’ve been sewing all weekend on a Slantomatic 401 I bought on a whim for $50, as a fixer upper project, when I first began my downward spiral journey into sewing machine hoarding. It was a mess. The camstack was frozen solid with old grease, and the stitch selector wouldn’t move at all. The whole machine was full of weird grime–not dust, which tends to wipe off easily enough, but a greasy caked on goo that soap and water and even WD40 didn’t do much to remove. I’ve been working at it with isopropyl alcohol and Q-tips. The outside isn’t fantastic, but I went over every nook and cranny of the inside and removed all the gunk and reoiled it with Tri-Flow oil. I freed up with camstack with a combo of WD-40, a screwdriver to scrape hardened crud bit by bit from the gears, and a hairdryer. The hairdryer is magical. The heat loosened up old frozen parts just enough for the penetrant to work its magic, and now it’s fully functional! Not beautiful, yet, but functional. (For your tinkering pleasure, see the end of this post for a Slantomatic 401 manual, service manual, and a link to an amazing tutorial on all things frozen camstack related from The Archaic and The Arcane blog.)

So I oiled it up to work on my Advance raglan pattern. For my wearable muslin version I settled on an ivory jersey, and most of it went really well. Well, I should explain. There is a cycle of emotions I go through when sewing vintage patterns. I begin in dreamy joy, enamored of the pattern illustration, dreaming of looking all Audrey Hepburn in my future garment. The main seams sail along. I get most of it together with my illusions intact. And then I get to the facings, and my dreams begin to crumble in the face of geometrical reality. They inevitably blow my mind. Most of them seem to be designed to fit together, from front panel to back to the other side, which I think is great, theoretically. But there are always problems with the snips and clips and places where the work has to turn to match edges and it’s never quite all I’d hoped. This is where the worry sets in. By the time I get to sewing up closures and hems, I’m pretty sure I’ve blown it. The topstitching is the nail in the coffin, especially with jersey fabric, where the feed just never goes as smoothly as it should and my lines end up looking like I sewed them drunk. When I try it on, I almost inevitably find that my tree trunk waistline does not fit without risking taking someone’s eye out popping off a button. And the shoulders. Typically, they don’t fit for crap. So I find myself staring at the pattern illustration feeling foolish for ever believing that I would resemble a woman whose waistline is drawn to be smaller than her head. But then, if Mad Men should have taught me anything, it’s that illustration=advertising=creation of a fantasy.

This time, I mostly just disliked my topstitching and resolved to add more width at the waistline. Shoulders, at least in jersey, fit wonderfully in the raglan cut. Also, I wasn’t sure about interfacing the jersey; now I know. If I want a crisp finish and pretty collar edges, interfacing is a must. Especially in formless bendy soft and squishy jersey. I’m considering redrafting the facing where it joins. There must be a simpler way.

But…I like learning things the hard way.

Links:

(Singer 401 Sewing Machine Manual)

(Singer 401 Service Manual)

(The Archaic and The Arcane’s Tutorial on Camstack and Other Issues)

Advance 7833: Vintage Raglan Blouse with Collar and Sleeve Variations

image
This, friends, is my weekend sewing project. Having wonky shoulders (broadish, forward) and an utter hatred of garments restrictive of my arm movements, here’s hoping the raglan sleeve will prove to be my friend. So much to love in this design–simple but fitted, with the optional elegant touches of the French cuffs and scarf collar, versatile in terms of wardrobe. I’m hopeful.
For any pattern drafters on the hunt for inspiration, a look at the actual pieces:
image(1)I’ve also been wanting to make a pair of pants. I think this blouse, in a light blue broadcloth to start, and maybe in some ivory satin should it go well enough to dip into the higher end of the fabric stash, would look amazing with some high waisted Katherine Hepburn style pants or closer fitted cigarette pants. My pants making has been dreadfully limited, though, and I’m highly perturbed by the problem of the prominent camel toe I see sometimes on sewing blogs. Being an extremely self conscious type mocked for odd things in grade school I simply cannot deal with the camel toe. Not at all. So I fell down a rabbit hole tonight reading all about adjustment possibilities to avoid the dreaded thing. More on that when I get some practice in. Also, discovered the possibility that I might have a swayfront issue (like a swayback, I suppose, but a pelvic tilt in the opposite direction that might make an excess of fabric in the front). It seems to be an elusive adjustment to track down a tutorial for, so one of my goals for the weekend is to dig around some of my vintage pattern drafting books for more information.