Vintage Library: Designing Women by Margeretta Byers

Another vintage find too cool to keep to myself. This book is subtitled “The Art, Technique and Cost of Being Beautiful” and is from 1938. And is available, for free, from archive.org (here).

“Today clever women build wardrobes as carefully as architects build skyscrapers.” This is more of a style guide than a sewing guide, and some of the advice is (obviously) very period specific, and the value of hard and fast rules about what to wear is questionable, but it is thorough and has tons of things that I hadn’t thought of. How to hide my big feet?! Um, yes please! It also breaks down styles in an interesting way (exotic, gamine, patrician, romantic, coquette, sophisticate) and gives examples. Turns out my style preferences are gamine + sophisticate, which was fun to find articulated in this way. My colors and styling preferences are even outlined, much to my surprise, very accurately in these descriptions! This has info on designers of the era, too. And the ever important, ever difficult trick of balancing all of these style and fashion tricks with the day to day reality of (dum dum DUM) the budget. Lots of pages devoting to budgeting here. It’s kind of like Style Statement with all the hippie frou frou self-helpiness drained out of it replaced with budget sense and practicality. I’m definitely enjoying the read!

designingwomen00byer_0139 designingwomen00byer_0147 designingwomen00byer_0107 designingwomen00byer_0049 designingwomen00byer_0039

Vintage Sewing Library: Free Isabel Conover Books Online

Old sewing books are a weakness for me; when the original is not available or is too expensive, I can usually content myself with an ebook. When this ebook is sold by a seller who scanned the material him/herself, I am perfectly okay with paying them their asking price for the time and effort put into digitizing the info. I also sympathize with their obsessive, hoardy nature and their love of the vintage; we are probably similar creatures. But I am decidedly NOT okay with shifty, shitty booksellers who find material on sites that offer it for free (University of Wisconsin has a great archive, archive.org, etc) and then present it as their own “item they have seen value in and brought back for our customers.” What really, really pisses me off is when I spend $8 on an ebook of a super rare book from a bookseller overseas which turns out to be taken from the University of Wisconsin site. So I could have downloaded it for free, but instead I paid someone $8 to be a shady shit. The seller even offered me a discounted rate, still upward of $40, to buy a hard copy reprint of the same book. Jerks.

So today I find myself hunting for Isabel Conover books and see that the same shady shit bookseller is offering ebook versions of her stuff (let’s just say they’re based in Delhi, India). So I KNOW it’s on the internet somewhere, because said shady bookseller isn’t actually going to bother with scanning something themselves to offer valuable information back to the world, they’re just going to steal someone else’s contribution to humanity. GAH.

So because screw them here are all the links I have found while looking for Isabel Conover materials. She had a dressmaking course in two versions (a longer, 12 volume, 1200+ page version which I did not win a heated bidding war for on ebay, and an abbreviated multivolume version) and a Dressmaking Made Easy book out during the 1910s-20s, so the designs are very lovely Edwardian and art deco designs. Which I’ve been crazy about in the last few weeks. (My sewing obsessions flit wildly from decade to decade as I get a broader sense of my own style, the lines I like, the detailing that appeals to me, what flatters and what does not. See: HBO’s Mildred Pierce as case study in what to sew and what not to sew. Kate Winslet’s costuming=vintage but dowdy and unflattering, as befitting her character. Rachel Evan Wood=sizzling, flattering vintage that makes me want to lose 10lbs and wear a epic shit ton of satin. More on this later, I’m sure, as that movie has me in a style swoon marveling at the perfect clothes of one of the coldest women I’ve ever seen on film.) Anyway, links:

Archive.org has one volume (Lesson 12) (Men’s Clothes and Index) of the complete dressmaking course available for free (here).

Antique Pattern Library (a fabulous free resource for lots of arts and crafts; I love their calligraphy books too) has six volumes of the abbreviated booklet version:

Lesson 1: Introduction (here)

Lesson 2: How to Make Aprons and House Dresses (here)

Lesson 3: How to Make Underwear (here)

Lesson 4: How to Make Infants Clothes (here)

Lesson 5: How to Make Blouses (here)

Lesson 11: How to Make Coats (here)

Archive.org also has her entire 160pg book, Dressmaking Made Easy, available (here) for free.  Incidentally, it was part of a “Made Easy” series which also included Entertaining, Dancing, Etiquette, Grammar, Spelling, and Tricks and Magic Made Easy, all available on the archive.org site for anyone interested in the cultural atmosphere of the era. 🙂

Happy reading!

Current Projects: Sewing Dickeys and Tinkering on the Necchi Esperia

So far I’ve sewn up one dickey that I really like. It needs buttons and buttonholes and some pressing, but here’s the work in progress:

photo 1It’s draped on the newly re-stuffed and covered-in-pinnable-jersey dressform my grandma and I made out of duct tape. Not perfect, but a good start. I wanted a high, cut on funnel-neck style collar so that I can press the edges down for that tuxedo look. Like this:

photo 2I love, love, love the color. I was surprised that it wasn’t pure hell to sew, either–it’s a cheap-ish stretch satin and the only ones I’ve worked with seemed to fray quite a bit, but this is holding up pretty well in the time between cutting and edge finishing.

photo 3Next time I sew this I’ll use lighter interfacing, because with a facing and the interfacing, it ends up a bit wonky around the neck when it’s worn beneath something. Behind it is the machine I’ve been using–it’s a Necchi Esperia from 1957 or so. I love the minimal design and the pastel. It was a Goodwill purchase–the motor was shooting sparks, so I got it for a song. I’ve seen that before, actually; if you’re lucky, it’s one of two simple things: carbon brushes that need replaced, or just dirt. these old machines are just a bit dusty in the motor and if you disengage the handwheel and run it at high speed for a few minutes and maybe add a bit of lubricant to the designated holes in the motor, it fixes it right up and runs much better. That was the case here, but it still isn’t quite right. I’m not sure if the timing is a bit off, but even after about 20 solid hours of sewing it still isn’t quite as smooth as it should be for a Necchi. (I haven’t learned how to work on timing yet, but I will soon thanks to the Ray White sewing machine repair class! :D)

photo 4There’s something I love about the simplicity of a straight stitch sewing machine. So much less to go haywire in the mechanics. And it seems like working with wovens about 90% of the stitching I have to do is a plain old straight stitch. This one is extremely crotchity about backstitching, though, and I haven’t ever noticed the same thing in another straight stitch only machine–if I switch to a reverse stitch from any position other than the lowest needle position, it’s pretty much guaranteed that my bottom thread is going to bind up and turn into a thread nest I have to pull out. It may be that all sewing machines do this and I’ve just been oblivious about the reason for the bind ups, but I don’t think so. Maybe a timing thing? We’ll see.

In my usual trying-to-do-five-million-things-at-once way, I’ve been at work on a black taffeta blazer, binding with chiffon seam binding as I go (my usual raggedy overcast inner seams are a pet peeve at the moment), doing the Burda University digital pattern drafting course, AND living out some of my early childhood library career fantasies by digitizing some of my old sewing books. So many things I want to do and make and try and read and, alas, so little time. #digitalageproblems

Sewing Project: Refashioning Old Clothes + Dickeys in 30s Style

So many projects, so little time. Among a bajillion other things, I’m currently working on a wardrobe refashion project. I’ve been really, really into wartime sewing pamphlets and cotton bag sewing materials that give tips on how to reuse fabric and refashion clothes that you already have into something new. During WW2 especially war rationing resulted in some ingenuity in reusing old materials.  It has me digging through my old bags of clothes I’ve been meaning to discard with a new pair of eyes! So many things that I don’t like because they don’t quite fit can be deassembled and used in ways I had never though of before. Some of my many sewing failure projects can be reused too.

There are lots of ways to do this–patterns with yokes, with top pieces and bottom pieces that join, special sleeves, kimono type sleeves, etc.makedomend image by BeautyArmy

And my current personal favorite–the bodice with a deep neckline + a dickey beneath. What is a dickey, you ask? It’s a common vintage clothing article worn beneath shirts and suitjackets to add variety, or to dress lightly underneath an outer layer. It’s a kind of partial blouse without sides or sleeves that sometimes has ties at the sides to hold it in position. Here are some pattern examples:

dickeys1

Advance 3247

dickeys2I love it for the potential variety this could add to a wardrobe. One shirt + an infinitely variable number of necklines. It also gives me a low risk way to indulge in and wear some of the nicer fabrics from my stash. Here’s what I’m planning on playing with over the next few days:

DSC_5291Two kinds of gorgeous red chiffon, some dot lace and some stretch satin. Normally I would be too afraid of wasting them, but since a dickey requires so little fabric and is cursed with far fewer fitting issues than a full blouse, results are likely to be pretty good.

I have two pieces of clothing to rework–both are velvet, semi fitted, and not at all my current style. One is an old button up basic blouse with no darts or embellishments. The other is a burgundy pair of pants which are a bit too clingy for me, and which I wore so much in my teen years when grunge was the thing and we all walked on our pants legs that the bottom 4″ of the pants leg is not pretty. The shirt will be remade as a deep v-neck (cutting out a new neckline, binding the raw edge with wide bias strips of a similar color broadcloth) long sleeved blouse, but the pants I will be completely disassembling and trying to remake as a more bustier-like fitted blouse or Edwardian style corset cover shaped blouse. The end goal is to be able to wear them with dickeys sort of  like this contemporary interpretion of 30s fashion:

30sfashiontoday

Vintage Sewing Library: Elizabeth Blakely’s Practical System for Drafting. And Dracula.

So I recently considered bidding on a hard copy version of Elizabeth Blakely’s The Practical System for Drafting Ladies’ and Children’s Clothing from, oh, 1907 or so. It went for a higher price than I was willing to pay because, well, we hoarders gotta practice some kind of selectivity once in awhile if we wanna have money for sewing with cotton bag pamphlets.

Much to my satisfaction, it’s available on archive.org for free. Both volumes! Part 1 is (here) and part 2 is (here). What’s that you say? Yawn. Edwardian/turn of the century fashion just isn’t your thing?

Then clearly you: a) did not grow up in the 90s wanting to be Mina Harker or b) you need a visual refresher romp through Eiko Ishioka’s swoonworthy interpretation of the era to remind you of its glorious kinkified potential. Apparently a huge part of the film budget went to elaborate costume design; the idea was that the clothing should tell a story in itself. Let me just put these right here:

Meet our heroine / dream version of our prettier, better dressed self.
Meet her bestie, another woman who we wouldn't mind changing places / wardrobes with.
Meet her bestie, another woman who we wouldn’t mind changing places / wardrobes with.
Girl meets exquisitely pleated dress.
Girl meets exquisitely pleated seafoam colored dress.
Power dressing circa 1890.
But let's not forget about Lucy, our lady in the streets/freak in the sheets who has the BEST lingerie collection in the British empire.
But let’s not forget about Lucy, our lady in the streets/freak in the sheets who has the BEST lingerie collection in the British empire.
Work it, girl.
Work it, girl.Behold the power of embroidery. BEHOLD.
Poor Keanu is the most vanilla boring character in this movie. But I'd rock his look.
Poor Keanu is the most vanilla boring character in this movie. But I’d rock his look.
Enter the prince. *Swoon*
Some version of this scenario happens in 97% of my sexual fantasies.
Blah blah blah our clothes should have 3,000 babies.
And I kind of forget the rest of the movie after this point. Denouement. Redemption and shit. Let's just pretend it ends here, yes?
And I kind of forget the rest of the movie after this point. Denouement. Redemption and shit. Let’s just pretend it ends here, yes?

I think me and my Mrs. Blakely text need a cold shower.

Early 20th Century Sewing: Woman’s Institute Course

dressmakingmadeeasycover
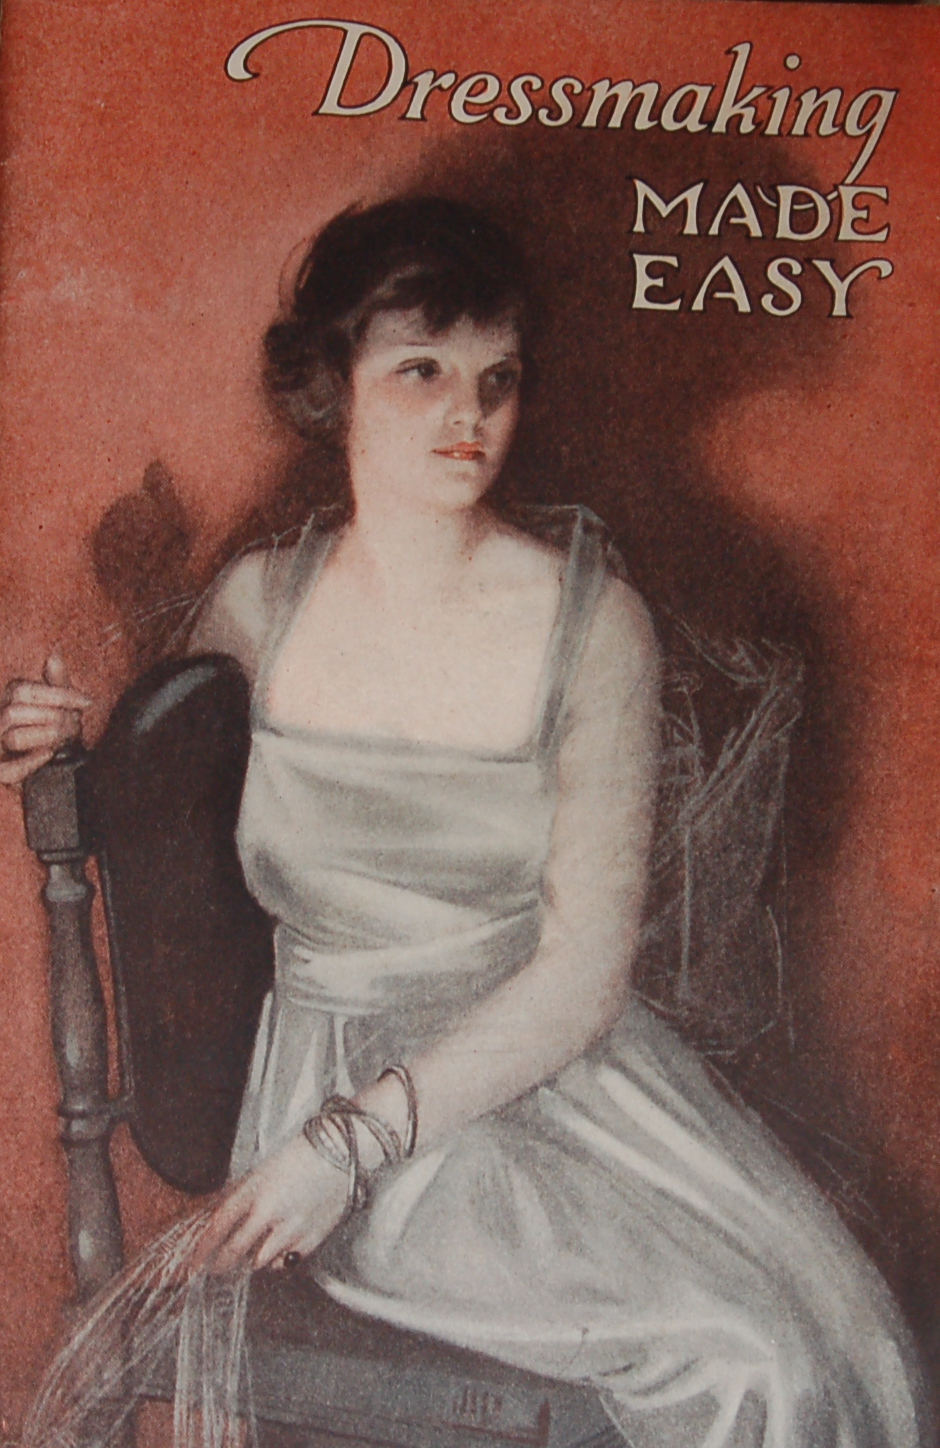
As part of my recent obsession with the Woman’s Institute courses and trying to figure out what books are part of which set and how to HOARD THEM ALL, I bought this. I wasn’t sure what it was or how it fit into the series, but it turns out it’s a kind of advertising pamphlet that gives an overview of the WIDAS courses.

Some history of the Institute from the first few pages:

The Woman’s Institute of Domestic Arts and Sciences is an educational institution for women. It teaches dressmaking, millinery, and cookery by the home-study method…

The first student enrolled February 26, 1916, and the number of students is now more than 150,000. No other educational institute has grown to such usefulness in so brief a time; no other renders to womankind so practical and unique a service. It is preparing school girls for useful lives and teaching grandmothers the things they have longed to know but never learned…It copes with cold facts by making one dollar serve for three and reveals anew the virtues of thrift. It teaches helpless hands the useful arts, puts the color tints of joy into dull, drab lives, and gives the humblest home a new vision of happiness. It has ushered in a new dawn for the homes of the nation, a new day in the lives of its womanhood.”

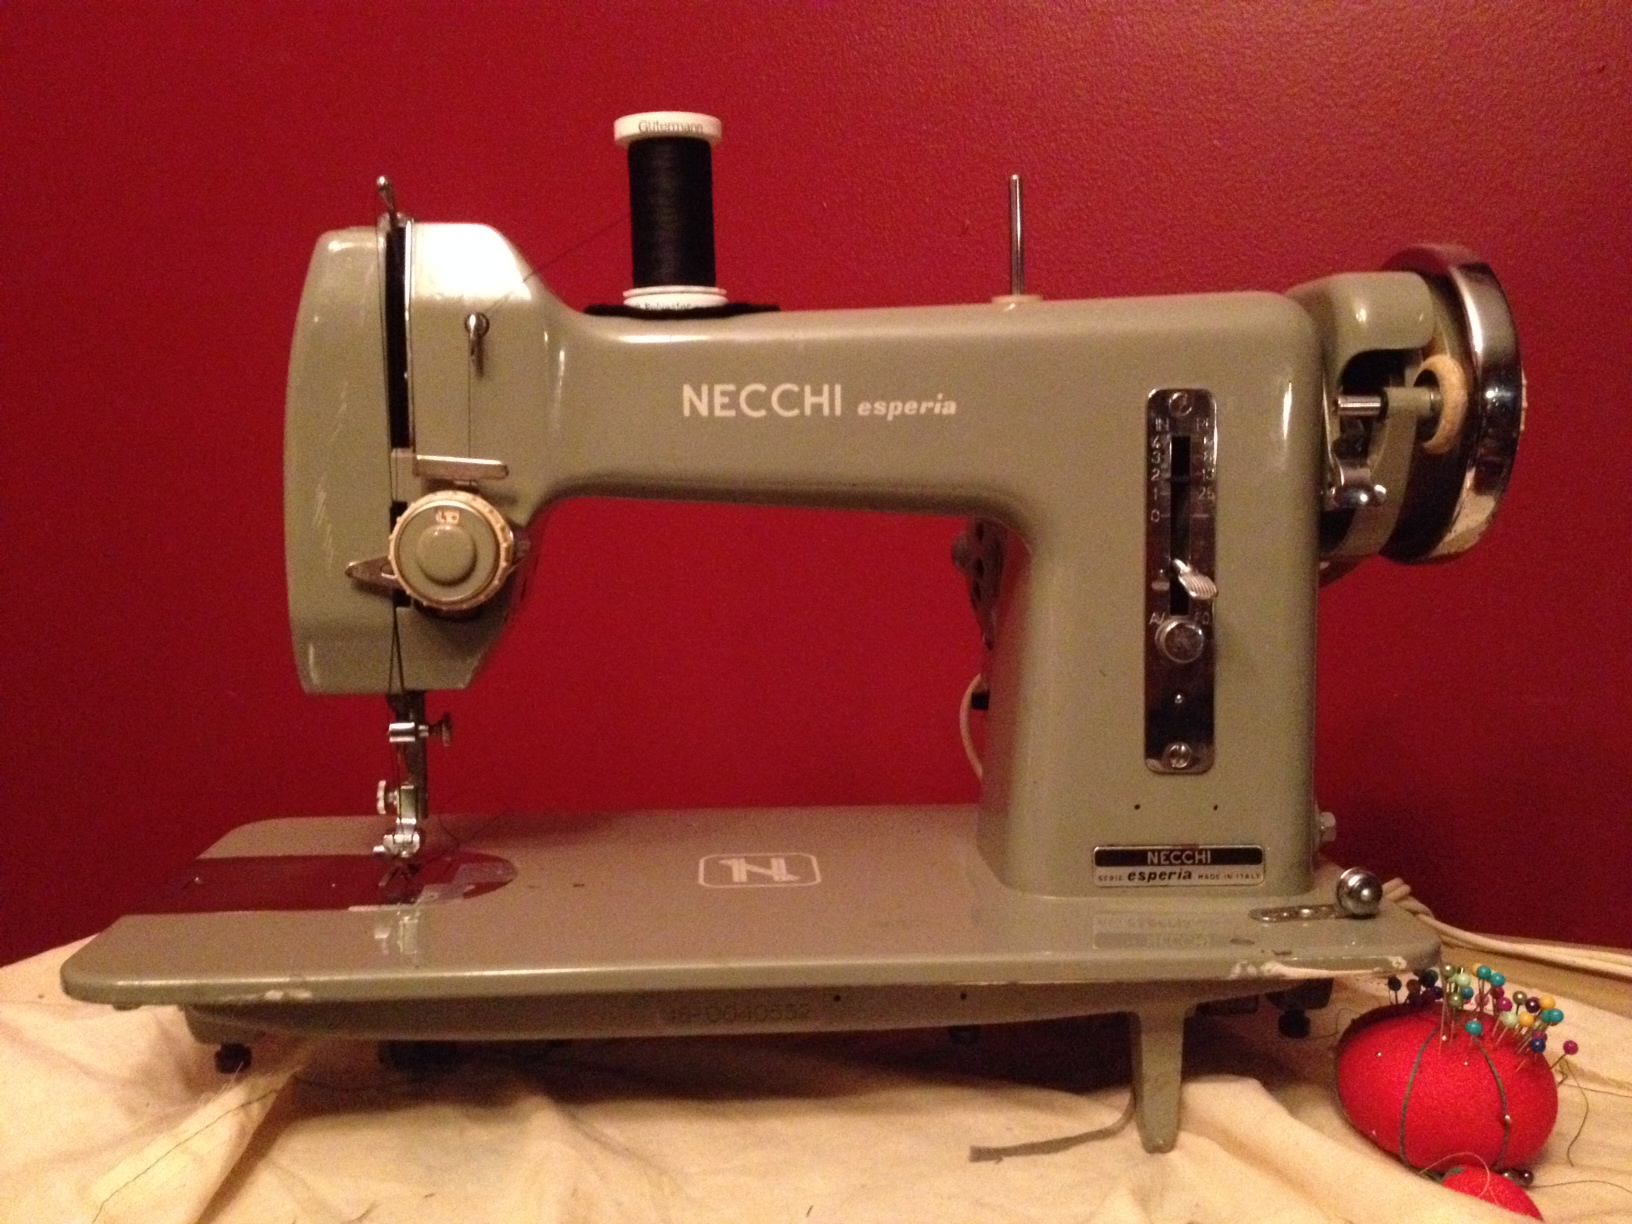
It might sound pompous to modern ears, but given that the sewing machine had only been around for 50-70 years and probably not at all for those without a lot of money to invest in such an high cost appliance, clothes would have been sewn at home, by hand. Women weren’t typically working outside of the home. Suffrage was still a contentious issue. For a woman to learn a trade that could provide an income and some independence would have been huge. HUGE.

The booklet explains that there were two courses of instruction offered by their Department of Dressmaking and Tailoring:

Complete Dressmaking and Tailoring (with Drafting and Tissue Paper Patterns)

Dressmaking (With Tissue Paper Patterns)

The dressmaking course was designed for women who want to learn to sew for home use, for themselves, with pre-made patterns.  The course in dressmaking and tailoring was intended for those who wanted a complete knowledge of sewing, dressmaking, tailoring and drafting and was intended as a comprehensive education that would serve the woman seeking to design her own garments and pursue professional work as a sewist. The booklets for each course would have been sent in the mail in order, as the lessons are intended to build upon each other.

For the Dressmaking with Tissue Paper Patterns course, the following 25 booklets would have been sent (order is my best working guess; I intend to keep researching until I get this figured out!):

1 and 2. Essential Stitches and Seams (2 parts)

3 and 4. Tissue Paper Patterns (2 parts)

5. Plain Dressmaking

6. Tight Linings and Bonings

7. Laces, Silks and Linens

8 and 9. Embroidery Stitches (2 parts)

10. Plain Undergarments

11. Harmony of Dress

12. Woolen Materials and Tailored Plackets

13. Skirts

14 and 15. Tailored and Lingerie Blouses (2 parts)

16 and 17. Dresses (2 Parts)

18. Tailored Pockets

19. Tailored Buttonholes and Buttons

20. Remodeling and Renovating

21. Maternity and Infants’ Garments

22. Children and Misses’ Garments

23. Miscellaneous Garments

24. Ribbon Trimmings and Flowers

25. Tailored Suits, Coats and Capes

The Complete Dressmaking and Tailoring Course with Drafting and Tissue Paper Patterns would have included 38 lessons (order is my guess):

1 and 2. Essential Stitches and Seams (2 parts)

3 and 4. Tissue Paper Patterns (2 parts)

5. Pattern Drafting

6, 7, 8 and 9. Drafting and Plain Dressmaking (4 parts)

10. Corsets and Close Fitting Patterns

11. Tight Linings and Bonings

12. Laces, Silks, and Linens

13 and 14. Embroidery Stitches (2 parts)

15. House Aprons and Caps

16. Fancy Aprons and Sunbonnets

17. Patterns for Underwear and Lingerie

18 and 19. Underwear and Lingerie (2 parts)

20. Harmony of Dress

21. Woolen Materials and Tailored Plackets

22. Tailored Skirts

23. Patterns for Blouses and Dresses

24 and 25. Tailored and Lingerie Blouses

26 and 27. Dresses (2 Parts)

28. Tailored Pockets

29. Tailored Buttonholes and Buttons

30. Remodeling and Renovating

31. Patterns for Children and Misses Garments

32. Maternity and Infants’ Garments

33. Children and Misses’ Garments

34. Ribbon Trimmings and Flowers

35. Miscellaneous Garments

36. Patterns for Coats and Capes

37. Tailored Suits, Coats and Capes

38. The Dressmaker and Tailor Shop

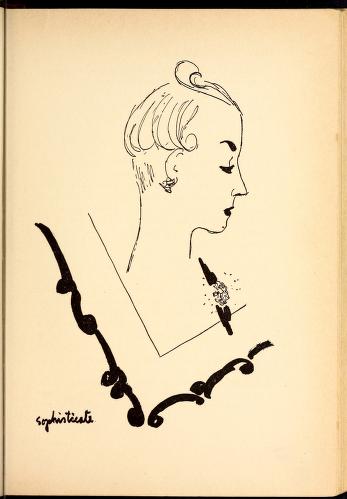
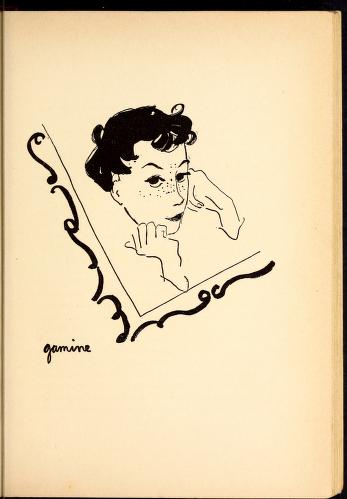
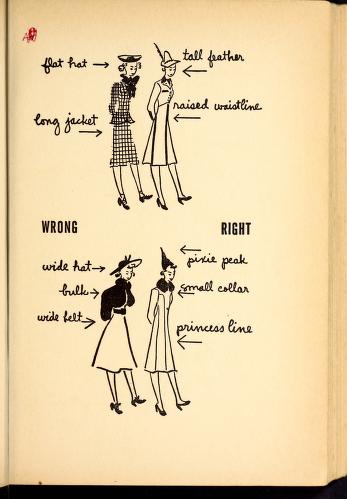
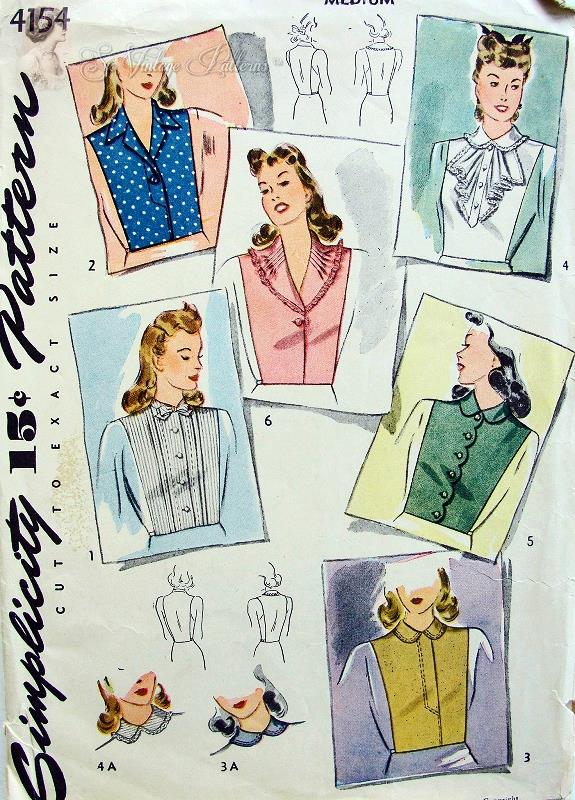
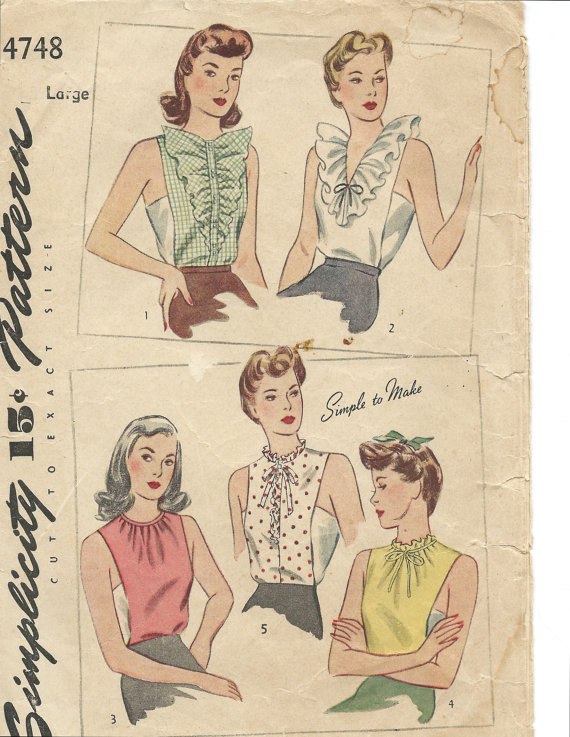
This would have been a complete list as of 1921, though there appear to be other very rare drafting and draping related booklets around. I’m collecting them and trying to assemble a full set of all of the home study materials (millinery, you’re next!). They’re filled with gorgeous illustrations:

gownshop

I’m considering scanning them and listing pdf copies on Etsy, not because I want or expect to fund my retirement and buy an island with proceeds from them (ha!), but because if I’m obsessed with 1920s/30s fashion, I’m sure other people are too, and these books are a great resource. Buuut paying $100 or more for a rare edition is a bit cost prohibitive, yes? It would be fun to work through them all. Even more so to start an online sewing circle to do so together. Please let me know if you’re interested–I might just be a lone obsessive shuffling through sewing ephemera, but these books are pretty amazing.

There are gorgeous hardback versions and another 4 volume dressmaking library by the Institute as well–more on those as I figure out if they’re just repackaging of the same information in different format or what the relationship is.

Obsessions: Sewing for Victory + Wardrobe Revamp

I’m an incredibly obsessive person. There are big obsessive interest cycles (ex: sewing, fashion theory) and then there are minor little hot burning obsession cycles. Currently I’m in the grips of two minor obsessions: figuring out and collecting the full series of the Woman’s Institute of Domestic Arts and Sciences books and pamphlets, and WW2 sewing trends related to rationing, mending and “remodeling” old clothing.

4.2.7

Is it really best fix his pants while they are on his body? Ummm, is he bent over a lawnmower? And what madness would drive someone to mow the yard in those shoes?? That poor woman is going to have to work at them for days to get the grass staining out after having to patch a man’s ass in full view of the neighbors. Nice.

It was such a different time and different mindset, both for good (yay community, yay sense of shared purpose) and bad reasons (stricter us/them dichotomies about different ethnicities, orientations, social status and horrible ways those were expressed). I’m fascinated by the way that “tightening our belts” and conserving was seen as patriotism during this era, but these days our priorities and propaganda seem more concerned with keeping those economic gears moving. We seem a much faster, more self centered, more acquisitive bunch and although I hesitate to oversimplify and judge one as inherently better than the other, I think that there’s a lot to be learned from the attitudes of the era. (And calling my pathetic rabbit ravaged failed psuedo-garden a Victory Garden is just the sort of irony of our time.)

Which is all a long winded way of saying my dumbass just hoarded an original Make Do and Mend pamphlet and is now hell bent on reworking my old wardrobe. I’ve been wanting to clean it out and reconsider my style in general. But reworking old clothing seems like killing two birds with one stone: wardrobe clean out + working on my craptastic sewing abilities. The fabric I love cut in a style I hate? Let’s not just dump it on Goodwill (especially with the questionable labor practices of theirs coming to light these days), let’s deconstruct that bitch and applique some Alexander McQueen style birdies on something. And if I fail, it’s not like I have to feel guilty for wasting the fabric.

Iconography: Lauren Bacall “The Look” Exhibition at FIT

The museum at the Fashion Institute of Technology is doing a swoon worthy exhibition of Lauren Bacall’s personal collection of pieces. She donated over 700 pieces to them over the years, and this is a selection that is guaranteed to induce salivation. My personal favorites:

Lauren_Bacall_68.143.6_20101013_01_450This glorious Norman Norell piece, designed with subway travel in mind. Cool and casual on the outside to get you where you’re going without drawing attention, with the vavavoom sequins and shimmer sheath dress beneath. I love the champagne color. Also a big fan of the era’s tendency to match jacket linings to the main garment.

10933827_10153088914448092_5970238721621315498_n

And this 1968 Christian Dior silk jersey and ostrich feather piece of evening dress wonderment. Could I pull this off? Incredibly doubtful. Could I sew on ostrich feathers? Also incredibly doubtful. But faux fur sleeve accents to add that Scarlett O’Hara flair to a otherwise minimalistic black top? Now that’s within reach. Gotta work on my resting bitch face, though.

There is a digital version of the exhibit on FIT’s website (here) with tons of information and photos. Amazing, of course, I wish there was a bit more on her menswear pieces and earlier style, but that’s just my unfaltering love of the power suit speaking.

Sewing Machine Problems: Bernina Favorit Edition

Despair, today thy name is Bernina. *sob*

My 740 has a cracked vertical gear. It was fine just days ago. Totally fine. I have no idea how it broke since I’ve hardly used this machine, but I noticed it today turning over the balance wheel by hand. It’s a slight catch, like when thread is beginning to jam or there’s some issue with a bobbin. It took me a few minutes to realize that the vertical gear in the Bernina was cracked completely through. There’s a gap in the teeth, and when the teeth of the other gear get misaligned because of it, that’s when there feels like there’s a catch in the machine.

On the plus side, I might be able to fix it. Eventually. I’m signed up for Ray White’s super legendary awesomeness SEWING MACHINE REPAIR CLASS next month. I had no idea the White Sewing Center is but a two hour drive from my humble abode so I will be revisiting my former life as a commuting student and driving back and forth for the three glorious 8 hour days with fellow obsessives. I am beyond excited about it. I only signed up for the basic class, which likely will not cover the mad drama and heartbreak of taking apart a machine to replace a gear, but it will definitely teach me enough about the interconnected systems of the machine to be able to adjust the timing and any other things I might mess up in the process. I don’t want to undertake this repair till after the class, but when I do, I will be documenting it extensively (because abandon all hope, ye who attempt to dismantle any part of a sewing machine without photographic help retracing your steps) and will share my progress.

I was considering selling the 740 in order to make room in the collection for a machine I *thought* was too good to be true–a Bernina 540 in exquisite shape complete with table and a dazzling array of vintage accessories. “Sews great.” they said. “Should be in a sewing machine museum,” they said. Should be in the ever growing museum of stupid mistakes I’ve made re: sewing machine purchases. When I received it, it was frozen. A few hours and some TriFlow and some BlueCreeper and some Singer lubricant and a whole lot of f-bombs later and it sort of turns, but something is still so bound that the entire machine sort of heaves forward at a certain point in the rotation of the handwheel. The motor turns but only while emitting a banshee-like screech and of course it doesn’t actually engage the machine because the belt is completely disintegrated and I don’t have a replacement that fits it. The seller was super nice and most likely shipped it at a loss, so I feel almost bad for him–I don’t think I was deliberately misled but think the seller doesn’t sew and doesn’t know the first thing about it. Like that the machine actually needs to turn. *sob*

Since there’s jack crap on the internet as far as in depth information on the favorit, I took some photos of the 540 as I tried to nurse the ol’ girl back to functionality:

A view from above. The silver toothed gears are the decorative stitch cams; my lever is frozen at the moment so even if the machine ran, not usable. Visible close to them is the dirty looking white-ish gear–it’s one of three or so that is nylon/silicon/some kind of mystery crap sixties plastic prone to breaking. I do love that the oil points are clearly marked in red.

DSC_5032

Another top view. Under the main shaft is the vertical gear (I think), another plastic gear. This is what cracked in my 740. It’s interesting that the needle position selector in this one is a wider pin and moves very freely; this is bound up on some of my other Berninas and not TriFlow nor BlueCreeper nor sailor names has pried it loose yet.

DSC_5033

Oh, look, my cracked hand wheel. No one knows how to pack sewing machines except sewing machine obsessives. It’s sad. I’m not even mad about it, because luckily there is a metal core like a common metal stop motion knob which will keep it functional even if all the plastic crumbles away. Behold the disintegrating belt. It feels like a cloth covered elastic hair tie, which is interesting and a bit different than the other belts I’ve seen on machines of the era..

DSC_5035

DSC_5036

Front view. Cosmetically, she ain’t bad. I like the avocado green, though, because I’m stylistically perverse like that.

DSC_5037

DSC_5038

Interesting details that differ significantly from the Records and other Berninas I’ve seen. No buttonholer lever, but a toothed setup instead.

DSC_5040

DSC_5041

The decorative stitches it can do. Theoretically.

DSC_5042

The back view, where the dust is a bit more obvious. It has a three pin connector power cord/speed control pedal. I have a flatbed Husqvarna and a Pfaff 130 that use this same somewhat uncommon setup. It took me forever to find a cord that would fit this shape.

DSC_5044

DSC_5045

Underside. The machine looked pretty clean so I was surprised to find it so bound up, but it was dry as a bone and so dusty. The Favorit models I’ve seen all have these covers on the underside obscuring the gears. I’m not sure if it’s because the Favorit hook system is supposed to be faster and more heavy duty than other Berninas and they felt a need to have an extra protective layer over them, or if these are more like oil pans, or what exactly. But the black cover houses the hook gears which are metal on metal and need lubricant.

DSC_5046

I removed the stop motion knob and the balance wheel and oiled the main shaft here. The clutch washer and stop motion knob work just like a typical Singer’s.

DSC_5048

DSC_5050

DSC_5051

DSC_5052

Here’s the hook gear.

DSC_5055

Here’s the third nylon/plastic gear with its cover removed.

DSC_5056

The middle cover removed. Not a gear, but grooved metal parts that move against each other. Not sure why this cover is held on with a spring, either.

DSC_5057

DSC_5058

So ends the tour. We’ll see what the BlueCreeper does overnight. The Necchi facebook folks turned me on to the wonders of this penetrating lubricant. I wouldn’t use it for oiling a sewing machine but it’s great at breaking loose stuck parts–apparently it’s used heavily in the logging industry to loosen rusted screws and a billion other things. I have been very impressed by its ability to un-stick what TriFlow couldn’t on another machine. It seems to need a few hours to really get in to all the cracks, so we’ll see how it works tomorrow.

Today was not a good day for hoarding.

Pattern Drafting: Basic Blouse for Forward Shoulder/Broad Back Fit

Over the last weekend, I decided to knuckle down and try drafting a pattern for a shirt from my own measurements. As I’d ranted previously, despite sewing something in the ballpark of 20 shirts over the last year from various patterns and with various modifications, nothing would end up fitting correctly without looking like a feed sack. So I consulted the Esther Pivnick Fundamentals of Patterndrafting book (freely available for download here) and proceeded to measure myself and fire down some synaptic pathways that have not been used since high school geometry. It was, essentially, a Klingon ritual of pain.


If I ever do it again I will a) draw actual lines on my body with a cheap eyeliner pencil so that there is no risk of measuring from different places and b) compile a worksheet to fill in measurements and label points for easier translation when actually drafting them. Hopefully no one catches me doing this because it might look a little too “it puts the lotion in the basket” for non sewers to understand. My measurements must have been a bit off, because the garment I ended up with was bigger than needed and didn’t really fit my midsection. The dart I ended up with in the front is, well, huge, which seems incorrect because my bust/waist/hip measurements are all within a few inches of 36, so there is almost no need for dart control to take in difference. BUT IT DID FIT MY SHOULDERS, which means IDGAF about having to redraft the waist.. I’m almost finished with the third test garment, which is a totally wearable buttondown blouse that allows for super fantastic happy funtime full motion of my arms. I can drive in it, I can raise my arms in it, I can EXERCISE in it (highly unlikely, but possible). Photos to come!

So here is what I learned about fitting a broad back and forward/curved shoulders:

-Adjust the angle of the shoulder seam on the front and the back bodice pieces. It’s easiest to lay them out so that they are butting up against each other at the shoulder seam. Adjust at the actual sewing line, not the seam allowance line, and add seam allowance back to your pattern pieces afterward. Consider the point where the shoulder seam meets the neck an anchor point. This does not change. The armhole also doesn’t change position. But the point at the end of the shoulder seam should be moved forward, usually just a small amount–for me about 1cm was perfect. Then redraw the shoulder seam line from the center anchor point to the end point on both the front and the back pattern piece. You’re essentially adding fabric to the back piece and subtracting it from the front. For me this makes the garment hang much better. But again, don’t move the armhole itself. Some things I’ve read have recommended shifting the curve of the sleeve pattern piece so that the sleeve cap ease is situated with the most fullness exactly over the ball of the shoulder, but I’ve found this adjustment to be unnecessary.

-Don’t mistakenly think broadening the shoulder seam and/or enlarging the armscye will add more freedom of movement. Been there, failed that. What you really need is to isolate the shoulder, which, almost counterintuitively, means the bodice comes high into the crook of the arm (think of what a gusset would cover). It also means the end of the shoulder seam should be behind the shoulder point, not quite on top of it. For me finding my shoulder point, subtracting about 3/4″, and angling the whole armhole back to meet this point made an enormous difference. It places the ball of the shoulder in a position to actually utilize the space in the sleeve cap to move.

-For the broad back/big shoulderblade area, I have in the past tried adding extra fabric at the lower third of the back and front armscye. Sometimes this works, sometimes it doesn’t. Sometimes it works but looks a little more 1950s dolman sleeve than I would like. But this time, I adjusted the bodice. In the Pivnick instructions she points out that the point at the tip of the side bodice, where the bodice side seam meets the sleeve seam, can be extended out horizontally up to 1″ to allow for greater movement (with no necessary change to the sleeve pattern, as I understand it). I did this and blended it into the previous line of the side seam and it seems to have worked very well.

And now that I have a basic pattern that fits, with a bit more refining, I should have a basic block to use for experimentation and I may, just *maybe*, be coming out of my shirtmaking rut.